The stretch ceiling is one of the most popular methods of decoration in residential and public premises. This is explained not only by its low cost, but also by small labor and temporary costs. In addition, even a non -professionalist will be able to mount the canvas, which also saves. But even in the simplest work there are specific moments that can ruin everything. In the case of stretch ceilings, this is a bypass of communications. In this article you will learn how to get around the pipe with a stretch ceiling and do it as carefully as possible.
Content
Specificity of installation of stretch ceilings
Installation of suspended ceilings independently without the help of professional craftsmen is a real, but still quite difficult task, therefore, before taking up it, thoroughly study the whole theory and soberly evaluate your abilities. Our articles will help you with this: " Stretch ceiling in the bathroom: photo, installation features», « Stretch ceiling in the kitchen: photo, installation features», « Matte or glossy stretch ceiling - which one to choose».
Each room has communications going upstairs, so the need to bypass the pipe with a stretch ceiling is inevitable. This is where the risk of spoiling the entire coating in one careless movement-the canvas, especially plastic, is easy to tear off in the direction during the cut. It should be taken into account that most manufacturers provide a guarantee for their products only in cases where the installation of a stretch ceiling is carried out by professional workers from the same company. At first glance, such a requirement is not entirely correct, but in fact it is quite justified and saves a mass of nerves to both sides. Therefore, if you decide to independently install, be prepared to take all responsibility for yourself.
So, when installing a stretch ceiling, the following typical situations arise:
- You need to go around the heating pipe located in the immediate vicinity of the wall.
- Several pipes stand nearby, differ in diameter, or the stretch ceiling itself has a complex configuration.
- Bypass occurs around a round element, the dismantling of which can be performed only on one side (usually an extract in the kitchen).
There are also non -standard situations that are less common. For example, if the room has a large column or another voluminous obstacle to a complex configuration. In this case, it will be most rational and easiest to not suffer from cutting holes in the shape of a column, but simply install two separate canvases and carefully connect them with a special profile.
The first way
The most common and simple way of bypassing the pipe with a stretch ceiling. As a rule, it is used for white plastic paintings and heating pipes that are available in each room.
Step -by -step instructions for the installation of the ceiling around the pipe:
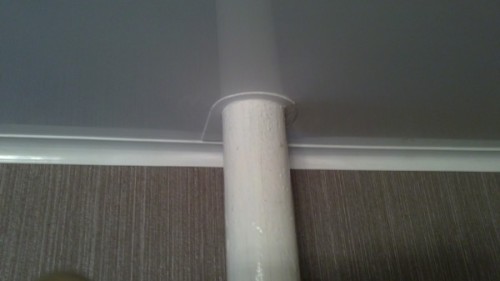
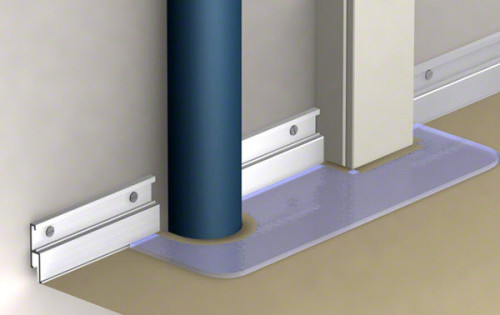
- Prepare a rectangular connecting profile of plastic in advance, the color of which corresponds to the color of the canvas. The thickness of the plate should be 1-2 mm, and its dimensions should close the space from the baguette to the extreme surface of the pipe surface by about 1 cm from the wall. The width of the plastic profile should correspond to the diameter of the heating pipe plus 2 cm of the reserve.
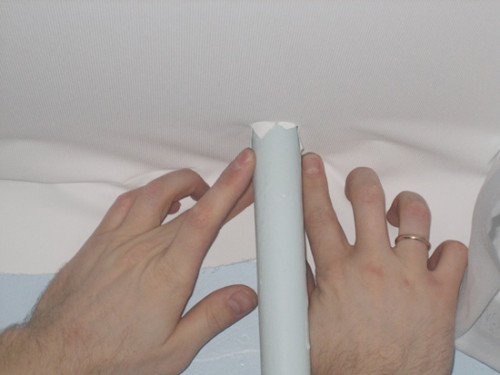
- Take the canvas in the baguette and make a cut with an office knife or scissors with sharp ends. Plastic plates will hold the cut canvas and prevent it from “creeping” further. But even in this case, you should act very carefully, making the minimum deep incision and tightly pressing the film to the pipe.
- The incision is best done in a place where the riser is closest to the wall - so in case of errors, defects will be the least noticeable.
- At the end of the cut line, make an incision of the cross, so that in this way the free ends of the canvas can carefully close the pipe without folds and tension.
- Cut the extra sections of the film, not forgetting to leave 2-3 cm of the reserve to tuck them into the baguette.
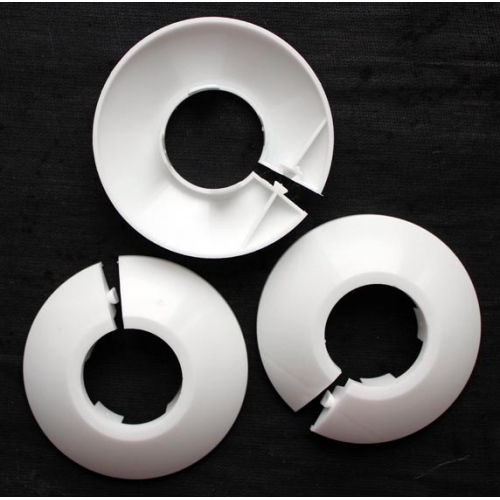
- Install the pad on the pipe. Such a decorative ring can be made with your own hands from plastic a suitable color with a thickness of 2 mm, or you can buy in the store.
This technology is used for the most part to install seamless stretch ceilings with white plastic overlays for bypassing pipes. If you are going to mount a colored canvas, then select the decorative linings of the corresponding shade in advance. In some cases, you can play in contrast, for example, by choosing a purple lining to a yellow canvas.
Useful advice: if there is very little space between communications and the wall, it is not necessary to look for a suitable segment of plastic, you can simply cut the reinforcing ring of the corresponding diameter.
The second method
There is another way of staging the pipe with stretch ceilings, used for surfaces with a complex configuration, or when pipes of various diameters are installed in the room, and standard overlays are not suitable for them. In this case, plastic rings must be installed not outside, but inside the canvas.
Pipe instructions with a plastic stretch ceiling:
- Heat the ceiling to the required temperature and pull it to the baguette.
- Holding the film, make markings exactly in the center of the pipe. If you miss a little, nothing is terrible, because in which case the canvas can be slightly tightened, thereby compensating minor defects.
- Glue a polyurethane reinforced ring to the back of the canvas so that it is located closer to the wall.
- When the glue grabs properly, make a cross section on the canvas in the center of the ring.
- Skip the edges of the cut through the ring up, and then glue them so that they hold on to the reinforcing ring at the top.
- Cut the canvas in the direction from the reinforcing ring to the nearest wall.
- Put on a ring with a canvas tilted into it.
- Chop the edges of the incision to one piece of plastic lining, which will perform the function of a kind of lock lock.
- Glue the harpoon with a small segment of the canvas.
- Pull the ceiling from the nearest corner.
Such plastic rings can be installed not only for bypassing heating pipes and other communications, but also when installing various lamps, signaling sensors and other equipment. About how to install a reinforcing ring and perform a bypass of the pipe in a stretch ceiling-in the video instructions below:
What to do with hood?
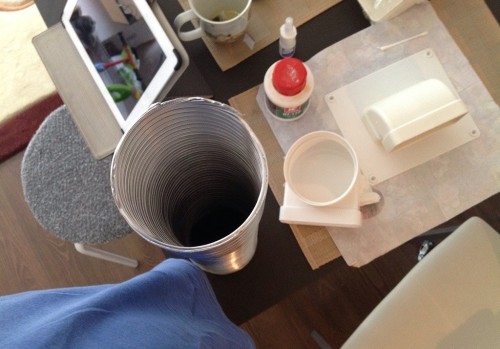
It would seem that it is no more difficult to do with the hood than with a heating pipe or any other obstacle, but in this case the problem is the features of the operation of the device. The fact is that in the process of working, the duct of the hood is very warmed up, which may well lead to melting the plastic stretch ceiling.
In such situations, it is necessary to provide maximum protection of PVC film, constructing the temperature -resistant barrier. The easiest way to do this is using a piece of drywall. Gypsum cardboard is an environmentally friendly material, which is very often used specifically to strengthen fire safety in the decoration of the premises. The second option is to install a sandwich pipe with double walls and a heat-insulating layer between them instead of the usual corrugated pipe of the hood. Such a duct is more expensive, but it lasts longer, and externally many people like much more than corrugation.
To protect the edges of the ceiling film, use rings made of heat -resistant plastic. Exactly the same rings are used when installing lamps, as well as when bypassing hot heating pipes.
Historical certificate
Stretch ceilings seem in the modern and unusual way of decorating rooms, but few people know that the first stretch ceilings were popular even in ancient Egypt and Greece. Of course, then the PVC film was used, but the technology was almost identical - a silk fabric decorated with patterns was pulled on the ceiling. When, after some time, the fabric began to sag, or the owner of the “apartments” wanted to change the interior, the workers simply pulled a new canvas on top.
In medieval Armenia, the technology of stretch ceilings was also practiced, but not silk was used for this, but a cotton tissue impregnated with a chalk solution. It was pulled on a special frame around the perimeter of the room (nothing reminds?), And when the chalk solution dried, the canvas was on its own and there was not a single fold left on it. Some masters today practice this method, only instead of chalk they use water -based paints.
In the early 70s of the last century, instead of fabric, they began to use a light polyvinyl chloride film that did not sag and served much longer than any fabric. This happened in France, so initially stretch ceilings were called "French." As they say, everything new is properly forgotten by the old one, and fabric ceilings appeared on the market in the late 90s. They quickly gained popularity, because they did not require warming up, which reduced the risk of damage to wall decoration and the complexity of work as a whole. Today, the market presents the widest range of film and fabric ceilings for every taste, and we hope that this article will help you make installation quickly and beautifully.

