
Despite the huge selection of all sorts of flooring, wooden flooring remains in the list of the most popular ways to finish residential premises. This is explained not only to relatively low cost, but also exceptional performance. On the wooden floor it is pleasant to walk, it is a durable, beautiful and easy enough in the installation. You can equip wooden floorings not only in a private house, but also in the apartment, and today we will talk about it.
Content
Choosing materials
The choice of wood is very important when laying the board of the board. In this case, several factors should be taken into account: cost, operational loads, humidity and temperature conditions indoors, aesthetic side. Before moving to the listing and description of the tree breeds, it is necessary to designate the general technical requirements for any of them.

So, when buying boards, you first pay attention to the degree of their humidity - the tree must be sufficiently dried. Otherwise, after laying, the material will begin to dry and deform, and your beautiful new gender will go "waves." But too dry wood is also not suitable, as it can crack. Carefully inspect each board for cracks, bitch, chips and other deformations. For each material class, there is a certain norm, for example, 1-2 bitch per piece. Do not buy material with cracks or split, even if you offer an impressive discount.

The length of the board also plays a role. Experts recommend choosing a material with a length of at least 2 m - it is more convenient to work with it, and the load is distributed more evenly. The board configuration defines the appearance of the future floor and the complexity of the laying. So, the headboards, in contrast to the usual, have special lock connecting connections on the edges that allow elements to get up as closely to each other, almost without forming slots. The usual board is simply putting the jack, so the slots on this floor much more. The cost of the flooring of wooden flooring from tipped boards will be higher than from ordinary, but it will last much longer.
Useful advice: always buy a little more boards than you need for wooden flooring. The price will be slightly higher, but you can ensure that the material is enough with a margin. In addition, you can replace the spoiled board with a suitable tinge on any time. To do this, select boards from one batch.
Wood breed
Now you can choose the wood breed. How much is the flooring of a wooden floor, will depend on this.
For the manufacture of genital boards, the woods of the following breeds are used:
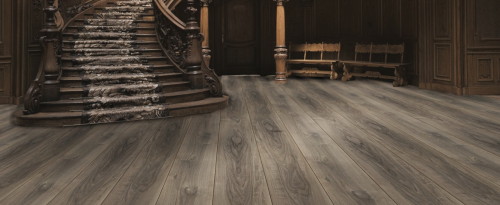
- Oak is one of the most expensive, but durable and beautiful breeds. Oak has one interesting property - over time he begins to be serving, and the stronger it changes the color, the "nobleness" and more valuable becomes more valuable. For this reason, you can find artificially aged gray oak on sale. It is more expensive than usual, but you immediately get a beautiful flooring. The oak is very durable, and therefore it will last long decades, and with proper care and protection, even your grandchildren will not think about changing or overhaul of flooring.
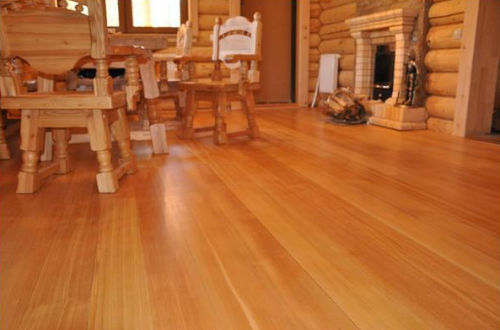
- Larch is another solid wood breed, a distinctive feature of which is a high resin content, which is why it is practically not erased and does not rot. According to the cost of the Siberian larch several times greater than pine, however, is cheaper than oak, so many see it a worthy alternative. Such a coating is ideal for room with high humidity or for houses, where the owners come for a short, for example, seasonal cottages.
- Alder, Osina - these breeds do not have such strength like oak and larch, but they have other advantages. Thus, there are special enzymes in their composition, which have a positive impact on human health. Such a floor will be especially useful in a nursery or bedroom, since the load on it will be small, and wood will be able to fully show their healing qualities. In addition, the Osina has long been empowered with powerful protective properties, to recall at least the ritual of getting rid of the vampires with an aspen cool. This tree was planted near the house and used for various facing values.
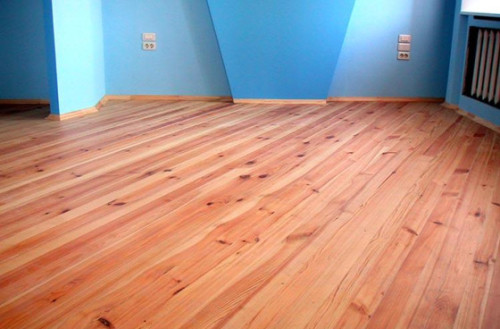
- Pine, fir, spruce - soft wood. Due to the availability and ease of processing, such floors are inexpensive, but also serve less than the above. Such a flooring is recommended to do in a room with low patency, for example, in a bedroom or living room. Also better, if it is not going to walk in rigid shoes - only in slippers or barefoot. Coniferous rocks contain phytoncides with therapeutic effects, so in the room with such a floor will always be pleasantly smelling with freshness and spicy forest aroma. If you decide to do the flooring of a wooden floor with your hands from coniferous rocks, follow the advice of specialists and buy a spanned board for this. Otherwise, there is a risk of deformation of boards for several years after laying.


Types of wooden flooring
Wooden floors can be different, and they differ not only by laying technology, but also the characteristics of the components used. So, there are boardwiches from the array for which one-piece wooden elements are used. Parquet is also a kind of wooden flooring, which makes from the boards of various configurations, for example, from the same array with grooves from all sides. The standard groove board is located only on both sides, and in parquet - from all for a stronger docking. A parquet board can be glued, that is, not made from a solid piece of wood. Despite this, such a material retains the operating properties of the original. High-strength glue connects minimum 3 layers, and the gluing process itself occurs under high pressure, excluding the formation of air emptiness. The top layer of such a board is usually made from the wood of valuable rocks, for example, oak, Merbau, etc.
The wood breed determines not only its value, but also the configuration of the boards: thickness and length. For example, oak boards are very durable, so their thickness starts from 2 cm. But a two-chamber pine board will quickly get better and break, so if you work with this breed, choose a thickness material about 4 cm. Standards for the headboard slightly others: 28-36 mm. When choosing an outdoor board, repel from the intended load - than it is more, the thicker should be the material.
The width also has an important meaning - the durability of the wooden flooring depends on it. In particular, it feels unpleasant boards. This parameter should be chosen, focusing on the degree of moisture of wood - the higher the humidity, the same should be the board, since the wide is deformed, and it will be very noticeable. It is best to buy boards with a width of about 10 cm, but if you are 100% confident in the quality drying of the material, you can safely buy a block of 18-20 cm.
Technology laying
Wood flooring technology can occur in two scenarios: with lags or without them. In this chapter, we will consider all the details of the main points of laying on various grounds. It is worth noting that each of the methods have their own advantages and disadvantages, so to say what better will not work - choose the situation and our own opportunities.

Useful advice: Before starting the installation of wooden flooring, leave the boards for several days in the room where construction will be carried out. This is necessary in order for the material to be adapted to the temperature and humidity regime. However, for considerations of savings in some cases, the floor is assembled from insufficiently dried boards with humidity level up to 20%, laying them immediately without conducting acclimatization. This method is very risky, because it never managed to predict whether the board is deformed, and how not the changes will be.
By lagas
Laying the wooden flooring on lags is the most common way of installation, since it allows you to quickly and effectively disguise any roughness of the draft floor. In addition, a free space remains between the draft floor and the flooring, where you can comfortably hide communications or put the insulation.
For the manufacture of lag use pine timber 50x100 or 100x100 mm. Since this method takes about 10 cm of the room height, it is better not to use it for low rooms. Before installing lags, you also need to give a few days to adapt to temperature and humidity, after which it is necessary to treat them with an antibacterial agent and antipiren.
Wood floor mounting stages of lags:
- The lag installation step is determined by the thickness and length of the boards. It is necessary to exclude sex bending, so the thinner the board, the more often the lags should be put. If you put the boards with a thickness of 30-40 mm, the distance between the lags should be about 80 cm. For thinner boards, it must be reduced to 50-60 cm. If you have to work with a thickness of more than 40 mm thick, lay lags in increments of 100 -110 cm.
- First of all, it is necessary to install side logs from opposite walls, retreating from them 20-30 cm. The top face of both lags along the entire length should be in one horizontal plane, so during installation, use the construction level.
- Clearly exhibiting lateral logs, you can quickly cope with intermediate. To do this, every 1.5 m lengths pull the caprochy thread - it will indicate the level to which all intermediate lags should be raised.
- Adjust the height of the lag with the help of wooden wedges from lumber or thin plywood, attaching them to self-draws or nails. For fixing to the floor, use dowels and steel corners. You can also use this article: " Adjustable floor on lags: installation features».
- In between lags, put thermal insulation material. If the room is located on the first floor of a private or multi-storey house, it is recommended to lay waterproofing in front of the insulation. The usual construction polyethylene is suitable with a thickness of 100-200 microns. Cuts of the film fasten a wide scotch, making adhesions at 15 cm. Place with an approximately 20 cm when installing thermal insulation you will simply complete the film on the insulation.
- After laying the insulating layers, you can pave communication, after which there should be attached plates of the Fiberboard on top of the lag.
- Now you can proceed to laying boards. Their size should be selected in such a way that each joint is located in the center of the lag. Start the installation of the first row, retreating from the wall of 1.5 cm. Pre-hold the holes with a drill under the self-tapping screw in each lag.
Why leave the gap near the wall? This is a deformation gap, which in case of drying wood will allow you to compensate for the expansion, and the floor will remain smooth. To disguise it, use outdoor plinth.
On Faneru
In residential premises, rough floors are very often made from plywood. Over time, such wooden flooring is practically not deformed. In addition, Phaneur can be put even on top of the old focusing, without dismantling it. This significantly reduces the labor intensity and time of work and at the same time provides additional thermal insulation.
To mount plywood black floor, you do not need to carry out long preparatory procedures. If you are in room with a normal and low level of humidity, use the usual fane. But experts recommend in any case to take moisture-proof material. We'll have to pay a little more, but the floor will be able to withstand even a small flood.
How is the installation of a wooden flooring on Phaneur:
- Attach the Phaneur to the floor is simpler simple, but to avoid unforeseen difficulties and save the material, first make a test layout without fixing. When you find the optimal method of location of the sheets, mark them with chalk, to then put in the same order.
- To align the floor of the floor, set the beacons throughout the area of \u200b\u200bthe room. To do this, on the wall near the entrance door, make a mark on an arbitrary height of about 1-1.2 m. Next, walk through the entire perimeter of the room, setting the marks at the same height using a laser level. The more marks, the more accurate the results you will receive. Then the line measure the distance from each tag to the floor level and find the least value - it will be the level to which the floor should be lifted to align it.
- Screw at this point (zero level) Self-tapping screw and with the help of the construction level, set the labels throughout the perimeter. Tension between opposite self-pressing on the zero level of the Capron thread.
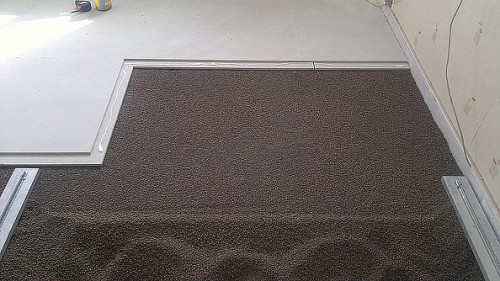
- Next, you can put lags in the method described above, or make a dry tie tie with a bulk material. Usually for this use clay. Experts advise you to take clamzit with different types of fractions to get a more dense intake. Before laying a grainsite, the floor is shown by waterproofing film.
- When the subflink reaches the zero level, align it and proceed to laying plywood according to the numbering made at the very beginning. Start from the door, gradually moving towards the opposite wall of the room. Between themselves fasten the sheets of plywood moisture-resistant glue and self-drawing. For greater strength and homogeneity of the coating after mounting the joints, you can sharpen.
- When the base is ready, you can start the installation of wooden flooring.

On concrete
To equip wooden floors on concrete, it is necessary to determine the moisture of the concrete screed. It should be sufficiently dry (up to 3%), otherwise the evaporating moisture will lead to a refurbishment and deformation of the board. If after filling the screed passed less than 3 months, it is impossible to lay the boards.
Useful advice: To assess the degree of humidity of a concrete screed there are special devices, but to avoid additional spending, you can use the proven method. Although it gives small errors, but it allows you to determine whether it is possible to work with a screed or you need to dry it some more. Located on the floor of the segment of polyethylene 1x1 m, hermetically gluing his edge with scotch. After 48 hours, open the film and check if there is a condensate or a dark wet spot on concrete. If the condensate is quite a bit or not at all, you can start laying the flooring.
If you work with an old concrete surface, check it for the presence of drops in height. Even minor irregularities can cause the screenshot of future half. You can eliminate this problem with the help of self-leveling bulk floors. If there are minor protrusions, they can be stuck.

Device of the boardroom flooring on concrete:
- Treat the screed to the primer to take the surface and at the same time enhance the waterproofing. A single-component polyurethane mixture can be used for a well-dried screed as a primer. If the screed is fresh and a little damp, take a two-component epoxy mixture and apply it in 2-3 layers. Wait for the full drying of the primer.
- Waterproofing can be carried out with the help of rolled materials - polyethylene or rubberoid, but for an apartment building is quite enough impregnation with primer. If you work in a private house, the room is located on the first floor or in the basement, lay the waterproofing with two perpendicular layers.
- Place the insulation and the vapor barrier membrane on the waterproofing carpet, which will divert the excess moisture. If you make a wooden flooring on a plywood, choose a foamed polyethylene as insulation. If on lags - mineral wool. But the fastest and cheapest method is most popular - the floorboards are simply glued to the concrete tie (only for an ideally smooth tie).
- Apply high-strength glue on a polyurethane based on the surface.
- Polypropylene film with a thickness of 10 mm polypropylene film (if necessary, it is necessary to put a film with several layers to achieve the thickness). In this case, the film must go on the walls by 15-20 cm.
- On top of polypropylene again apply glue and put the boards.
- After mounting, cover the wooden flooring of varnish or paint.
Wooden floor flooring video will summarize all the above information and will help you avoid common mistakes:


