If you decide to equip your apartment with your own office, or simply protect some room, for example, under the children's room, then the partition will be installed correctly. Plasterboard came to replace heavy piece materials. Zoning the desired plot using this material, you will receive not only a reliable wall, but also a properly sounding the room. To save a little, you can perform everything yourself. Installation of plasterboard partitions with their own hands will not only reduce the project budget, but also will be a useful experience for you who can be used with the further finish of your interior.
Content
Pre-planning of plasterboard partitions with discovery under the door
Such a sheet material such as drywall, has several advantages, thanks to which more and more builders selected dressers for arranging its flats. Before proceeding to installation, you need to thoroughly prepare. Designate for myself goals and tasks to be performed by the partition. Because drywall has many useful properties that will adequately achieve the desired result.

Advantages walls of plasterboard with an aperture for the door
The primary task of drywall is the zoning of the space. It will help to separate the small area in the room with a large area, such as a bedroom or children's play.

The main advantages of such a construction as drywall, can include the following:
- lightness (construction assembled from the GCR is much easier, for example, aerated concrete or masonry);
- strength (correctly assembled partition, not inferior in quality to similar structures);
- longevity (life expectancy is about 70 years of partitions);
- quick installation (setting the carcass structure and assembly can be completed within 1 day);
- create forms (GCR very malleable when it comes to assembling the curved design and smooth forms, it all depends on your desires and fantasies);
- ease of assembly (such work will be on the shoulder to anyone who has ever held in his hands a drill);
- heat-sound insulation (in the framework of special paving mineral insulation, you keep the heat inside the building, thus freeing it from the penetration direction of the sound);
- fast finishing (the exact installation partition, you get a flat surface. Due to this, you will significantly reduce the costs associated with the application of a thick layer of filler).
Zoning space in the room with the help of plasterboard partitions, you get a robust design that will not only last a long time, but also excellent protection against the ingress of unwanted room noise.
The choice of material for the creation of a framework for the partition
The frame design - a "skeleton" of the partition. Picking up all the necessary components of the design, it is important to calculate the expected load. The main material for the frame is a profile. This special metallic parts of various sizes, thicknesses and shapes that were produced in accordance with the size of the GCR, and other parameters.

To install and mount high-quality frame, use the following profile type:
- UD 27 and CD 60 - guide and transverse profiles, respectively. They are intended for mounting the ceiling type designs, but they can also be used in the creation of partitions, it all depends on their features;
- UW 50, UW 75, UW 100 and CW 50, CW 75, CW 100. Also profiles of guide and transverse types, which are used to create partitions. Apply to a pair with a profile of the corresponding nominal, that is, UW 50 with CW 50, etc. As well as the ceiling form of the profile, is made in a different range of thickness and length;
- suspension, crab, connector, timber - composite frame designs designed for fixation, branching and elongation of certain elements. Since they carry the greatest load, it is better to choose them in an embodiment with a metal thickness of at least 0.5 mm;
- dowel portal 6x40, 6x60, 6x80, etc; Self-tapping screw in 2,5x25 or 2.5x35; "Seed" or "Bloch" 9.5 mm. All these fasteners are used both to fix profiles with each other and to secure the structure to the base.

In addition to the above materials, you will also need the following: insulation, sulfur mesh or glass christmake, PVA glue, primer, shp can, sandpaper, paint bits, cutting discs for metal, boiled brackets, metal perfoux. They are necessary for the finishing finish of the finished design. Such a list of materials is relevant to create plasterboard partitions with drive under the standard door.
Selection of partition cover material
Before starting the installation of plasterboard partitions in the room itself, you need to correctly pick up all the necessary material. From how much exactly you will do everything, the further operational properties of the structure will depend on. Choose only high-quality components, then the partition will serve you more than a dozen years. Do not forget also about the tasks that it will perform.

To select a plasterboard for your partition, we advise you to consider each view separately, and so:
- GLK 12,5x2500x1200. Conventional wall sheet with a thickness of 12.5 mm. It is used to create structures in dry rooms.
- G CLEV 12,5х2500х1200. Moisture-resistant version of the leaf of green color. It is used for the premises, the most frequently affected by dampness, for example, in the bathrooms, balconies and basements.
- GKLO. Refers to the refractory type of this material. Through the use of additives and impurities, the sheet can be used in the arrangement of premises, potentially susceptible to fire, such as baths or fireplace rooms.
- Ceiling. List thickness 9.5 mm. As can be seen from the name, such a GCL is used to cover the ceiling part of the rooms. In addition, it is often possible to meet the walls that are mounted by a double layer of the ceiling leaf.
- Arched. Thickness 6 mm. The thinnest of sheets, which allows it to be used to create radius and curvilinear parts of plasterboard structures.
If you are going to separate a small room in the room under your own office, then it is better to use a wall option. It will be most acceptable for the price, besides, it will last long, performing all the necessary tasks in due measure.
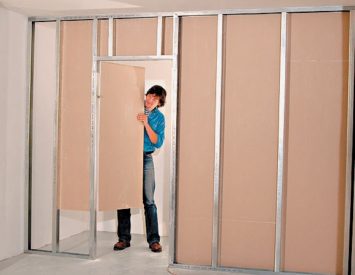
Installation of the partition with the opening of the door with their own hands
The feature of the installation work related to the arrangement of the room with a plasterboard partition with a door will be slightly varied from the classic option. Because the door design involves further gain, then the installation method is different. If you are going to do everything yourself, it is better to take care of the additional assistance of the subband in advance. This is due to the fact that some stages of the installation simply cannot be implemented without interfering with an extra pair of hands.

Required tool
Getting Started to install the frame, it is better to prepare in advance and get everything necessary, then all the works will pass quickly. In addition, choosing a good tool, you can achieve the desired result without loss of quality design.

Having equipping the private room with a plasterboard partition, we advise you to use the following tool set:
- perforator, drill or screwdriver, Bulgarian, mixer with a nozzle for a kneading solution;
- knife construction, scissors for metal, hammer, passatia, screwdriver, needle roller, spatula Small and large, stapler;
- paint brush, flushing brush, roller coat for primer, bath, shoulder, holder of sandpaper, tessel on plasterboard;
- plumb, rule, regular or laser, stone pencil, chopping thread, rally;
- gloves, glasses, special equipment, respirator.
Working with cutting material and metal, do not forget about safety technician. Always use protective equipment to avoid injury and injury.
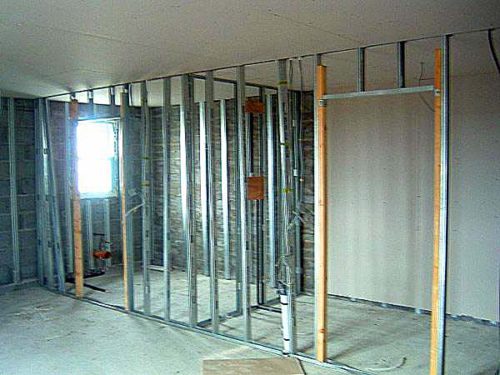
Assembling frame partition
So we approached the first floor of the partition mounting for your room. Like most construction processes, the initial stage provides for the marking of the future design. It is also important to prepare the basis before installing.

Explore the surface for the presence of bugro and depression. Putting the pieces of the escape, recesses close the solution, clean the base from the garbage. To mark the place where guide profiles will be installed, use a plumb and a twin thread. The plumbing is lowered from the ceiling to almost the floor, after which the exact location of the pencil is noted. For greater accuracy, you can do it in two places. Do not forget to also take into account the location of the future door.
After all the preparatory work is performed, you can start creating a "skeleton" for the partition, adhering to the next algorithm:
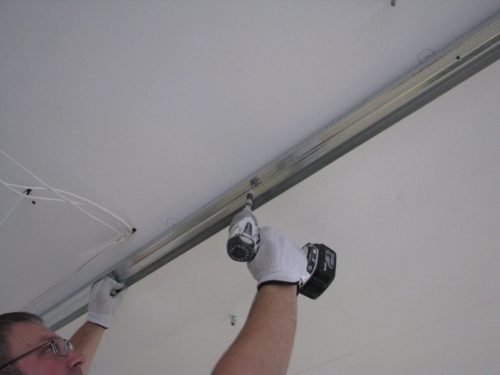
- Secure UW profile to the floor, walls and ceiling in the planned places. Use the dowel portage of the required length. At first drilled hole through the profile in concrete, where then the dowel is inserted. For final fixation, you need to drive into it a nail. Act carefully not to deform your profile flights, moving in increments of 0.6 m.
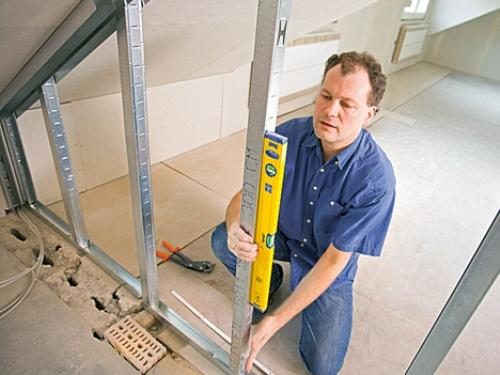
- Now you need to set the rack profile CW. It must be cut off by 0.5 cm less required length. Since the metal has an expanding property, this stock will protect the design from cracks and deformations. Use the level to withstand parallelism of profiles, fixing each other with the help of "seeds" or ripples.
- In the place where the door will be located, it is necessary to strengthen the disc. To do this, the timing of the required thickness is inserted into the rack profile. Do it around the perimeter of the door box, screwing the ram through the profile on the tree screws. To create a transverse part in the top of the work, you need to bend the profile of the letter "P". For this make cuts from each of the profile onboard at the same distance with the help of scissors for metal, after which it is neatly bend. The bent parts are fixed with the help of all the same "fleas".
- Once again check the frame plane on the level drop. Make sure the design is reliably fixed.


If you do everything in consistently, in accordance with the proposed instructions, you will get a reliable and durable design. Do not forget to always check the vertical level to avoid inclination of the partition. For convenience, use the level with magnetic overlays. Be sure to withstand a step of 60 cm between the rack profiles, it is necessary for the exact docking of the GLC.
Putting partition plasterboard
At this stage, it is necessary to give the design volume and strength. For this, the frame is crucified with plasterboard sheets. Depending on the type of room, select the desired sheet option. Often, apartments have the height of the walls of no more than 2.5 m. Therefore, it will be suitable for us a conventional wall leaf size 1200x2500 mm. If your walls are higher, get a sheet of 1200x3000 mm.
Saving a partition in the room with their own hands, act in stages, adhering to the next algorithm:
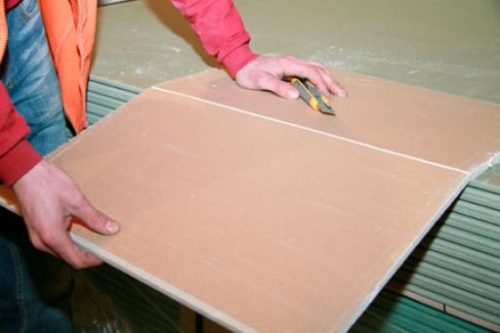
- Measure the height from the ceiling to the floor to cut off the sheet to the needed length. The sheet is planned from each edge, after which they spend between the line marks. Now, armed with the rule and knife, carefully cut off the cardboard, moving at the same time, from one edge to another. Now the sheet is bend so that he breaks out the crack. From the reverse side cut off the curved cardboard.
- Install the sheet vertically so that one edge it lies tightly to the wall. The second edge should be located strictly along the rack profile, while take only half of its width.
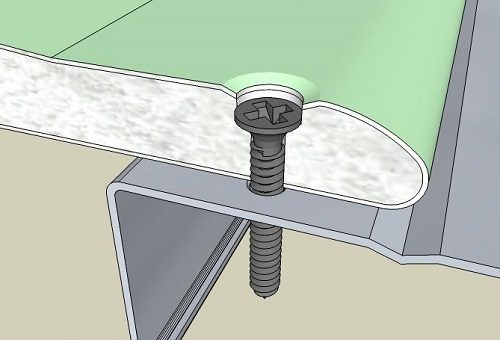
- Now you can screw the drywall to the frame. To do this, use self-tapping screws. For our sheet enough fasteners with a size of 2.5x25 mm. Self-tapping screws so that the hat is slightly hidden in the leaf surface. To do this, you can apply a special bit with the limiter. It is also important that the fastener passed through the rack profile vertically, and in the guide profile - horizontally.
- Similarly, cover one side up to the next wall. All sheets should be located strictly parallel to each other. If the sheet falls on the doorway, it must be cut from a solid piece of drywall in order not to lose the fastener step.
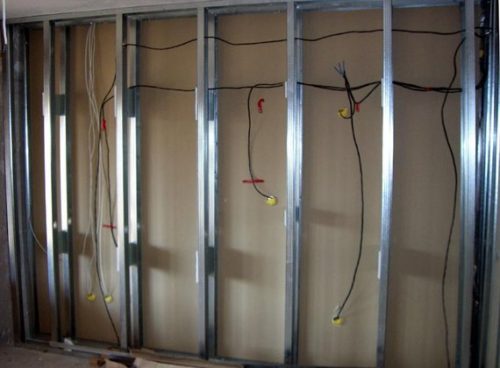
- When one side is trimmed, starting to mount the wiring, if required. For this, the cable, previously projected in the corrugated PVC tube. In the racking profile make holes, after which they focus on the insulated cable. Where there will be future elements of lighting and sockets, cut holes. It is possible to make it a knife or a drill with a nozzle "crown" of the desired diameter.
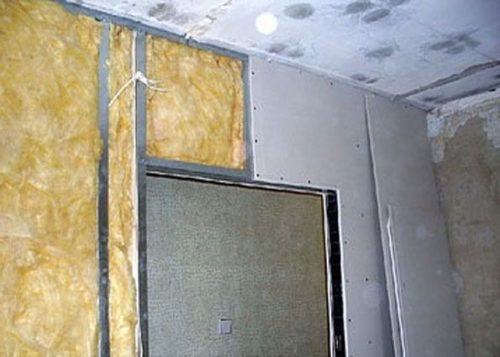
- Now we take the insulation and start laying between the racking profile. It is usually produced in a roll or matte version. We advise you to take it in mats, because they have a size of 50x600x1000 mm. This will help to avoid material overwhelms, as well as accurately calculate the number of necessary insulation.
- Similarly, we are cutting the second side of the structure. If you decide to install additional lighting, or forgot to dilute the power point, the sheet can always be dismantled by unscrewing the fasteners. It should be done gently, slightly pulling off the GLC on itself during the twisting of the self-press.


When assembling the frame and the cover of its plasterboard, be sure to follow the pitch of the rack profile and the parallelism of the mounted sheets. Accuracy of compliance with calculations at the preparatory stage is a pledge of durable, and most importantly, the reliable construction.
Decorating partitions from drywall
To give the partition a nice appearance, it is necessary to carefully prepare the basis for the finishing of a kind or other, be it wallpaper, painting or decorative plaster. Next, we give an example of the septum finish using paintwork.
To paint the plasterboard partition at the final stage of the finish, you must do the following:
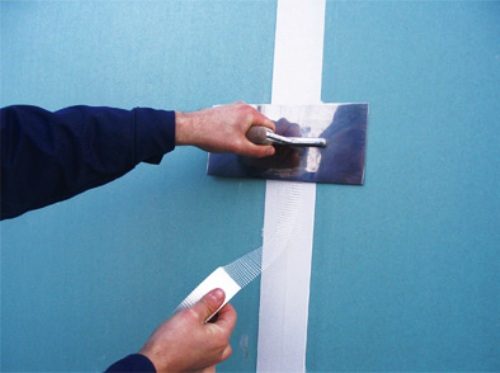
- Along the plasterboard seams, turn the glass cholester with a width of 50-100 mm. Use the PVA construction glue to fix the tape. This is necessary in order to avoid cracks along the places where the sheets are connected.
- Mix a small amount of solution to seal the seams, then apply on top of the glass cholester, as if indulging in the surface of the tape.
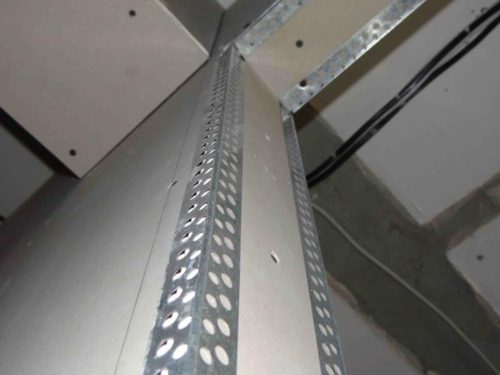
- At the outer corners of the design, attach a metal perfouge. Make it with a stapler, which is pre-inserted waters. At the same time, the bracket should be one part through perforation, and the second is fixed to the sheet.
- Now learn the entire surface of the partition. Use the roller so that the primer is evenly absorbed into the surface.
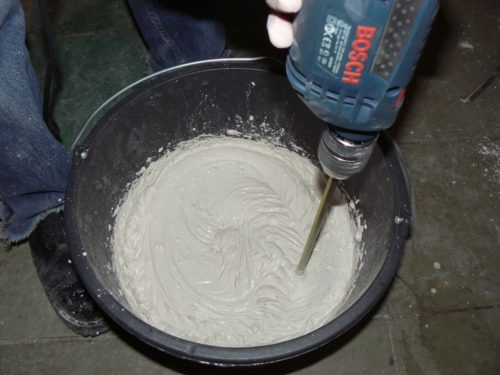
- Mix a small amount of dry finish shtcloth in accordance with the proportions proposed by the manufacturer. If you work with the finished acrylic mixture, it is better to stir it a little too.
- Apply a small spatula with a small amount of solution on a wide spatula, evenly distributing it along the entire length. Start to smooth the mixture by progressive movements. Usually a layer of 1-2 mm is sufficient.
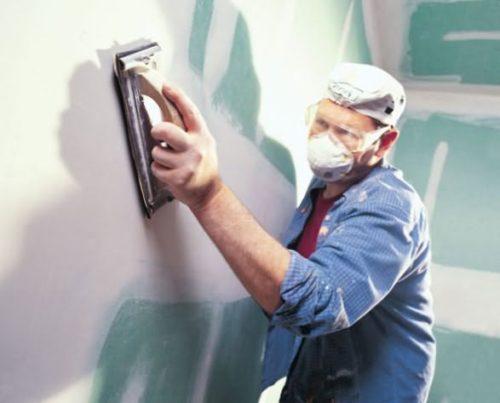
- When the mixture is dried, arm yourself with emery to sweat all visible disadvantages.
- Now the surface is once again stung, after which they give to dry.
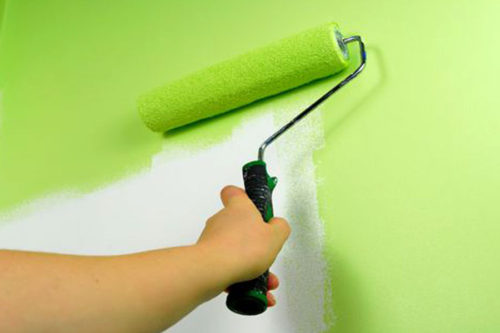
- Carefully stirrate the paint using the mixer or drill with the nozzle "whisk". This will help to avoid lumps on the surface of the plasterboard, avoiding the pattern unevenness. Take paint with roller, hacked in the bath.


As you can see, the assembly and installation of the partition with the opening under the door do it is not so complex, as it seems at first glance. It is important to choose the material and act according to the instructions. Always check the level and step of the rack profile, then a good result is guaranteed.


