The lack of sound insulation of the room in a modern panel house gives a lot of inconvenience to those living. The audibility of what is happening in the next apartment sometimes makes it doubt in its insolation from what is happening. Options Create Comfortable accommodation conditions Little: move to a private house or make the ceiling, walls and floors. Let's talk about how to execute the first paragraph of the plan.
Content
Soundproofing ceiling in the apartment. Cost of work in contractors
The easiest way to call professional construction builders and order sound insulation. Pay work and enjoy silence and comfort.
How much will it cost the owner, depends on the material and method of installation of sound insulation:
- The use of perforated gypsum or zeolite plates cost an average of $ 7 to $ 40 per m 2.
- The use of mineral wool costs an average of $ 15.5 - $ 30 per 1 m.
- The use of thermal insulating nonwoven material for mounted ceiling cost an average of $ 50 to $ 240.
- Installation of a branded acoustic ceiling from $ 180 to $ 300 per stranded meter.

Work on the improvement of the ceiling is not difficult, most of the amount is deducted for the material, but 30-40% of the price exhibited by the customer goes to pay for the wage of the employee.
For the economic and master person, it is not difficult to fulfill all the work on the soundproofing of the apartment alone.
Soundproofing types
The essence of noise isolation is to create a blocking barrier for coming from a sound wave source, weaken or completely neutralize them. The thickness of the barrier and the technical characteristics of the material for capturing will affect the efficiency of absorption of sounds. Specialists guarantee noise reduction by more than 40% when using modern noise absorbers.
Insulating materials manufactured by modern manufacturers are divided into such groups:
- Organic insulators. These are polystyrene foam, fiberboard, chipboard, eco-art. They are used for soundproofing of utility rooms: garages, sheds, hangars, temporary cells. Advantage: The cost per 1 m2 from $ 1, permanent availability, ease of installation. Flaw: Easily burning material.

- Extruded polyethylene foam. Advantages: Creates a high sound insulation, resistant to chemically aggressive media, is not subjected to rotting, shock noise. Antipiren enrichment increases refractory properties. For effective noise absorption, there is enough plates with a thickness of 2-3 cm. The average price from $ 1.8 to $ 2.5 per 1 m 2.

- Inorganic insulators. Produced with the addition of components that increase the protective properties of material to fire, moisture, rotting. These are well-known glass gamble and stone wool products. Advantages: Durability, environmental friendliness, low cost, average price for 1 m 3 it is 1.2 $ - $ 30, a large temperature range from - 60 0 to + 400. 0What is significantly higher provided by the norms of indicators for residential premises. This quality allows the use of an inorganic insulation for industrial premises, hot shops, bakery, culinary workshops. Mineral insulators are inert to aggressive substances and media.

- Butyl rubber self-adhesive tape. Advantages: Ecology, high sound insulation characteristic, elasticity, high water repellent characteristic, long service life.

The choice of material is made independently, taking into account the budget, the characteristics of the material and its safety for health.
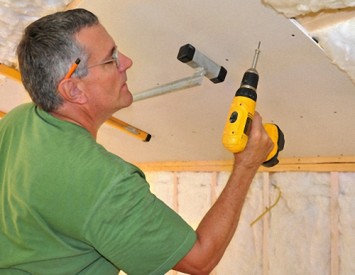
Preparatory work. General description of the process of laying a mounted layer on the guide profiles
Consider the sound insulation of the ceiling in a house on a single-layer design.
Start preparing the ceiling surface:
- Remove the old wallpapers, rush to the base of the overlap, the old blades, a spatula with a sharp edge remove the putty.
- Check the adhesion strength of putty with the base of the ceiling with a light tapping on the old layer. Remove the covered seal.
- The emerging cracks, gaps, recesses are masked by a special sealant, and not alabaster or starting putty. Sealant additionally isolates vibration and noise effects.
- Measure the corners and check the ceiling area at evenness. For these purposes, the most reliable tool will perform a water level. It is filled with water to the label. Left to one corner, an indicator is noted, then a similar procedure is done in the second corner. The difference of readings is marked on the wall. Each angle is checked, the labels are affixed.

Measures:
The length and width of the ceiling are flimsy. The length of T-shaped wide profiles and narrow rails is calculated. Important moment for construction of mounted ceiling design. Insulation materials have their own sizes, which will have to be purchased. First, the number of panels or elements for the suspended ceiling is calculated on the total area, and then the amount of insulating material is calculated. In the dimensions of the finishing material, the placement method is determined: across or along the room.
Selecting the material, prepare tools and connecting elements on the general list:
- Screws, suspensions, screws.
- Guide strips - the number defined after measurement.
- Adhesive drug.
- Drill, perforator, manual drill, screwdriver.
- Hammer, pliers, metal scissors.
- Hacksaw, knife, rail, planer.
- Step, building goats.
- Selected noise insulator. Volume, a meter or quantity defined after measurements.
- Finishing material. The amount is determined after measurements.
- Level, level, roulette, pencil or coloring lace.
- Spatula for sealing joints, screws, corners.
- Roller or brush for priming.
- Mixture for spatlement.
- Capacity for the preparation of a wet mixture.
- Grout with sandpaper.
All of the listed tools can be replaced by infrident, existing in the farm.
Mounting frame:
- The installation of the guide profile is made. It is attached around the ceiling perimeter to the base of a dowel or a long self-tapping machine around the perimeter.
- From the attached rail, an indent of the width of a sheet of plasterboard or other finishing material is made, a mark is put. This is marked for a narrow profile, additionally reinforcing sheet.
- Promper procedure should be done to the opposite wall. It is checked by the reliability of the attachment of the rails and profiles manually. The main thing is to secure the corners in accordance with the ceiling verification level.
- The mounting profile is attached to the profile by self-draws. The transverse rails are equalized and fastened with straight suspensions or "Butterfly" suspensions.
Locking sheets of plasterboard:
- Length is placed, the width of the sheet, the extra part is trimmed.
- The sheet is applied to a stamped frame and a screwdriver or self-drawing attached to the profile and slats.
Advice: The fastening caps are slightly bleed into the sheet, hardware are selected with an oxidized coating. The process of packing is fast and simple.
Sealing sheets of mounted ceiling:
- The first spacion layer is applied by the starting, rough mixture. After drying, it takes grout with sandpaper and smoothed the places of roughness.
- The second rapid layer is applied to the finishing construction mixture. The dried layer is processed by grouting with emery before smoothness.
Ceiling painting:
- Getting Started, decide on the color of the mounted ceiling.
- Properly selected color scheme has a positive impact on the well-being of residents, adorns the interior, creates the visibility of volume and space in the room.
- The choice of dye should stop on acrylic paints. They are designed without the addition of organic, solvents, inexpensive at the price, have a wide range of shades, are easily applied with a roller or sprayer.
Video lessons will help to visually present work, it is steadily to consider obscure moments:
Multi-level ceiling insulation
With multi-level noise insulation, work is not carried out on the ideal alignment of the ceiling surface. Soundproofing disguises small defects. The focus is on accurate profile installation.
Prepare tools for work:
- Reiki, guide profile planks.
- Glue for noise insulating material. Primer for the basis.
- Drill, manual drill.
- Screws, screws.
- Workers building goats or staircase.
- Pliers.
- Scissors for metal.
- Work gloves.
- Protective glasses.
- Capacity for solution.
- Suspensions.
- Roller with foam rubber, 150-180 mm long.

Work process:
- Wash off the ceiling old blots, you consider paint. Seeing the surface. Close up microcracks.
- Install on the ceiling guides with anti-vibration system.
- Divide the adhesive composition according to the attached instructions.
- Mold in the container part of the solution, apply a roller on the ceiling. Prepare insulating material, cut a piece along the length of the ceiling.
- Cress the insulator to the surface and immediately clamp it with the suspensions. Distribute material with a margin of 1-2 centimeters on the walls. Running the material on the ceiling, make sure that the air bubbles between the ceiling and mineral wool remain. The edges of the next roll are born to the glued.
- You feed the dowels or secure self-made wide T-shaped profiles, withsting the distance between the slats to the width of the sheet of finishing material.
- Crepact narrow rails, to support sheets of finishing.
- Place plasterboard. Screw to the profile slats with a screwdriver.
- Close up of joints with sealant. Put in 2 layers of sheets. Collect.
This noise insulation provides protection by 20-25% higher than one-level one.
How to make yourself stretch ceiling
Soundproofing of the stretch ceiling is performed by tensioning a special web, tissue material based on polyester on profiles. Visually design is simple, it means easier than the drywall. But in each process there are features and subtleties.
Installation of a simple stretch ceiling. On the surface do not pass pipes, communications, room strictly geometric shape, without niche or protrusions. What you need to prepare for work:
- Material: PVC film or fabric.
- Baguet-profile.
- Centimeter, roulette.
- Pencil.
- Water level.
- Folding transport.
- Handling or scissors for metal.
- Fan heater, calorifer.
- Screwdriver.
- Self-tapping screw or dowel.
Installation of a simple stretch ceiling:
1. Water level find the lower corner of the room, retreating 1-2 cm, make notice.
2. Find a zero level around the perimeter of the walls, make a mark.

3. Perform measurement of the corners with folding shipping for smooth profile dusting.
4. Prepare the profile rail. Two options are possible:
- the baguette length is greater than the width of the room. The railroad edge is cut at an angle equal to half the corner of the room;
- the baguette length is less than the width of the room. One end of the rail is cut into half the angle of the room, and the second is roasted at 90 0 For accurate fit to the second rail. The missing piece of baguette takes and is done with its endings the same operation, with a bevel for the opposite corner. Parts of the baguette glued.
5. Baguette is attached around the perimeter of the wall, uncharged in terms of level. Fasteners perform self-drawers or dowels.
6. Include calorifer and warm the room to a temperature of 40 and more degrees. Footages and doors to the room cover. Only after installing the required temperature, unwind the insulating material on the PVX base for the mounted ceiling. Avoid the close contact of the insulator with the calorifer. Warm the film to 60 0.
7. Getting striking the panels. The base angle is marked on the film. Installation start with it, then secure the angle diagonally. Similarly, secure the two remaining corners. Getting Started Bohokin. The fabric material is also heated, but the order of attachment is used by another: the sidewalls are primarily attached, angles - in the second place.
Video lesson for consolidating knowledge:


