It so happened that in most multi-storey houses erected another 30-40 or more years ago, the ceilings differ in curvature. Most often, this problem is that the plates performing the function of the overlap are in a bit different levels. Accordingly, if we make the ceiling exclusively, there will be serious irregularities in the eyes, remove which is almost impossible. In some cases, people try to shove wallpaper on this surface, but the ceiling flaws are extremely rare. The best solution to hide the curvature of the surface is the alignment of the ceiling with drywall.
Content
As is known, drywall is used when finishing almost any premises. It can be high walls, corners, ceilings, as well as ceiling and wall structures. It is based on plasterboard that you can correct all the errors made during construction. However, it is necessary to understand that these are just visual corrections, so it is necessary to seriously refer to any problems that can threaten the integrity of the structure.
As for the process of equalizing the ceiling, then drywall here is really the best solution. After we align the ceiling, you can completely transform the home, install modern lamps or puncture the surface with wallpaper.

Features of using plasterboard for ceiling leveling
Immediately it must be said that the ceiling leveling process with plasterboard is quite simple. For this, it is not necessary to use specialists to use the services, it is possible to restrict ourselves to our own. But for this you need to explore the technology of the process, we will talk about it a little later.
And to begin with, consider the main advantages of drywall compared to other options for the ceiling alignment.
- Plaster. Of course, it is by using plaster Many owners try to hide substantial flaws of the ceiling. And for this process, there are a lot of plaster, since after hiddening some irregularities, others begin to manifest. Moreover, for the process of plastering, you need to have a considerable experience, as it is very simple to allow errors.
- MDF and PVC panels. The materials released on the basis of the rustic are always highly appreciated. However, in this case, this is not the best option for finishing the ceiling. The fact is that the appearance of the ceiling, aligned with the MDF panels, is not entirely presentable. In modern conditions, all this will look ridiculous, especially if the dwelling has some particular interior style. Most often with such panels align the ceilings in industrial buildings and offices, where the design of the room is not of great importance.
At the same time in a situation where it is necessary to align the ceiling by plasterboard, there are several positive sides:
- Space for creativity. With the help of drywall, you can create multi-level ceilings, as well as implement a variety of decorative parts. With such a situation, there are a lot of options that allow you to turn the ceiling curve in a really attractive space.
- Simple and fast repair. For mounting drywall, you do not need to spend a lot of time for preparatory work, as well as other events that usually occur to the main repair procedures. In this case, you can only prepare the surface and start alignment.
- Useful space between the bearing plate and plasterboard. In the event that we need a gap between the main ceiling and plasterboard, it is very easy to implement. The resulting space can be used quite effectively. For example, there may be wires or parts of the lamps. Here you can also realize a lot of useful scenarios.
From the entire information provided it becomes clear that the choice of material for alignmenting the ceiling is obvious. However, it is also necessary to first learn all the information you are interested in consultants in building stores, as some subtleties relating to the specifics of the room can seriously affect the use and operation of drywall.


Specificity of installation technologies of plasterboard
There are as many two ceiling leveling technologies using drywall:
- Hard ceiling. In this case, we have plasterboard sheets that are attached directly to the base ceiling, as well as the wall profile. The last element should be located all over the perimeter of the room. This design will ensure the full safety of the ceiling operation, as well as the perfectly gentle surface.
- Free installation. The advantage of this method (without the use of profiles) is the lack of negative effects of static and dynamic stresses, which often manifest after some shrinkage of the supporting structure.
The second option is most often used in new buildings, so in all other cases you can safely make a choice in favor of a hard ceiling.

Preliminary calculations
Before purchasing plasterboard, you need to make calculations. They will allow us to determine the number of necessary material. It is very important to make counting several times to accidentally not mistaken, as any item can significantly affect the installation process.
For calculations, it is best to use a regular sheet of paper on which the sketch is schematically created. It will also be necessary to know the dimensions of plasterboard sheets (as they may differ), as well as the ceiling area. With a high probability of plasterboard sheets will not fully match the dwelling dimensions, so in the process you will have to use cropped parts of the material. There is nothing complicated in this, but the reserve is better to purchase 2-3 sheets of plaster material.
It is also necessary to analyze the creation of the supporting structure. Most often it is a metal frame, which will be attached by plasterboard. However, it is possible to use wood bars if necessary.
Installation of plasterboard for ceiling leveling
Marking for installation
To prevent any errors associated with the location of plasterboard sheets, you need to mark up. In the last stage, we made some calculations that allow us to approximately imagine how the ceiling will look like in the end.
Now you need to put markup. This will allow us to identify the main problem areas on the ceiling that can complicate installation. Accordingly, we will be ready for any problems. Next, let's talk about the main options for marking:
- To achieve horizontality, it is necessary to make a penalty from the ceiling in several centimeters, then start marking. This process requires a construction level that will not allow any errors associated with future installation of drywall. Marking is performed using a conventional pencil. Marking elements need to be made with maximum accuracy, as any millimeter may have a tremendous value, especially if we are talking about fixed size of plasterboard sheets.
- Instead of a construction level, you can take the so-called hydroelectric system. We are talking about the hose, which is filled with tinted water. Accordingly, applying the hose to the wall, we have an approximate view of the horizontal ceiling. This method also allows you to easily make markup.
As a landmarks for creating a plasterboard ceiling, screws and cord can be used, which is stretched between the fasteners. Such a benchmark for the ceiling is the best suitable for accurate work.
Mounting carcass
Immediately after marking, we begin to mount the suspensions to the ceiling. These are metal plates that have several holes. In this case, the height of the ceiling structure depends solely on the wishes of the owners.
Next, the ceiling profile is installed for drywall. At the same time, the extra part of the suspension should be cut up.
Before mounting any metal element (and there will be a lot of them here), you need to be checked with the created markup. Already during the installation, it will be incredibly difficult to fix something.

Use of space between the main ceiling and frame
Previously, we talked about the fact that there will be a space between the main ceiling and the plasterboard surface that can be used with benefit. It is about the fact that this gap allows you to install the thermal insulation material without unnecessary problems. Moreover, if this event was planned before installing a metal frame, then you need to think about the distance between the carrier surface and plasterboard. If we want to use glasswater as insulation, then the thickness of this material is quite impressive.
In addition, the useful space can also be used to arrange noise insulation. For example, it can be a material based on felt, which has a very small thickness. If the ceiling itself is very high, you can easily create several insulating layers. The main thing is to make insulation and noise insolonation are tight.
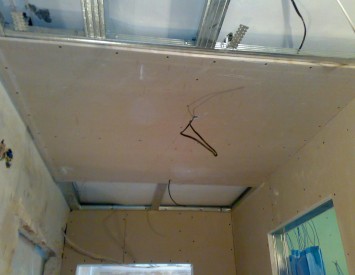
You should also not forget that the space between the bearing ceiling and plasterboard can be used to hide some communications. It can be different wires or even pipes - it all depends on the existing space. Plasterboard also makes it possible to install point lamps that are well combined with a perfectly smooth surface. In this case, the gypsum material has a lot in common with stretch ceilings, but the process is slightly complicated with the beginning of the cutting of the holes for the lamps. In this case, it will be necessary to bring the wire to the hole, as well as make them hang. This significantly simplifies the further installation of lamps.
Installation of plasterboard
If we correctly installed a metal profile, then install plasterboard - not a problem. It is enough just to apply the material to the surface of the frame, after which it is fixed with the help of screws. It should be borne in mind that such work should be carried out carefully, since even small dents on drywall will then be felt.
It should be borne in mind that the length of self-samples must correspond to the thickness of the drywall, as well as the specifics of the attachment. If we do not have a metal frame, but a wooden, then the length of the self-samples should be impressive. In the case of installation of plaster material based on a metal frame, everything is much simpler, and if necessary, you can fix everything.
It is desirable to have several sheets of plasterboard in stock, since in the presence of a large room to allow serious errors very simple. In any case, drywall is never excess in the farm.
After mounting the sheets of plasterboard begins the process of shtlocking joints. In this case, we will need an assembly grid that will add durability to the created layer. It is necessary to apply a putty only in small volumes, as the surface horizontal surface is incredibly simple.
Next, the installation of lamps, which, as already mentioned, are installed directly based on drywall.
Now you can safely decorate the surface of the gypsum material. To do this, use paint. You can also return to putty and create a solid layer of decorative trim.
If everything is done correctly, the ceiling will really turn out to be even, and the very room space is attractive. At the very end, it should be noted that to hide the flaws that are often formed in the corners between the walls and the ceiling, or decorative baseboards produced on the basis of plastic or foam plastic can be used.


