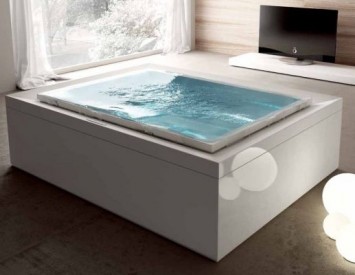
An embedded bath in contrast to the standard model has constructive features that highlight such a product of a dozen others. All the charm of such a designer decision is to visually save space. Integrated baths look exquisitely and harmoniously in any interior. The only one, the installation of embedded baths is technically complicated.
Content
We will analyze the design features of the installation of plumbing of this type, we note the advantages and disadvantages, we will deal with the order of installation.
Distinctive features
- The main difference between traditional baths from these plumbing products lies in the size and configuration of the bottom. Often built-in baths - impressive design with a flat bottom. These developers emphasize the grandiosity of the Court. Indeed, in large rooms, standard baths will look like a trivial puddle.
- Another distinction of the floor-being built into the floor or table top is the presence of labels from the side internities. This technological innovation allows you to extinguish water flows that stripe splash on an expensive carpet or handmade parquet. Built-in baths are often used in country houses. Plumbing reinforcement is cut into the floor, decorated with a parquet or laminate.
- The drain mechanism of such structures is also highlighted by the original performance. In most cases, manufacturers offer products complete with siphons, which in turn are produced in accordance with high security requirements. This is an important aspect, having remembered about the installation of such baths in the houses of noble Lord.
Varieties of embedded baths

Such products are not produced for a wide mass of consumers. Based on this, a limited choice of models and configurations is understood. Embedded baths are conventionally divided into groups on the criteria of dimensions and form. If the market can be found on the market of various sizes, then the variety of forms is not among the virtues of the solution. Bath form can be:
- round;
- rectangular;
- corner.
The first use the greatest love of the designers - round plumbing products give the interior of the bathroom luxurious style and make a mini-museum from the bathroom for excursions.
In addition, embedded baths differ in material for production. By analogy with such models of the standard species, the market presents in a large number of cast-iron embedded baths, acrylic, as well as steel. Of these, the unconditional favorite is acrylic. From this material you can make a bath of any shape and sizes.
Built in the floor bath: Conditions for mounting

To install an oval or corner bath in the floor, it is necessary to take into account certain conditions. Without them, installation is doomed to failure. We list compulsory conditions:
- The impossibility of installation in the city apartment. Even with the technical reality of the construction of the structure on the first floor of an apartment building, permission will not be issued any state competent organization. Unauthorized installation will lead to a violation of not only the plan of the apartment, but also the integrity of the residential building.
- The optimal installation condition is a private house with a spacious bathroom. Associate, it is necessary to make installation on the first floor either in the basement. Otherwise, you will have to provide reinforced concrete construction during construction to support the bath. It is not enough to just buy an embedded bath, you will have to work pretty for installation.
- An important condition is the supply of a sewer system with a pre-installed pumping station. As you can see, such baths are more like constructive features on the jacuzzi, or pools. Calculate the costs not only for the purchase and installation of the design, but also on a fair amount of water required for a complete set. On average, the volume of tanks reaches 300 liters.
- Finally, a prerequisite for installing baths of this kind is a professional brigade of plumbing edges. Independently carry out the installation almost impossible due to the high complexity of some operations.
How to install embedded baths: Important nuances

- For high-quality installation, a veil is required. It is not enough just to dig a pit, you will have to concrete the floor and walls using a high-quality solution. At the same time, the pit should be made across the shape of a bath. In fact, if placing a plumbing product in a niche, it should sit like a cast.
- An important nuance: the greater the side of the side of the sides, the more reliable.
- The depth of the pit must be calculated in such a way that the baths installed on the legs rumped over a maximum of 50 mm high. In the future, supports are fixed, and the bath is based on the finishing floor.
- The veil is pulled by sewer and plumbing communications. The optimal place for this is the area of \u200b\u200bthe pit in the field of hidden hatch. View all the structural features of the built-in baths you can in the photo.
- Next comes directly assembly. As a rule, at this stage, specialists establish a siphon and attach to the bottom of the supports in accordance with the recommendations of the manufacturer. It is likely to be needed to embed the mixer in the bath tub. The main thing is to follow the instructions and not replace the factory parts of the plumbing in other details.
- The next step is to install and connect. You must insert a bath in a hole by lifting the legs to the maximum possible position. The rest is both in a conventional connection scheme: connecting to the sewer network, then to the plumbing. It is desirable to use stainless steel corrugated metal sleeves to connect. Flexible hoses are not reliable and not durable.
- Finally, a test test is produced - water is filled, tightness of connections and nodes is checked.
- The final stage is considered to be the floor cladding. For bathrooms recently use 3D-flooring technology. Such rooms are transformed, give new sensations. Traditional options include laminate, marble, parquet, tile.
Bathroom furniture: how to assemble a tabletop

The trend of modernity is the roll towards uncomplicated solutions, original performances. In this regard, the bathroom is the best place for experiments. Furniture today does not surprise at all in miniature premises with plumbing.
Furniture for bathrooms are developing for embedded plumbing elements like shells or baths. Moreover, such countertops are made of girlfriend - MDF, plasterboard. What is curious, the installation of a skeleton for the countertop is carried out according to the same rules as for other premises.
- At the desired height of the installation of the bath or shells, it is necessary to accumulate the line on which the guide profiles will be mounted.
- Using the guide in the form of a reference point, you should form the contours of the design.
- Then it is recommended to decide the frame, leaving the space for maneuvers.
- To form a cut under a washbasin or bath.
- Fix plasterboard sheets, without forgetting about supports (it is necessary to support massive structures).
- The finish stage is the installation of sanitary fittings, as in the case of embedded baths, and the surface finish. A mosaic or tile is suitable as a finishing material. This will give the design of the finished look and protect the fat-resistant plasterboard from the water.
By the way, the bath, embedded under the worktop, is made in the same way. It is enough to determine the dimensions, draw markup for carrier profiles and collect a simple framework. Then it must be additionally strengthened and sew. This rule also works when using MDF as a base-top base.
Embedded plumbing in any case will be a highlight of the bathrooms, especially in combination with skillfully assembled and decorated table tops and floors. Now you know how to install an embedded bath, how to assemble a worktop and decorate it. It remains for small!


