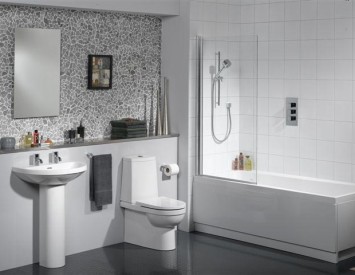
Often the bathroom is the only cold room in the apartment. The reasons for uncomfortable microclimate can be a different one. It may be a wall of the bathroom, which goes to the street or to the technical room, not working a coilsheel coil, problems with ventilation channels, etc.
Content
It is not always the real opportunity to produce outdoor insulation. For example, behind the wall is a deformation seam, the elevator mine, an entrance or a different unheated room in which it is impossible to mount insulation. Make the inner warming of the walls with their own hands in the bathroom is not difficult.
Selection of material for insulation bathroom from inside
The insulation material for the bathroom should have low heat resistivity, not absorb moisture, be durable and durable. Mineral wool due to its characteristics absorb moisture, not suitable for bathroom insulation.

- The easiest way and cheaper to warm up the insulation of the inner walls by foam and do it yourself. Polyfoam is inexpensive and practical material. The low price, the ease of processing and low heat resistance is beneficial to allocate it among similar species of insulating material. Polyfoam has an extremely low parry permeability coefficient. He does not miss steam, but also does not absorb it and is suitable for the insulation of any kind of walls. Choosing material for insulation of walls inside the bathroom, keep in mind that its price depends on the density and thickness of the insulation.
- You can make insulation of inner walls and expanded polystyrene. Extruded expanded polystyrene has similar foam properties. The high density of expanded polystyrene allows at a lesser thickness to maintain high thermal insulation properties. It is of great importance when warming up a small bathroom. In addition, it is stronger, and its installation methods are no different from the insulation of foam.

The process of insulation of the inner walls by foam with its own hands is on the video at the end of the article.
Materials and tools for internal bathroom insulation
Measure the area of \u200b\u200beach wall separately. On the sheet of paper, draw a scheme of the bathroom in the deployed form. According to the diagram, the required number of insulation sheets is calculated. Polyfoam and polystyrene foam are produced in sheets 1x1 and 1x0.5 m. In the drawing, consider the order of laying the insulation with a minimum amount of joints and waste.

- In the event that the inner finish is planned from drywall, it is necessary to take into account the tolerances to the crate of a galvanized profile, which is attached to the walls of the bathroom until the insulation is started. In this case, it is economically a step of profile planks 1x0.5 meters, and the insulation will acquire the appropriate size and thickness.
- For the arrangement of the crate, purchase a rack profile (PS) or (CW) and a guide profile (PN) or (UW). Standard profile depth 40 mm, and in width for a bathroom is enough 50 mm.
You will need adhesive for foam, glue consumption according to the area specified on the package. Plastic dowels, reinforcing plastic mesh, primer and putty.
Tool:
- Turbosteral machine and drill with a mixer.
- Hammer, chisel, roulette and mounting knife.
- Spatula 50 and 200 mm and one toothed for glue.
Preparation of the room to install insulation
Before starting work, it is necessary to dismantle all removable items in the bathroom. Bathroom, shower, sink, lockers, etc. For pipes internal water supply and sewage pipes, it is best to build a box of plasterboard or moisture-resistant OSB.

- The walls are cleaned of paint, blots or ceramic tiles and are aligned. Paint and whims are removed with a spatula and a brush with a metal bristle, and then the walls are washed with soap solution and water. The tile is knocked out with a chisel and hammer. The remnants of glue are equivalent to the turbo-shelf machine. Pile and depressions are shrinkled with glue for insulation or cement mortar. The surface of the walls should be smooth and hygroscopic.
- For the installation of foam plastic, the drywall is mounted with a galvanized profile. In order to avoid the occurrence of the walking of the cold, empty opening profiles should be filled with strips of foam. The profile is attached to the walls with dowels in such a way that the vertical cells of 1x0.5 meters are formed.

The surfaces inside the cells are processed deeply penetrating primer and antiseptic preparations.
Installation of fontoam insulation inside bathroom


- Take the bucket and to its half fill the dry adhesive mixture for foam. By adding some water, stir the mixture with a spatula, and then a drill with a mixer. Alternately adding water or dry glue, achieve the consistency of thick cream. The adhesive mixture should not crawl off a spatula or foam.
- The foam leaf is 1x0.5 meters in size 16 - 18 glue smears. The smears are evenly distributed on the plane of the sheet of foam and poured with a toothed spatula.
- The foam leaf is installed in the cell, tightly pressed against the wall and packed with palm throughout the plane. In the middle of the sheet in the upper and lower quarters, plastic dowels are installed for fixing foam. Through the foam holes are drilled by the diameter of the dowel.
- The tip of the dowel is split by the mounting knife on the factory label and is inserted into the hole until it stops. The locking plastic nail is inserted into the hole of the dowel and clogged with a hammer. Nothing terrible will not happen if in the process of mounting the hat of the dowel deepen into the foam of 3 - 4 mm. This place is simply embarrassed by glue for the insulation.
- After mounting entire sheets, measure and reveal the remaining empty places. The roulette is measured by all four sides. Using a ruler or level rail, dimensions are transferred to a sheet of foam. Cutting blanks with a mounting knife and are installed in their cells in the manner described above.
The final stage of the insulation of the bathroom from the inside
When finishing insulated walls with plasterboard, the sheets are screwed up with self-drawing to the crate, processed deeply penetrating primers and put off. Plasterboard can be saved with ceramic tiles or paint with waterfront.

Insulated bathroom walls without mounting frame for plasterboard are placed and put off. During the plaster, a reinforcing mesh is used to give strength, and after putting down the walls are processed with a soil mixture for waterproofing and an antiseptic.


