In a modern house or apartment, it is difficult to find a kitchen room that would not be equipped with forced exhaust ventilation. Moreover, the hoods are used by different ones, from simple fans, which are inserted into the window window, to complex turbinesed systems that can cleanse a large volume of air in a few minutes. Exhaust models are also divided into airing air into the ventilation duct and to filtering it. The latter have no ducts, which significantly save space. However, they require a constant replacement of filters.
Content
- Ventilation in the house. Ready -made solutions to extractors
- Ventilation in the house. Upgrade of the existing hood
- Ventilation in the house. Preparation of air ducts
- Ventilation in the house. Working with an extractor fan
- How to automate a kitchen hood with your own hands
- DIY kitchen control controller
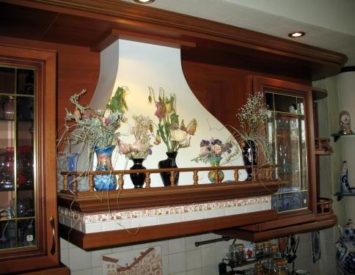
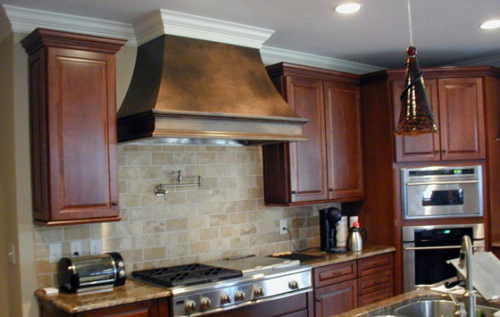
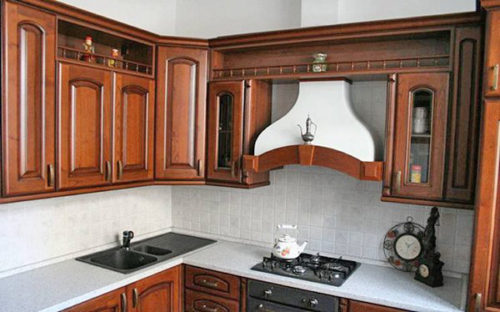
- DIY kitchen hoods: photo
- Installing kitchen hood with your own hands: video
Ventilation in the house. Ready -made solutions to extractors
The main purpose of the hood is the removal or filtration of air in the kitchen during cooking. During this process, the room is filled with carbon monoxide, steam, the temperature in it rises. All these factors are not too favorable for kitchen furniture, ceiling, walls. That is why the work of hoods during this process is required.
It is worth remembering that the higher the performance of the hood, the more it consumes electricity. On average, the power consumption of this device is 1,500-1700 watts per hour, which is not very small. However, the device should work only when the air temperature over the plate reaches a certain temperature. The rest of the time, the work of the hood does not make sense. This operating mode can be achieved by automation.
About how to make the repair of a kitchen hood with your own hands with automation and more about the characteristics of these units - further in the article.
Leading manufacturers of kitchen equipment have long thought about automating the work of hoods. So, Siemens offers its consumers a rather original solution. A set of hoods and hobs have radio modules that synchronize their work. When the hob is turned on, it gives the signal to the hood, due to which it turns on. When turning off the firewood, the hood goes into low performance mode, after which it simply turns off. The disadvantage of using the radio signal is that even with slight pollution, the signal cleanliness weakens and the synchronization of the operation of the devices can be impaired. Therefore, they must be kept in complete cleanliness. In addition, the work of hoods at the initial stages of cooking can be meaningless.
To solve the problem of automatically turning on the hood, Krona has released a series of hoods with the Intellect Start system. When the device is included in the automatic mode, air analysis sensors are activated. With an increase in the concentration of vapors in it above the limit value, it turns on. If the content of vapor in the air will grow, the intensity of the fans will increase.
It will be fair to notice that such trains are quite expensive, so you should try to automate an ordinary hood with your own hands.
Ventilation in the house. Upgrade of the existing hood
The procedure for improving the existing hood:
- Work on changing the design of the hood should be carried out only on dismantled equipment. To do this, it is removed from the mounts, necessarily disconnected from the duct and power supply.
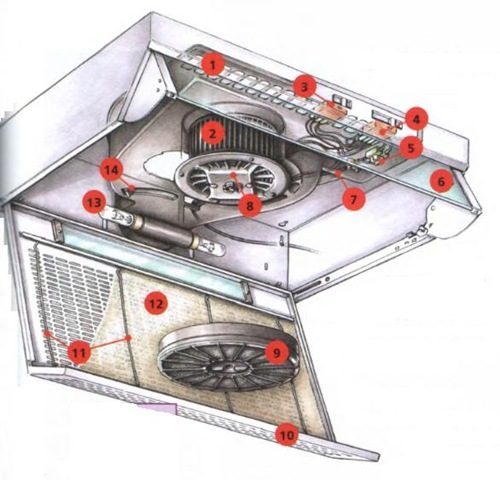
- Then the structure is analyzed. First of all, fatty filters for kitchen hoods with your own hands are removed, then coal ones. After that, you can temporarily disconnect the electric motor. It can so far be aside.
- Next, check the electrical circuit for the presence of a signal lamp. If it is not, a hole is drilled in the case for its installation. As an indicator, you can use signal lamps with a voltage of 230V, or indicators such as IEC AD16DS, or their analogues.
- In the lower part of the hood case, it will be necessary to drill another hole for installing the temperature sensor. So that fat does not fall on it, for the hole it is worth providing a cap. For this purpose, a furniture plug is perfect. The thickness of the cap should be as small as possible so as not to distort the work of the sensor itself.
- In the back of the hood case, a case or a DIN-rack is installed for installation of machines, and several holes should be drilled to supply wires.
Ventilation in the house. Preparation of air ducts
At this stage, several tips should be used:
- As a rule, corrugated aluminum pipes are used as the main air duct of the electric hood. They are easy to process, have a low weight, can increase by a length of almost 25%. Standard internal diameters of corrugated pipes are 125 and 110 mm.
- When installing the duct, it is necessary to take care of the tightness of the joints. In the presence of “suction” air in the places of connection of the pipe with the flange of the hood, its effectiveness will significantly decrease.
- The pipe is mounted to the flanks using plumbing clamps. For a more sealed joint, silicone sealant can be used. When installing a kitchen hood with your own hands in a private house, you will have to make a duct pipe. Here it is necessary to remember that the higher the pipe, the better the craving.
- For the construction of the outer part of the duct, a plastic sewer pipe is perfect. To protect it from the precipitation from entering its upper part, a protective fungus is installed. The diameter of the pipe should not be less than the diameter of the output of the hood.
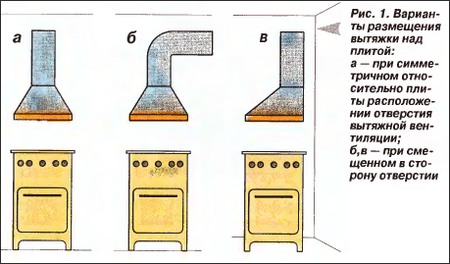
- When installing the hood in the apartment, the air duct is displayed into the oven space with the installation of a special flange.
Ventilation in the house. Working with an extractor fan
Typically, the fan installed in the hood is enough to ensure the normal operation of the ventilation system. Especially if a centrifugal fan is used, the so -called turbine. If the power of the standard fan is not enough, then you can replace it with a more powerful one. It is problematic to do this in most cases. The size of the pipe is to blame, because for an extract with a 110 mm output diameter it is quite difficult to find a powerful fan.
The solution to the problem of increasing the hood power can be the installation of the external axial fan in the duct channel. Their inclusion can occur in parallel. If the outer fan is highly powerful, then you can remove the factory and leave it only. An increase in the power of the hood will make it more effective even with a large amount of cooking. If desired, it can even be lifted above the hob. When installing in a private house, you can take the fan outside the room. This will significantly reduce noise and vibration with an increase in its power. However, the cost of such a decision will be slightly higher.
How to automate a kitchen hood with your own hands
When all the elements of the future exhaust system are selected, you can proceed to its automation. The basis of the automatic inclusion system of exhaust ventilation will be the TR-16.01 digital controller TR-16.01. It is also used in the automation of heating boilers. The controller is set paired with an automatic voltage of 6 amperes. Such protection is enough to ensure the safe operation of the electric circuit. The machine should be two -pole.
There are several terminals in the thermostat circuit:
- Power - connects to the machine and gives an electric current on the controller relay.
- Connection of the sensor. In this case, a temperature sensor is connected to the controller, which will transmit information to him.
- Relay output. It is designed to supply power to the network when the controller is triggered.
Work order:
- The power supply is supplied to the controller from the lower pole of the machine gun, it is also connected to it with a jumper of the central contact entrance of the relay.
- In order for the hood to be enabled, its switch is connected parallel to the relay contact, to which the engine is connected. This contact is called normally open.
- The second wire of the fan electric motor is connected to the opposite of that terminal terminal into which the jumper is connected.
- The temperature sensor is installed in the cap on the hood body. It is necessary to pour the KTP-8 paste into the cap and gently immerse the sensor into it. Before that, the heat -shrink tube, which is installed at the end of the sensor, must be carefully removed.
- Pasta should stand for a couple of hours to freeze. Before that, using the sensor is not desirable.
DIY kitchen control controller
Included with the thermostat relay (controller) must be instructions in which the connection schemes and the settings of the device must be described. When setting up the controller, it is necessary to take into account the fact that the temperature sensor works a little with delay. This happens due to the fact that its metal shell should warm up to the nasal temperature.
During the operation of a gas stove or a hob in a slow fire mode, the air under the exhaust warms up to 50 ° C in less than a minute. Given the belated reaction of the sensor, the hood can turn on in about a minute or two. During this time, the air warms up more than necessary. Therefore, when setting up the controller, it is necessary to set the response temperature 8-10 ° C lower than the set. Suppose you need to set a boundary temperature at which an extract should turn on at a level of 45 ° C, then in the controller you need to set a temperature of not more than 35-37 ° C.
The lower temperature at which the hood should be turned off is set as a temperature difference or “hysteresis”. For example, if the inclination of the hood occurs at 37 ° C, and the shutdown should occur at 30 ° C, then the hysteresis should be at the level of 7 ° C. Automation programming is carried out by buttons “B”, as well as “↑” “↓”. To set the power temperature, press the “B” button for 3 seconds, and install it using buttons with arrows, fixing the result with the “B” button. The hysteresis is set in the same way, only at first the button “B” must be kept for 5 seconds.
