Perform a qualified insulation of the facade of the house from the foam on its own very real. The task of any insulation to prevent heat exchange between the room and the external environment. Insulated foam, the room acquires the quality properties of the thermos. In the cold time, warm air does not cool for a long time, and in the summer the coolness is saved. This significantly affects utility bills.
Content
- Types of foam for insulation at home
- Calculation of materials for insulation facade house foam
- Tools and materials for the insulation of the facade of the house
- Preparatory work on the insulation of the private house by foam
- Technology of mounting foam plates on the facade of the house and plaster
- Warm and plastered facade of the house
- Video: insulation facade foam with her own hands
Heat leaks in non-warmed room reach 35%. Upon compliance with the simple technology of insulation of the facade of the house with foam, all work can be performed with your own hands. The process of insulation of the facade of the house by foam, is presented on the video in the final part of the article.
Types of foam for insulation at home
Polyfoam, expanded polystyrene and extruded refer to the same group of insulation. In composition, they are identical, but differ only in density, heat transfer and price. Methods of installation and installation do not have differences.

- Expanded polystyrene foam called. Produced in plates 1x1 and 1x0,5 m and a thickness of 2 to 10 cm in order to house facade insulation depending on the thickness of the wall thickness of the foam applied 4 -. 5 cm., And it is different in density. The most popular foams with density of from 25 to 50 units. The loose structure of the foam plates with low density have a tendency to absorb moisture. To eliminate this trouble, the foam surface is further processed waterproofing mastics.
- Expanded polystyrene or extruded expanded polystyrene has a higher density and, accordingly, for the same thickness of the insulating foam to the quality of he above. Some businesses polystyrene edge equip T- shaped lock. This avoids cold bridges at the junctions.
Any of foams for thermal insulation of the house does not rot, durable and practically does not absorb moisture. Combining with other types of foam insulation is not a violation of the technology.
Calculation of materials for thermal insulation of facade foam home
Having decided to warm facade of a private house with foam, you must make a calculation. The calculation of necessary materials for thermal insulation is very simple.

- Length is insulated walls multiplied by the height. Subtracted from the obtained square area of \u200b\u200bdoor and window openings. the number of sheets of foam is then calculated. They are produced 1x1 and 1x0,5 meters.
- Mounting plates made from the corner in a checkerboard pattern. Calculate the required number of sheets of half-meter and meter size. In each sheet of plastic insulation 5 is dowels (builders are referred to as fungi, parachutes or sunshades). Four anchors driven into the corners and one in the center.
- Flow of the adhesive mixture, dry plasters and fillers depends on the layer thickness, the brand or manufacturer. Mesh material flow by the surface area of \u200b\u200b1 m 2 with varying thickness of the layer deposited on the package.
For a reinforcing layer must purchase a fiberglass mesh. It is available in rolls of a width of 1 meter. The total area of \u200b\u200bthe reinforcing mesh must conform to the area to warm the surface.
Tools and materials for thermal insulation of the facade of the house
- Kirochka or hammer.
- Hatchet.
- Building level and plumb.
- Drill with a striker or hammer, the drill tip and the concrete mixer.
- Spatula and trowel (80, 250 and 1200 mm).
- Roulette - 5 m and smooth rail (1.2 m).
- Grinder or grater with clips.
- Brush, roller or spray gun for primer.
- Mounting the knife with a retractable blade.
Materials acquired:
- 1h1m foam and 1x0,5 m;
- dry adhesive mixture to foam;
- dry facade plaster;
- putty mix "start" and "finish";
- plastic dowels with a broad hat like "fungus";
- deep penetrating primer impregnation;
- plastic reinforcing mesh (80 - 140 * 5x5 cell density).

Preparatory work for the foam insulation of private homes

- Dismantled drip caps, rain pipes, roofs and other elements mounted on the facade of the house is insulated. Hammer or kirochka obbivat old plaster from the walls. If necessary, for better curing materials applied to the walls of the oblique notch hatchet.
- Exterior wall is aligned. Convexity slipping kirochka or hatchet, and cavities and openings are sealed. Seal the cavity can be with cement mortar, gypsum or alabaster.
Lime whitewash necessarily removed. It can be scraped off or washed off with water.
Technology mounting foam slabs on the facade and plaster


- The bucket of water with a drill mixer is mixed adhesive foam. The solution is not too runny. It must not slip from the spatula and the foam sheet. On meter sheet of insulation is applied uniformly 16 - 18 strokes adhesive. Pritiskivaetsya sheet tightly to the lower corner of the front wall and leveled in all directions. The first level list is checked and is fixed by plastic dowels. From above it is set sheet size 1x0,5 m. Sheet is pressed firmly against the wall and clapping hands. This will set the checkerboard pattern foam installation.
- Setting 7 - 12 sheets dowels secure the sheets. Rechecking insulating sheets laying open to the wall level, drill at the corners and at the center of each aperture plate. The tip of each of the plastic dowel is cut with a knife. This is important, otherwise it can not open and does not gain a foothold in the nest. The dowel is inserted into the hole and tamp hand to seal the foam. The central dowel hole cap is inserted into the plastic of the web is hammered nail and hammer. If the cap deepened 3 - 4 mm in the foam, its seal the adhesive solution.

Smooth seams between foam plates are labeled with a glue mixture. The gaps and wide inconsistencies are filled with foam trimming and sample. Sometimes slots and hard-to-reach places are placed by mounting foam.


- Reinforcing fiberglass grid is superimposed on the foam. The grid band is unwinding from top to bottom and cuts off with a mounting knife in size. The upper part is temporarily fixed by plastic carnations on the foam. The kneaded plaster is taken on a wide spatula and, removing a little solution with a small spatula, the grid is grabbed. Making several smears at the top of the grid, wake it in the middle from top to bottom. Then overclock the plastering mixture to the sides. When plastering in this way, the grid does not bet and there will be no folds. The next lane of the grid is exhibited with an adhesive 5 cm and is placed in the same way.
- If necessary, taking into account further finishing works, a thin to 8 mm is made or thick up to 40 mm layer of plaster. For a thick layer of plaster, a metal mesh is used. Disted plaster is covered deeply penetrating the primer mixture. The primer gluits the plaster layer, prevents the appearance of microcracks and the penetration of moisture.

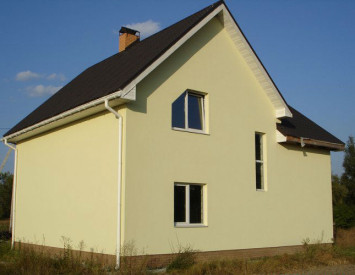
Warm and plastered facade of the house
After insulating the house of the foam and finishing facade plaster, putty is made. Putty works are not always necessary. When finishing the facade with wild stone, ceramic tiles or siding they do not need. For whitening or painting the facade part it is necessary to make putty work.


- Dry starting spacing is stirred with water. Use a drill and mixer for this. The solution should resemble thick cream consistency. A small spatula (80 mm) putty is equally distributed over a wide (1200 mm) to the spatula. The putty mass is applied to the plastered facade and is evenly smoothed. The first layer is applied with a thickness of 3 - 4 mm. If necessary, align the wall or hide different flaws, a layer of putty can be thicker, or after drying, another layer is applied.
- Finish putty has a thinner dispersion structure. It is applied in the same way as the starting. But at the same time smoothed much more carefully. The cream spacure wall is treated with a grinding machine or manually with a special grater with clamps for replaceable abrasive. As an abrasive, it is not recommended to use sandpaper. Pores are quickly clogged, and sandpaper comes in disrepair. For rubbing putty, a metal or plastic grid is used.
The surface of the facade wall is impregnated with primer. To do this, brush, roller or sprayer applies. The rich wall is ready to paint.


