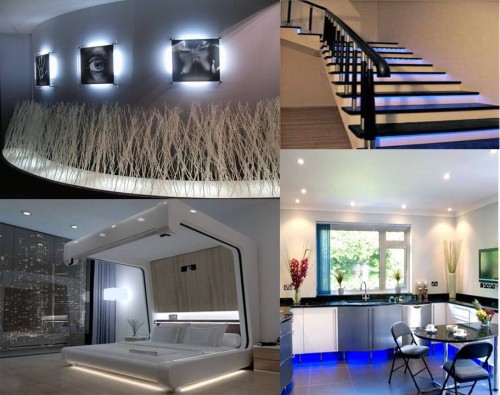
You can make a highlight in the interior and organize the lighting of the room using LED tape. You can install LED tape both in a living room, and in any room, and in a restaurant, a cafe and even a garage. You can handle it yourself with installation, so feel free to go to the store to purchase everything you need.
Content
The choice of LED tape
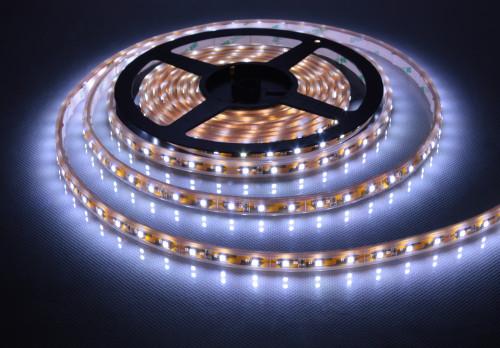
First you need to understand what this lighting device is. This is unusual for many, a large lamp in size, which is enough to simply install and connect to an existing power grid. The LED strip consists of small bulbs of one or different shades located on a thin tape. LEDs (as well as resistance resistors) are located at a certain distance from each other. The standard width of the tape is 1 cm, and the thickness is only 3 mm.
Most often, in everyday life, electricians call this miniature lighting device as Duralight or Duralite tape. Because the tape is wound on the coil and sold by finished segments, 5 m long.
A huge selection of LED tape makes the buyer think about which tape it is best to purchase in order to cope with the connection on your own.
Consider the popular types of tape:
- With protection against moisture. Such a tape with many small bulbs can be installed in places of lighting, where there is increased humidity. For example, in the kitchen, in the bathroom, in unheated rooms.
- On a sticky base - you do not need to make a lot of effort to perform the installation of the LED tape in hard -to -reach places or where it is impossible to drill holes for fastening. For example, such a stick on a sticky base is suitable for installation in a closet or in a pantry.
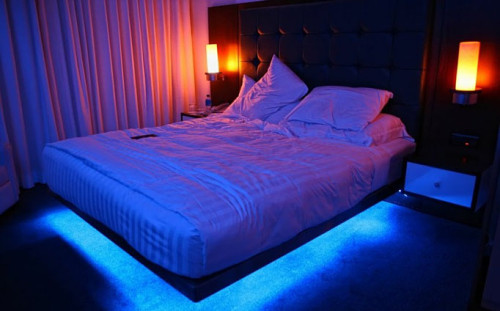
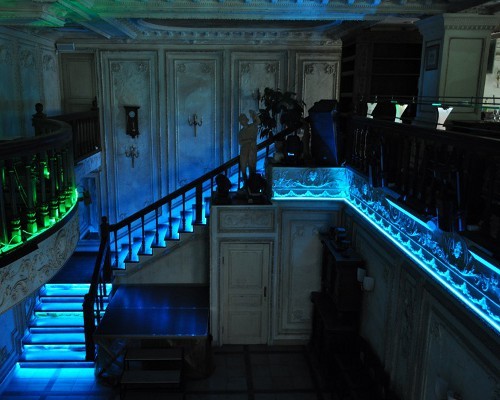
- One -color and multi -colored. The standard glow color of the bulbs is white, but you can purchase a tape with red, blue, green and yellow bulbs. You can buy a duralite one -color coil or choose a tape with multi -colored lamps that are connected sequentially. This option is much more interesting, since using a special block - controller, you can control the inclusion sequence of each color.
Why is it worth choosing on the LED ribbon? This inconspicuous lighting device often remains unattended, because buyers do not know what the advantages of this product are.
Advantages of LED tape:
- small capacity, and therefore economical consumption of electricity - it turns out that you can organize beautiful lighting in the room and at the same time save your budget;
- a long service life allows you not to think about an alternative lighting source. The device will last from 5 to 12 years;
- due to the fact that the bulbs are located on a flexible basis, you can give the tape the desired shape with soft outlines and perform the installation of the LED tape in any, even the most inaccessible place;
- the buyer has a great opportunity to save the family budget and purchase exactly as much tape as necessary. The seller will cut off the tape of the desired length (cutting frequency is 6-10 cm, that is, every 3 or 5 bulbs);
- great efficiency. If we compare the operation of the LED tape with conventional incandescent lamps, we can conclude that 70% of the heat given out by the lighting device goes to the heating of the room, but not for lighting. And the LED tape does not just release heat, but the electricity consumption is spent only on the organization of lighting;
- the bulbs do not flicker, which means they do not spoil their vision;
- do not study ultraviolet;
- maintain voltage drops in the network;
- they work at low pressure, since additional power supplies are used during installation;
- the ability to choose any shade of the tape and the color of the bulbs;
- meet the standards of ecology and fire safety;
- over the years, the quality of the glow of the bulbs does not change;
- you can install the tape yourself, especially if you use the tape on a sticky base. Or show ingenuity and not to drill holes in the wall and do not blame the room where the repair has already been made, you can stick a strong bilateral tape on the back and “plant” the bulbs in the right place;
- the manufacturer gives a guarantee for his product, which cannot be said about other lighting devices (incandescent lamps and fluorescent).
There are only 2 disadvantages of the tape: this is insufficient brightness, if you compare the glow of LED lamps with conventional lamps and low color rendering. That is, objects with the tape on the tape will not be as bright as in sunlight. Moreover, the multicolor tape often “goes” into one of the colors when installing white bulbs (glow with a blue, green or yellow tint).
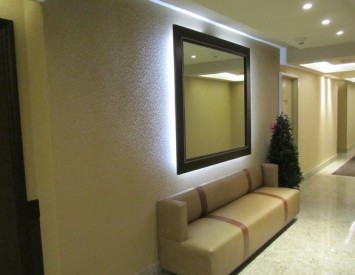
The lighting of the room with LED ribbon. Photo:
Installing LED tapes with your own hands
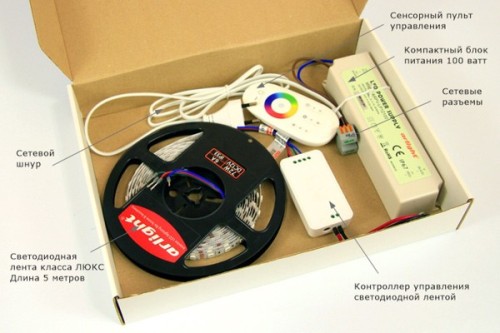
To begin with, we learn about the most important rule for the installation of the tape - you can not directly connect the bulbs to the standard power grid. The tape is not designed for high voltage and can burn. Such a light source can only function from a minimum voltage of 12 or 23 watts, and it is necessary to connect the tape only through a special device - a power supply. The device works as follows: it lowers the voltage at the input (standardly 220 W) to the required level and protects LED bulbs from voltage drops. It is very important to purchase not only LED tape, but also choose the right power supply, paying attention to the power of the device. The calculation of power can be calculated independently, knowing the number of bulbs on the tape, plus a small supply of 20%. As a rule, in large stores of lighting equipment, consultants offer customers immediately purchase a set of LED tape with a block ready for installation.
If you buy the tape yourself, trying to save money, then you need to adhere to such rules:
- Decide on the length of the tape.
- Choose a power supply.
- Follow the tape.
- Connect the tape to the power supply and check your work.
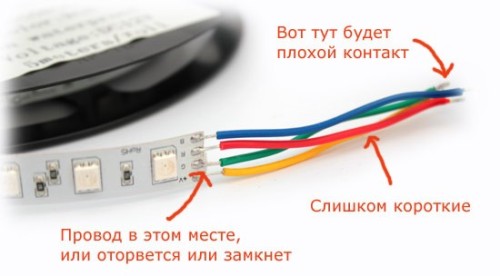
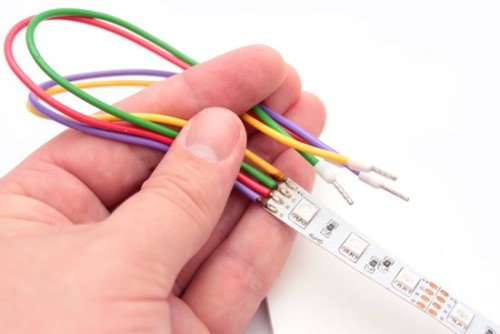
When buying an LED tape, you need to pay attention to the quality of contact and wires. As a rule, most of the goods are supplied to us from China, so the quality leaves much to be desired, but the price is quite satisfied. Take a carefully look at the tape, if you see that the contacts at the wire entrance are exposed, then the wire can easily come off during operation or installation and even close. Next, pay attention to the length of the wiring (green, red, blue, yellow). If they are short, then this will also complicate the installation and will not give a guarantee for long -term operation. It is better to immediately refuse such a tape or if you bought a cat in a bag (ordering through an online store), then you can try to fix the situation. To do this, using a soldering iron, we need to remove short wiring and purchase a colored wire. In order not to get confused in the correct connection of light bulbs of different colors (the color of the wire is the color of the light bulb), it is necessary to adhere to exactly the same scheme: to solder the long wire of the desired color, identical to the color of the LED crystals.
Buy a flexible multi -core wire (section 0.75 mm). From the end of the wire, you need to remove the insulation material (up to 0.5 mm), and on the other hand - 1 cm. Then you still need the tips to close the bare wire.
In order not to get confused and buy tips of the desired size, you need to pay attention to the packaging, marking numbers and indicate the size of the section. In our case, it is 0.75 mm.
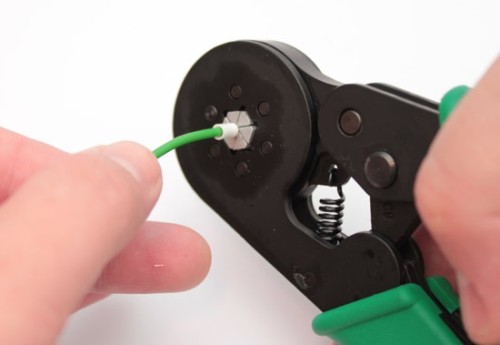
We do not stop there and then look for (from a friend of the electrician) or purchase a special tool in the store to “put” the tips per wire. The price of such a tool exceeds the total cost of the LED tape in the kit, so if you do not use such a tool in the future, it is better to rent it.
Insert the squima is very simple, enter the bare wire into the tip of the tip and then press with a special tool. No need to try to make this part of the work with pliers or teeth. You will not succeed, you can not even try!
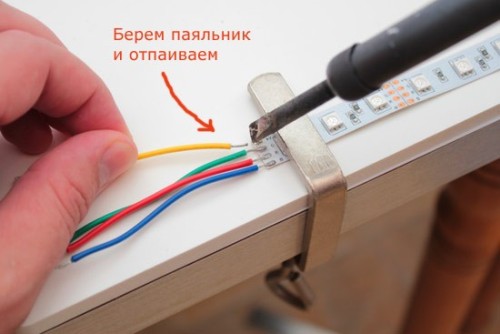
Now the wires need to be soldered to the tape. It is also important to familiarize yourself with the nuances of work: if you use a regular soldering iron, then neighboring LEDs can be spoiled from heat, so you need to take a low -power soldering iron (25 watts), as well as purchase a solder and rosin. Before you start the soldering, the wires need to be tied (dip in rosin). If you did everything right, then you can admire the result of the work done:
For reliability, we wrap the ration place with electrical tape.
If for you this preparatory work seemed too long and difficult, you can purchase the LED tape in the kit and immediately proceed to the installation.
Installation of LED tape on the ceiling
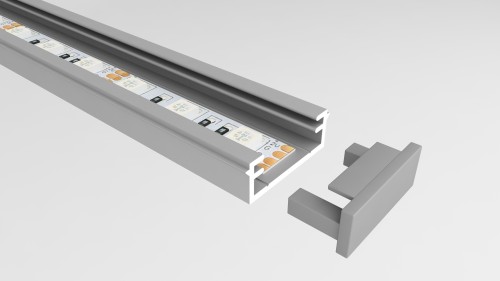
Most often, the lighting device is installed on the ceiling and is located in a special profile for the LED tape. This is an aluminum profile with a transparent disperfector of different plastic shapes. The profile is used to organize lighting not only ceilings, but also windows, shelves, kitchen niches and cabinets.
If it is necessary to install the tape on the ceiling, then a special place is given for it - in a niche (for example, from drywall). It is necessary to prepare a place in advance in order to then install the LED tape.
When connecting the LED tape, it is necessary to decide where the “entrance” is, and where the “output” and correctly connect the wires. “Exit”, this is a place for connecting the tape. Plus, it is also necessary to immediately allocate the place where the power supply will be located.
If it is not possible to install the profile on the ceiling so as not to drill the wall, then you can purchase a tape with a sticky layer and glue it directly into the niche, having previously been released from the protective membrane. It is only necessary to prepare the surface in advance - wipe the place with a disinfectant in order to get rid of dust and garbage.
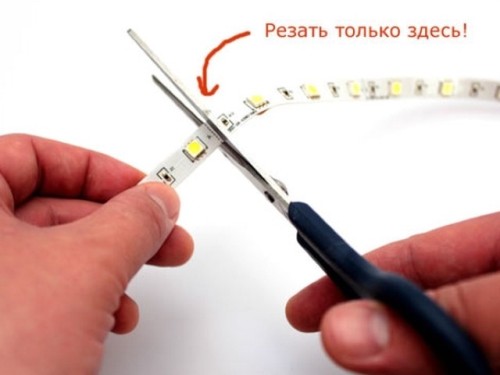
It is extremely undesirable to bend the tape, the permissible bend radius is up to 20 mm. If you need to cut the tape, then this can be done with ordinary sharp scissors, and then connect the tape to the power supply in parallel, observing polarity. That is, we connect the wires with the “+” sign to the plus, with the sign “-”, to the minus. So you will not confuse anything or spoil the tape.
How to combine LED tape
You can cut the tape every 3 diodes, so that, depending on the density of the tape, you can cut every 5 or 10 cm. It is impossible to make a mistake, since each tape has a designation. If something is done wrong, then you can lose only 3 bulbs, the rest of the tape will work. You can cut the LEDs with ordinary scissors.
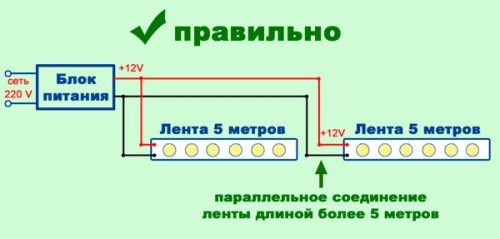
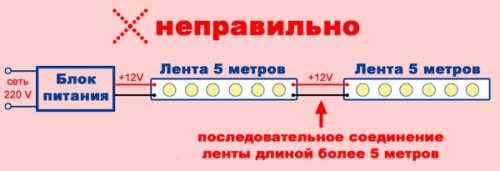
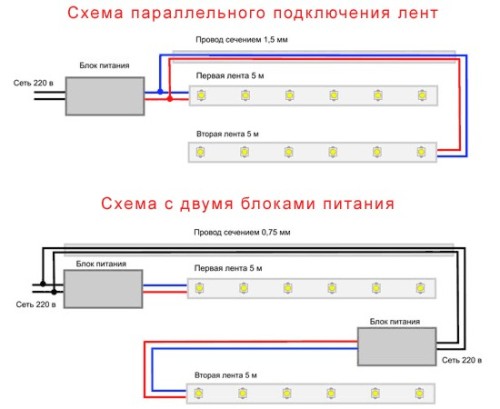
To combine 2 segments of the tape to each other, it is necessary to observe the sequence. But then at the junction, the lighting quality can be reduced, the lamps will not shine as brightly as the neighboring ones. Therefore, the best option for connecting the segments will be a parallel connection. To do this, prepare the wire with a section of 1 mm and adhere to such a scheme:
How to connect LED tape
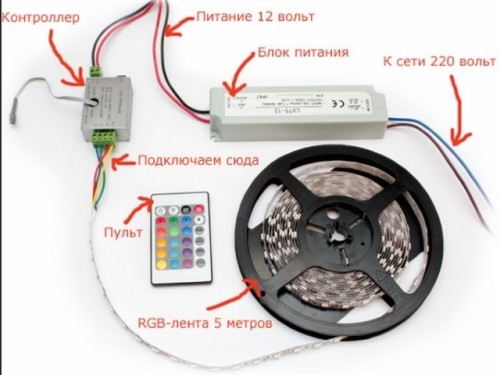
The principle of connecting the tape is slightly different. If you perform the installation of a one -color tape, then you can do only a power supply, and in order to install a LED tape with multi -colored light bulbs (RGB), an additional installation of the controller is necessary.
How to connect the tape:
- the wires must be connected to the controller so that the color of the wire coincides with the color of the label on the device;
- for red color, the designation in the form of the letter “r”, for the green “g” and for the blue “b”;
- to connect a black wire, select a terminal on the device with an inscription 12 or 24V;
- now you can assemble the tape, check the correct assembly and connect to the network for verification. If everything works, then you can start installing the tape, only first you need to disconnect the wiring from the controller.
After the tape is installed in a permanent place, you need to connect the wires again and check the result of the work. If everything is in order, on this work on installing LED tapes with your own hands is completed.
Installation of LED tape. Video:
