LED tape is a decorative lighting element with miniature diodes on the surface. Its length, as a rule, is 1-5 m. If necessary, the size can be corrected and cutting up the tape, but exclusively in the places intended for this purpose. These products are primarily used as design illumination when creating interiors. We will tell about all the intricacies of the application and installation of the ribbon in this article.
Content
Features of the material
LED tape is exclusively decorative, because It is not suitable for creating full light. These lighting elements have a fairly wide range of applications - designers often use it when designing:
- ceiling structures;
- stairs;
- decorative niche;
- furniture;
- shelves.
Also lighting tapes can be used for commercial purposes. With their help, highlighting promotional products, attractions, concert sites, shop windows are created.
Similar illumination makes it possible to imitate the sunset, daylight or create any other light effect. With the help of LED tapes, you can get a uniform lighting that will not be blind or create shadows. If you wish, you can change the color and brightness of the backlight, which allows you to change the interior of the room. Due to its flexibility, the product is freely located on any structures. The tape can be cut into fragments, each of which is then separately connected. A significant number of highlights have a self-adhesive foundation that, in the process, you just need to remove and attach the product to the right place.
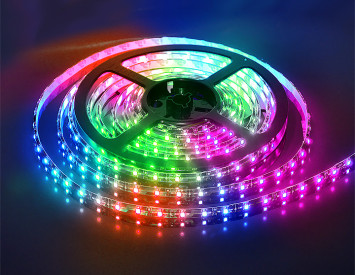
LED Strip Light. Photo:


Principle of operation
Such tapes are working with special blocks with a rather wide power range - 30-400 W. To ensure the power of the backlight, it is necessary to connect to it the contacts of the wires by switching into account of the polarity. To connect, power and control, a special device is applied - a controller that has three channels. The connection is carried out so that plus the lighting element is connected to the power supply plus, and minus, respectively, with a minus.
To choose correctly block for LED tape, you must proceed from the required power indicator. When it is determined, it is necessary to navigate the length of the product, as well as the number of LEDs that are supposed to be connected and the power per 1 m.
In addition, it is necessary to provide for another 20% of power as stock. It is also important to take into account the output voltage. The selection is carried out in the following sequence:
- First, you need to multiply the power consumed by the number of material meters.
- Next, taking into account the result and voltage obtained, the block is selected.

Varieties of LED tapes
Ribbons differ in each other to several criteria:
- One of them is the number of LEDs per meter. The backlight may have 60 or 120 LED elements. What they are more, the brighter the tape shines, and the lighting is distributed more evenly.
- The next difference is the color of the glow. A wide variety of color solutions makes it possible to embody any designer plan.
- The tapes are also distinguished by the degree of protection and are divided into this criterion for such types:
- ordinary;
- moisture protection elements.
The backlights relating to the first type are intended solely for installation in indoors protected from moisture penetration. Ribbons with moisture protection properties can be installed in rooms with high levels of humidity and even on the street.
Thus, 4 varieties of LED tape lights can be distinguished:
- monochrome products - they can be blue, yellow, red, white or green;
- multicolor - RGB tapes that change color with the controller;
- illumination with self-adhesive base or without it;
- ribbon with moisture protection qualities.

Advantages of LED tapes
The application in the design of the LED tape has its indisputable advantages. Among them should be allocated aspects:
- Easy installation. Installation of LED ribbons is easy enough to perform independently without the help of specialists.
- Minor consumption of electricity, which contributes to the economy of funds.
- Thanks to the ability to cut the product, you can form a ribbon of the required length.
- High efficiency. Unlike conventional lamas, 70% of the energy of which is spent on heat, LED backlights are almost entire electricity consumed on lighting.
- Ribbons do not emit ultraviolet radiation.
- In the case of voltage drops on the network, the backlight will not deteriorate.
- A wide selection of color solutions allows you to choose a product for any interior.
- Over time, the quality of lighting does not deteriorate.
- Ribbons are made on the basis of environmental material and do not represent health hazards.
- Reducing the voltage in the network will not affect the operation of the backlight due to the presence of the power supply.
- Long period of operation.

Preparatory stage
The use of LED tape in the design of the design is a very infertility way to create an extraordinary and aesthetic interior. It should be noted that work begins with appropriate training, which includes such steps:
- Before mounting the tape, you need to cut into fragments of the required length. The cutting of the cutting depends on the density indicator of the LED elements. It can be 3, 5 or 10 cm. The area of \u200b\u200bthe cut is quite clearly indicated by the manufacturer. Simple scissors are suitable for work.
- Next you need to solder wires. This requirement concerns and holistic tapes that were not cut. The wires are recommended to be replaced because their length does not match the necessary size, and some tapes go on sale completely without wires.
- If this situation occurs, it can be corrected independently. A soldering iron with a small capacity is required - from 25 to 40 W and wires of up to 20 cm and a cross section of 0.75 mm.
LEDs, like all semiconductors you can not overheat. For a monochrome tape, two wires of different colors are recommended. This will help avoid mistakes with polarity during the connection process.
- Wires must be cleaned from both ends, then processed the rosin or tin and solder.
- Place the soldering is recommended to insulate. To do this, a fragment of a heat shrink tube is 2 cm long, which you just need to wear on the soldering area.
- Next, this tube must be heated using a construction dryer with a special nozzle, which will prevent hot air into the LED.
- In the absence of a hair dryer, it is allowed to use a conventional lighter or matches, but the quality of work for this reason may worsen.
- This measure will make the solder more durable and create isolation from various influences.

How to install a LED ribbon
As noted above, for the maximum convenience of the consumer, many backlights are produced with self-adhesive base. To work with those products that do not have a similar advantage, you need to prepare bilateral scotch. Installation is carried out as follows:
- From the working surface, you first need to remove dust and other existing pollution, then the base is deguted.
- Next, the protective layer is removed from the backlight, after which it presses to the required place.
- On this, the installation of the LED tape is completed with their own hands.
Despite the obvious simplicity of the installation process, work should be carried out with regard to certain rules:
- Preferably, the tape enters the point of sale in the coils, each of which is 5 m of the material.
- If there is a need to divide into fragments, the type of tape and the density of the LED elements should be taken into account.
- You can connect to a single fragment not more than 15 m of the backlight. This is enough for the ceiling construction in an apartment with a standard metrah.
- If you want to illuminate a large room, then this amount of material is clearly not enough. In this case, the most optimal output will be the separation of the backlight on the sections up to 15 m long. For each of them you need to provide a separate power supply. Otherwise, if the electricity will take place on large consistently connected fragments, there will be a lot of tension on the first ribbons, which will eventually result in their rapid burnout. For this reason, the backlight is recommended to divide.
- The installation of the LED tape on the ceiling is performed so that it is not located below within visibility. For this, the backlight is fixed on the protruding lower level, in its upper part. In this case, the light will be distributed over the top level of the ceiling structure.
- When determining the distance on which ceiling levels will be placed, it is important to consider the brightness of the tape. In case of insufficient space, the lighting will be uneven, and in this case the placement of LEDs will be visible. Excessively the distance will worsen the lighting, as the light will dissipate.

Connecting LED Tape
First, consider the process of connecting the monochrome tape itself. It will require a 12 W voltage source. Since the voltage indicator is 220 W, it is necessary to prepare a power supply. It is equipped with a network cord or two wires of one color N and L, as well as two multicolored wires. The red polarity corresponds to the plus, and the blue is minus. To connect, you must connect the backlight to the block output.
Now we will analyze how to connect the RGB LED ribbon, that is, the backlight, the color of which can be changed using a special device:
- In this case, in addition to the tape and the power supply, you need to prepare the controller. It is connected to the wires of the block taking into account the polarity.
- Next to the controller connects the backlight. This element with a ribbon is connected to 4 wires, 3 of which are designed to control the colors, and the nutrition arrives in the 4th.
Important! RGB tapes can have high power LEDs that consume a significant amount of energy. Usually they are located in separate areas. The controller may not withstand such a voltage, and the power supply will be larger. In this situation, it is recommended to use signal amplifiers.
You will need two power sources with a small power to connect to the controller and amplifier. One end of the tape is connected to the controller, after which the wires are falling to the second end and it is connected to the amplifier.
The principle of action of the amplifier is as follows: it has two pairs of contacts. One receives a signal, and through the other signal goes to the second section of the backlight. Thus, the brightness of the plots and their color changes. In detail to understand this process will help the LED tape scheme.

Recommendations for the process
- There should be no mechanical exposure to the backlight, such as pressure or inflection. This will negatively affect the quality of the product.
- It is also necessary to monitor the integrity of the tracks for which the current passes and feeds the tape.
- The installation of the LED tape should be carried out on an aluminum profile, since this material has the ability to remove heat. And overheating as noted earlier, negatively reflects on LEDs, reducing their resource.
- At the installation phase, it is necessary to provide the ability to repair the backlight in the future.
- It is necessary to provide conditions for working with a soldering iron at the place of placement of the ribbon and block. For this reason, it is not recommended to install products for tension or suspended ceilings, since for repair work in this case you have to dismiss part of the structure.
Possible mistakes:
- in the process of connecting the backlight and the polarity is confused;
- use of the power supply with inappropriate power;
- mechanical load on the LED cord;
- insulating measures are not taken when the product sticker on the surface conductive electrical voltage;
- serial connection of long sections.
Conclusion
The main function of the LED tape is the creation of a decorative effect. These lighting elements have a significant amount of advantages that are beneficial to them from conventional lamps. Among the main advantages can be selected ease of installation and aesthetic appeal. A certain amount of ribbons is available on sale with a self-adhesive basis, which minimizes efforts during installation work. The installation of products that do not have such a basis is also available and will not require qualified knowledge or professional skills.
Features of connecting the tape are shown in the video:


