Installation and fastening of a plastic window sill is a very important and paying attention to the moment in installing any window.
Content
The window sills for plastic windows carry not only aesthetic function indoors, but also protective. With aesthetics, everything is clear - this is a complete appearance of the room and an additional area for accommodating various decor items. As for protection, the window sills will prevent condensate formation on glass and moisture from open windows. However, the windowsill itself is subjected to adverse effects: temperature drops, solar rays, mechanical loads. All these nuances predetermine the features of the installation and installation of the product.
Materials from which window sills are made are affected by a variety: natural stone, marble conglomerate, laminated chipboard, artificial stone, etc. However, the most common materials are still PVC and wood. To install both plastic and wooden windowsill, you can use a number of useful recommendations that will allow you to navigate at all stages of work. After reading this article, there will be no doubt that in the installation of plastic windows with their own hands there is nothing superpower. If there is a solid desire, perseverance and good instruction, then there is nothing to be afraid.
Advantages and disadvantages of PVC window sills
The following qualities can be attributed to the advantages of the installation of plastic window sills:
- resistance to moisture;
- not afraid of temperature drops;
- quickly and simply set;
- does not need careful care;
- small weight design;
- may be any form.

As for the shortcomings, they really are not so much. Naturally, the wrong setting will certainly entail a problem, for example, the windowsill will stick or his tilt will be too big. The problem may occur with trimming edges. However, these are not disadvantages of material, but the incompetence of the master. The only negative property is a non-mechanical influence, that is, a plastic surface is easy to scratch and damage the hot object. In general, the installation of plastic windowsides with their own hands is always practical, pretty and affordable.
Preparatory work
Tools and materials

© Stuart Jones Photography
In order for the installation process to be more comfortable and was not delayed, it is necessary to prepare the entire construction inventory in advance. The list below is easily adjusted for a specific situation and financial capabilities. Some tools can be replaced: For example, the metal hacksaw will be an inexpensive replacement of the electroball. It is not necessary to buy all the tools, because in the future they may simply do not need, or it will be useful only once, so it is better to take the same jigsaw or a perforator from relatives or friends.
So, in order for the process of installing a plastic window sill, he has become burdensome and has not been delayed for several days, it is necessary to stock the following consumables in advance:
- For laying a plastic cloth - wooden bars.
- For cracked cracks - silicone or liquid plastic.
- For reliable fastening - self-tapping screw.
- For heat and sound insulation, seals - mounting foam.
In addition to the listed, it is not necessary to do without special scissors for metal, hammer, mounting, building pencil, centimeter tape, screwdriver and perforator.
Dismantling of old windowsill
At this stage, you should be very neat and in no case to rush. If you come to this procedure irresponsibly and carelessly, you can easily destroy the slopes behind the batteries.

To dismantle the old window sill, a mount is useful, which you need to insert between masonry and boards and slowly press, slightly loosened the windowsill. It happens that the board is not immediately mounted, in this case, to destroy the lower part of the slopes use the perforator. And then again the mount is entering. Often these actions are enough to get rid of the old window sill. It is rare when it is not amenable and remains still, an electric jigsik is useful for this case. The electrolovka is made inscribed, after which the montage goes again.
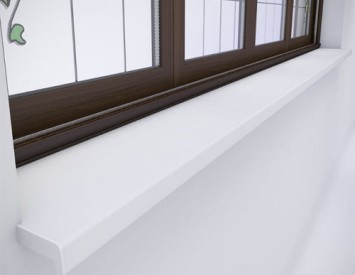
Pay attention to the photo of plastic window sills located below.
Trimming and marking

Plastic window sills You can order ready-made and installed, i.e. Cut the product from plastic canvas with your own hands. For this, competent marking is done with a centimeter tape and a construction pencil. Often the windowsills for plastic windows are produced standard size, the standard width of plastic window sills is 60 cm, which allows you to install them in almost any building.
Originally measured the width of the window frame to the edge of the window opening. Then the window sill with a margin of two centimeters is cut. The release of the window sill is selected at its discretion. Do not forget that too much the protrusion can interfere with the normal spread of heat from the heating devices and lead to the formation of condensate on the glasses.
The maximum length of the plastic window sill is 3 meters, the width is permissible within 25-70 cm. If the width of the plastic window sill is too big, the excess is simply cut. The cut slicing line should pass behind the ribs of the stiffness located inside the product, 0.5 - 1 cm. Then the product will be well shied with the window frame.

PVC is more convenient to cut the electric lobby than hacksaw. In the latter case, you should be more accurate and careful not to damage the material itself. Compliance with the elementary security rules will be quite by the way, so gloves and safety glasses are better prepared in advance.
Lining and fastening plastic windowsill

- The concrete base on which the plastic window sill will be mounted, is thoroughly cleaned from the construction waste, then it is necessarily ground. The primer is needed to protect against mold. Place the depressions and irregularities are not necessary. Of course, if there are large cracks on the surface, then the putty is necessary.
- For lining it is necessary to lay wooden bars of the corresponding thickness, i.e. So that the windowsill holds exactly horizontally, and did not lean down, as it often happens when the wrong installation. Better when the thickness of the bars is the same as the windowsill itself. Bruks will take over the entire load from the window sill.
- At the same stage, there are slopes with a perforator. The plastic window sill must freely enter the resulting deepening and under the lower edge of the window frame. It is necessary to make sure that the design is tightly adjacent to the frame. Bottom is led by wedges.
- Adjusting the window sill, it should be consolidated with self-draws. This is done on the other side of the frame plank.
- The space under the window sill, the niches in the slopes are blown by professional mounting foam. Before joining the windowsill, put the load so that the foam does not raise the product.

- The foam will only dry in a couple of days, so at this time it is better not to use the windowsill. Only after complete drying, the excess foam is trimmed with a building knife, and the remaining gaps and gaps are processed by sealant.
- After passing all the steps of fastening the plastic window sill, you can start the final finish - fixing the end plugs on the glue.

RESULTS
Having understood with the question of how to mount the plastic window sill with their own hands, it becomes clear that this process has a number of subtleties, missing, which in no case cannot. Do not forget that the fastening of the plastic window sill is the final stage of the installation work of plastic windows and it is from it that the appearance of the entire window depends on it. If you refuse to install a plastic window sill, it will not only be uncomfortable, but the general view of the room will be lost, and repair will look unfinished.
If this manual is not enough for independently, there is more detailed and visual information in the video for installation and installation of plastic windowsill.


