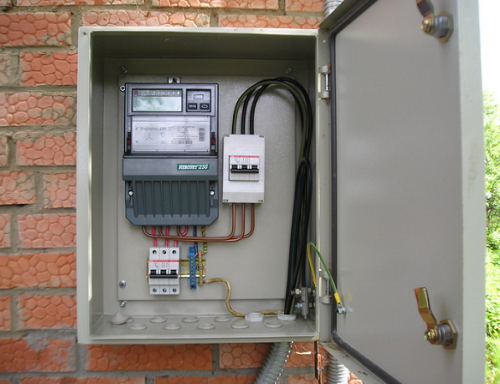
It seems to many that installing an electric meter in the house is a difficult task that only a qualified specialist can deal with. On the one hand, it is, since it has to be dealing with electricity, which is unsafe for health and life. On the other hand, with elementary ideas about the electrician and compliance with safety precautions, the meter will be able to install a newcomer. In this article you will learn all the details and nuances of the connection and after reading you can install the electric meter with your own hands.
Content
Choose an electric meter
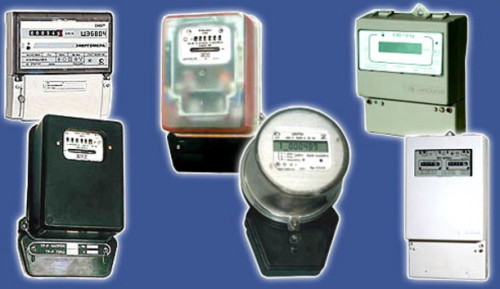
First of all, you need to choose a suitable counter, and for this you need to understand what kind of device it is and how it works. The main and only task of the electric meter is to measure the amount of energy consumed. Depending on the task, they are estimated (such are in apartments and private houses, payment goes for spent kilowatts) and control (such devices simply fix energy consumption for the analysis of any devices or calculations with Subababons).
For execution, electric meters are:
- electronic and mechanical;
- one- and two-tariff;
- direct and secondary type of launch (in the latter case, an additional counter is connected in power shields, for example, for a multi -storey building or substation, in places of large currents).
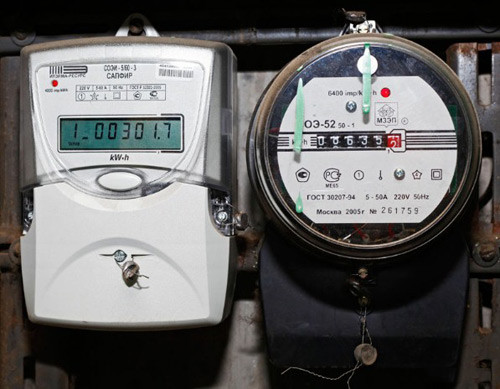
According to the principle of action, counters are electronic and induction. The former function due to semiconductor devices or microcircuits. They do not contain any mechanical parts, so the transformed signals go immediately from the voltage and current sensors. The advantages of electronic models include compactness, low weight, high accuracy of indications and protection against deception. Induction meters are better than electronic in only one - they are much cheaper. These are electromechanical devices that function from the rotation of the discs, and the accounting of the consumed energy is kept by the number of their revolutions. In most cases, such electricity meters are the property of the organization providing electricity, and therefore the act of installation of the electric meter and its sealing are carried out by their specialists for free.
By the number of phases, counters can be one- and three-phase depending on the characteristics of the network. Usually single -phase are placed for a single -phase network, and three -phase, respectively, for three -phase, but not so long ago, three -phase electronic meters appeared on sale, which can be mounted in single -phase networks. In a three -phase network, you can put 3 single -phase devices and keep records of energy consumed separately for each phase.
If you are going to work on your own, you should understand that the installation of a new electric meter should occur in compliance with all installation and safety rules. At the same time, all responsibility for the consequences will only lie on you, while contacting a private specialist or office, you can get a guarantee for the work done.
The main differences in electricity meters
There are a number of differences that need to be focused on when choosing a device. In terms of accuracy, counters can vary from 0.2 to 2.5. This parameter allows you to determine the degree of measurement error. At the end of the 90s of the last century, all electric meters produced with an accuracy class equal to 2.5, that is, the maximum error was 2.5%, but since 1996 the law came into force that the accuracy class should be at least 2%.
You can also connect devices in different ways. So, there are direct inclusion meters and those that connect through current transformers. The former is used for currents not higher than 100A, and for loads, more will have to buy transformer counters with a secondary current of 5A.
The voltage plays an important role when choosing an electric meter, and depending on this, you should buy devices at 220/380 V or 100 V. If the house is at a high-voltage line of 6-10 kV, or you have high-voltage transformers, you will need to buy it Also, measuring transformers with a secondary voltage of not more than 100 V. For this reason, the electricity class class should be 100 V.
Another classification involves a separation by the number of tariffs: one-, two- and multi-tariff. The installation of two -tariff meters is convenient in that you can pay for electricity at two tariffs: day and night. At night, electricity costs two times cheaper, which saves a certain amount.
Instructions for connecting an electric meter
In this part of the article, we will consider the technology for installing a single -phase electric meter, since such devices are the simplest and give an idea of \u200b\u200bthe installation of any other devices. Three -phase models are put on the same principle. Electric support with single -phase electric meters and auto switches today can be bought in the kit or assemble from individual parts yourself. If you have no experience with an electrician, it is better to buy a kit and be sure of its working work. In the second case, there is a risk of mistaken, and it is quite difficult to choose all components so that they carefully fit on the shield.
If you still decide to assemble the shield yourself, you will need the following:
- electric meter;
- a box of wood or durable plastic into which the counter and auto switches will fit;
- auto -liability shutters;
- mounting bar for auto switches (din-rake);
- contact plate (best to take from copper);
- three -core cable 5 mm - 1 m;
- self -tapping screws or plastic dowels.
Choosing a place for an electric meter
There are certain requirements for the installation of electricity meters, which are described in detail in the PUE collection in chapter 1.5.
Consider briefly the main provisions:
- The counter must be installed in a dry room.
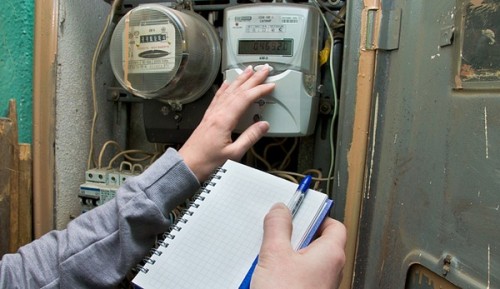
- Around the shield there should be enough space for installation and repair work, as well as withdrawing readings.
- If there is no way to put the shield in a heated room, you can install in an unheated corridor, compartment, dressing room or even outside the building, attaching the box to the facade or concrete support of the power line.
- If you install the panel outside, you need to purchase a device designed to work at strong temperature differences up to ± 40 ° C. The cabinet itself, in which the counter will be, must be insulated and protected from moisture from entering. It is permissible to use caps with heating up to +20 ° C from an electric lamp or heating element. The insulation should not be flammable.
- The shield can only be mounted on a stable hard design.
- The cabinet can be made of wood, metal or plastic.
- If you fasten the electric meter onto the shield, then between it and the surface of the shield it is necessary to leave a ventilation gap of 1.5 cm (use the lamers).
- Install the shield is not too high so that in the future it is convenient to take readings from the counter. The best option is 150-170 cm from the floor level (depending on the average growth of the residents). The minimum installation height is 80 cm (so that children and animals could not reach the shield).
- To reduce the risk of mechanical damage, do not install the counters near the door and window openings closer than 50 cm.
The rules for installing electricity meters in private houses are the same. If necessary, you can hang the lock on the box, and make a transparent window in the lid for convenient removal.
Installation of an electric meter
Installation consists of several simple operations. When you studied the rules for installing an electric meter and chose the optimal place, you can start work.
Installation instructions:
- Distribute the counter, automatic switches and contact plates on the shield evenly if you collect the kit separately. At the same time, it is important to leave a little free space for fasteners to fix the shield itself on the wall or lace of power lines.
- Fix the counter, plate, mounting bar for "machine guns".
- Click the auto switches on the bar.
- Start breeding wires. The phase from the counter must be carried out immediately to the auto switch for an electric stove or other stationary device. To do this, take out one red (brown) vein out of the cable, carefully cutting its rubberized protection with an office knife. As a rule, the phase from the meter is at 3 contacts on the left, but you can just find out only from the instructions for the specifically selected model of the device.
- Measure the suitable cable length. You can only lead it horizontally or vertical, but not obliquely.
- Fold the wire in the meter 2 cm, insert into the corresponding terminal and click with bolts.
- For switches, clean the wire by 1 cm and insert without clamps.
- Make a jumper in the form of the letter “P” from the wires, clean them from the ends by 1 cm and connect the switches. Only after that you can firmly clamp the contacts and connect them on all "automatic".
- Carefully make sure that all the wires in the circuit breakers during the clamping lay evenly and do not overwhelm each other. Otherwise, during operation, such compounds will weaken, they will heat up and can burn, provoking a short circuit.
- Bring zero by taking a white wire and measuring it from the counter to the contact plate. Make sure that the wire is also located only vertically or horizontally, but not obliquely.
- The installation rules of the electric meter say that the zero terminal is 4 on the left or the first on the right (see detailed information in the instructions for specifically to your counter).
- Stir the wire and connect it to the counter or plate.
- The most difficult, although, you see, it was completely easy, part of the work was completed. It remains to fix the shield on the wall. Attach it to the selected place and mark the fastening places with a simple pencil. You can also scratch the marks with a nail or screwdriver.
- Make the hole with a drill at the marked points, choosing a drill with a diameter of a little less than the diameter of the dowels.
- Insert the dowels, attach the box and fasten it with galvanized screws with wide hats.
- If you have chosen a steel shield, it is necessary to remove the ground conductor first on the shield, and only then on the contact plate. For a plastic or wooden shield, grounding should go immediately to the plate.
The installation circuit of the electric meter is quite simple, but before you take up the work, check in local energy consumption, whether it is possible to engage in connection on your own or is it still necessary to call a specialist for this. If Energosbyt does not give good, you just have to bring the electric line to the counter, and authorized controllers will be connected and sealed. Whatever the situation, the connection is certainly necessary to discuss with Energosit employees, otherwise there is a great risk of getting a serious fine.
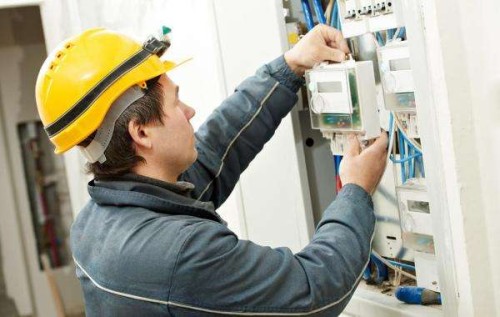
While working with electricity, do not forget about the technique of personal safety. Turn off the voltage and work only in rubber gloves. Just in case, it is recommended to work together so that the assistant, in which case, can provide first aid when shocking the current and call an ambulance. Before starting the installation of the meter, check the network several times for the complete absence of voltage! In the case of apartment buildings, where it is impossible to completely turn off the network and you need to connect the counter to the current electrical line, it is necessary to attract employees of the governing.
Finally, we suggest that you familiarize yourself with the useful video, which shows in detail how to connect a single -phase electric meter to a single -phase network:

