
Prints are an integral decorative element of any wooden design. Their task is to create a neat frame framing, concealing building defects and technological compounds. There is nothing complicated in the installation of door cages, however, for a successful result you need to know several nuances. In this article, we will tell how to mount the platbands on the doorways and choose the appropriate installation option.
Content
Ways trimming
There are two ways to install platbands, characterized by the technology of trimming elements: under 45 ° and at 90 °. From this depends on the appearance of the door design and the degree of complexity of work.

Trimming under 45 °
For this method of mounting the ends of the platbands trimmed at an angle of 45 °. This is the most popular installation option, since it can be used for platbands with different configurations. We will tell about the varieties of products a little later, but to be clear, the front side of them can be arcuate, carved, direct, etc.
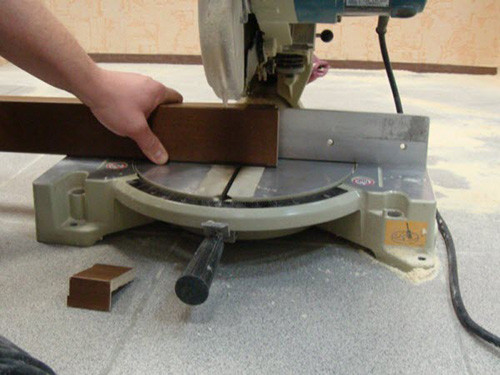
The main complexity of the installation of door platforms is the right and smooth trimming of the corners. If there is a divergence of at least a couple of millimeters, the details will not comply with each other, and the framing will turn out to be curves. To properly trim the platbands, you will need to get a tracing saw - it is this tool that makes clear and smooth cuts. If there was no such saw in the home arsenal, you can use the usual hacksaw, but act very neat.

Experts still recommend not to neglect special tools and, if necessary, take them for rent. In addition to the ending saw, you will also need a stubble and a manual hacksaw with a rotary mechanism. Stuslo is a pretty primitive tool - a pattern-groove with slots. The slots help determine the corner of the cut. Then the cutting tool, for example, the usual hacksaw breaks the slits, and it does not very accurately (in this is the main disadvantage of stusl). By and large, it is intended for disposable work.

It is much more convenient to use a rotary hacksaw. This tool is more durable and saws the parts much more accurate and cleaner. You can learn how to work with it in 5 minutes - just turn the saw under the required angle, fix this position and cut the wooden part.

If you have experience with an electric bike or manual hacksaw, you can make a cut manually. At first, with the help of the transporter, draw a line at 45 ° on the edge of the platband, and then with a confident movement to saw it. However, in this case, the smoothness and purity of the cut will depend only on your ability to handle the tool.
Useful trick: specialists to eliminate the appearance of chips on the decorative surface during the cutting process, glue transparent tape over the cut line, after which it is made.
How to cut a platband under 45 °, see the video instructions below:
Trimming at 90 °
This method of fastening door platforms is less common, but still deserves attention. Such unpopularity is due to the fact that it is not all types of platbands at a right angle, but only moldings with a clear rectangular cross section or weakly rounded edges. In other cases, it is best to resort to cutting under 45 °. The essence of the work is to connect to each other at an angle of 90 °, while the upper platband should be placed between the side. This condition allows you to make pruning easier and clearly fit the connection points.
Despite the seeming simplicity of work, everything is not so simple. Make a neat cut, as in the previous case, without accurate measurements and special tools will not work. For an ideal docking, the end parts of the platbands must have a flat rectangular configuration, therefore, the calculations of the height of the side parts and the length of the upper platband must be carried out up to millimeters.

If you bought platbands with slightly rounded edges, the situation is a bit more complicated, because it is impossible to do straight cut. If you directly cut such a detail, then after installation, the ends of the upper platband will be seen. To hide them, you need to make an inclined res, directed from the front side of the part to the rear.
Important: If you need to install a carved or rounded configuration platbands, this method is not applicable and you need to cut the parts at an angle of 45 °.
FEATURES OF MONTAGE
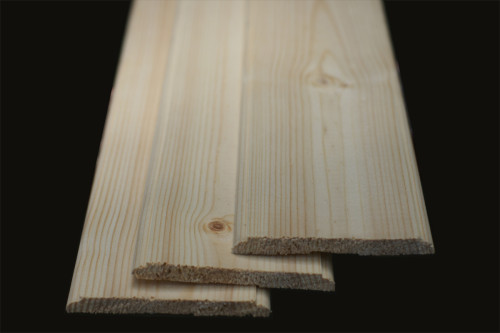
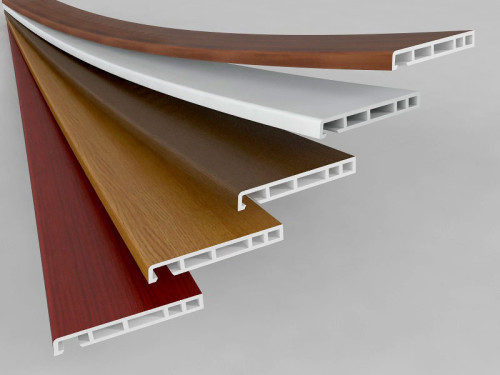
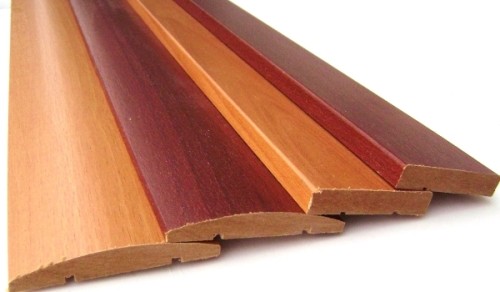
The specificity of the installation of the door frame depends on which material it is made and which configuration has. Cashbar are wooden, plastic or MDF.
Useful advice: If you cash the door in the bathroom, in the kitchen or in a bath, that is, indoors with high humidity level, it is better to give preference to products with a laminated surface. They are more resistant to the effects of steam and temperature drops, and therefore they will serve longer than normal.
Features of the installation of platbands depending on the material from which they are made:
- Wooden - with wooden door trims to contact the easiest way, since many ways to fasten are suitable for them. The most elementary option is to glue them to "liquid nails". However, disassemble such plats can not be correctly possible, and it will be quite difficult to do it. "Liquid nails" can only be used if you have perfectly smooth walls in your home, otherwise the fixation will be weak.
- You can also kill the platbands with special thin cloves without hats. If there were no such thin nails, it is also suitable, but then the hats will have to cut themselves. If you still use nails with hats, then the fasteners are needed slightly "trigger" so that it is flush with the surface of the platband. After the installation is completed, all the places of fasteners should be shred out with a putty on a tree into the tone with the color of the product.
- Plastic - such platbands are best glued, because carefully nail to nails will not work. This is the most budget class of products, so you can break them when dismantling without much regret. Unlike wooden planks, bent plastic can be glued to walls with small irregularities.
- MDF - the appearance of platbands is almost indistinguishable from wooden, but their mount should be performed in a special way. Since MDF is very hard material, then it is not so simple nails. Holes for fasteners need to drill in advance, otherwise there is a risk of damaging the guide strips. The diameter of the holes should be 1-1.5 mm. Alternatively, nails can use adhesive compositions, but as you remember, dismantle the platbands without damage it is unlikely to succeed.


The angle for the cutting of the door casing directly depends on the shaped relief. So, if the surface is smooth, you can make the rear at 90 °. Similarly, you can proceed when the door is cashed with the capitel. Pitch can be both vertical and horizontal.
Useful Tip: Before daspinet, climb the sleep with varnish or paint into the tone with the face of the platband.
How to pick a pen
In order for the door to the door looks aesthetic and completely hid all the unsightly elements of the door frame, you need to choose the right size. According to the rules, the width of the door-platband should be such that it overlap the gap between the box and the door by 3-4 cm. The market presents mainly universal models that differ in low cost and are suitable for almost all designs.

But it is important not to forget about the aesthetic destination of the platband. It must be harmonized not only with the door of the door, but also with the interior of the room. When choosing, you should pay attention to the color, texture and thickness of the door platband. If you choose too massive option, then a simple door in such a framed will seem even less and more increasing. And, on the contrary - too, a modest platband "will lose" against the background of a luxury door.
Typically, flat trimming of 5-8 cm wide (universal version of 6.4 cm) is used for simple laconic doors models. Semicircular are also very common, since this form allows combining various styles in the interior. Their width is usually 7 cm. As for figure curves, their width is determined by the complexity of the thread.
Installation of trim
To engage in the installation of the platband follows only after the end of finishing works on the walls: Wallpaper sticking, plaster, painting. If you plan to adapt platbands from two sides of the door, respectively, the walls in both rooms must be repaired. It should also be remembered that it is necessary to fix the platbands before installing the plinth, otherwise the latter will interfere.
Useful advice: Start attaching a platband from the other side where the door loops are located. So you will receive a measurement guideline in the form of a plank closing the door frame from the place where they sang, because due to them the platband can not get flush with the design. The distance between the platband and the box should be equal to the entire height. When you attach a platband from the reverse side, the distance to withstand is optional.

How to install platbands on the door:
- Measure the length of the vertical bar of the box, located next to the door hinges. It is very important to take into account every millimeter. The gap that will succeed during the indent, add to the length and make a mark. From this point will begin the line to be taken to make a coach at an angle of 45 °.
- To make a platband for the opposite side of the box, make individual measurements in the same way. It is impossible to just cut exactly the same element by taking the first template, since in most cases there are floors in the height in the apartments, and the dimensions of the door cylinder may differ by several millimeters.
- Suggest sawdwood with nails. The first nail attach at the very foundation, and the second - in a meter from it.
- The upper ends of the details will remain unfilted. To put the blank for the top of the platband, which will go over the door.
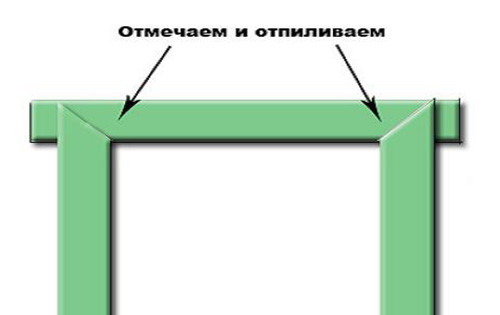
- Make markup on the top plank, designating where you need to do Spike under 45 ° to dock all three details.
- Fantastic saw or other suitable tool spill extra parts to get a smooth cut.
- Dock the details, supervised the base of the side of the side of the floor in the floor. In some cases, a peculiar wooden stand, which is put under the door salary, can act as a support.
- Fix all the details of nails without hats or studs. The distance between the fasteners can be chosen arbitrary, however, experts recommend to drive nails in a step of 15 cm. Especially it concerns the doors that are often used and clap - if the platbands are poorly fixed, they are very quickly separated and dismissed. If you used to take care of the doors carefully in your home, drive nails every 40-50 cm. In this case, you will have less masking attachment points.


If you are engaged in manufacturing and installing platforms for the first time, and have not yet been able to get a trotter saw, almost certainly the slice will not succeed. If when assembling items it turned out that small gaps remain between them, do not be discouraged - there is an output. Fill in the resulting gaps with silicone sealant, and when it dries, toned with a wood with a putty on a tree or paint the tone with the decorative surface of the platband.
Useful advice: In order not to fall around everything around the sealant, but get a neat result, tighten the surface of the platband on both sides of the slit mounting scotch. After drying, the sealant can be easily accessible.
Attach the platband to the door is not so difficult if there are correct tools at hand, and before your eyes - the correct instruction. We hope our article will help you cope with this work and make your home cozy.
Door platbands: photo


