The apron for the kitchen is not only a beautiful element of design, but also the functional part. In the process of cooking, spots inevitably appear on the walls, drops from sauces, food pieces, etc. To protect the surface of the wall and facilitate cleaning, it is recommended to lay an apron from easily washable materials - tiles, stone or glass. In this article we will tell how to make a apron in the kitchen with their own hands.
Content
Preparatory moments
An apron in the kitchen improves performance characteristics, and with the right color and design, it decorates and completes the interior of the room. With it, you can visually increase the space, emphasize the dignity of the kitchen headset, hide the shortcomings of the planning. The manifold of finishing materials makes it possible to implement the most original ideas. But to start building anything from layout.
Design Apron
First of all, it is necessary to decide on the design of the apron - to choose a form and color solution. The coating should be combined not only with kitchen headcase, but also with the other elements - accessories, fittings, floor decoration, walls, ceiling. During repairs in the kitchen, many make an emphasis on the selection of wallpapers or flooring, completely forgetting about the apron, and it is he who gives interior integrity.

How to pick up the color of the apron:
- If neutral pastel shades dominate in the kitchen, but the walls and headsets contrast each other, they must be harmoniously associated into a single image. To do this, select the apron as close as possible to the headset, making it in the tone of the cabinets or countertops.
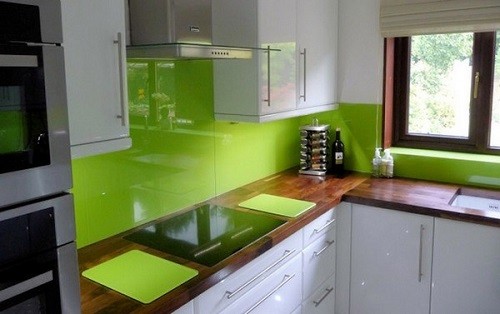
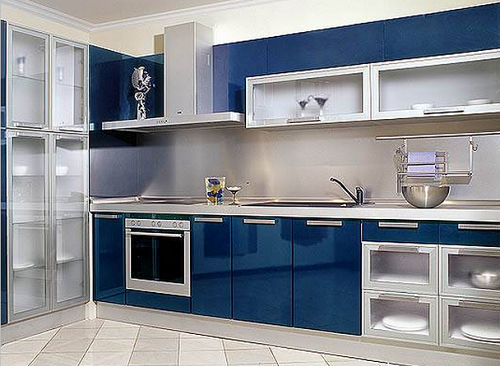
- If you are planning to make the kitchen completely white, then the white apron will "lose" in such a monotonous interior, so it should be made contrast and bright. Use the "juicy" colors causing appetite. It has been proven that not only "acid" shades (salad, yellow, orange), but also blue tones, starting from deep blue, ending with azure or indigo. Such a bright apron is recommended to "support" various accessories - shelves painted in tone, knobs of lockers, colorful vases or statueries. It is very important not to overdo it, so that the exquisite interior does not turn into a lip-up blessing.
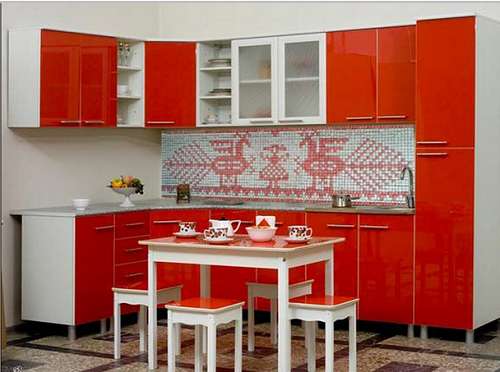
- If the situation is exactly the opposite, and the color headset is installed in the kitchen, the apron must support it not only with color, but also in text. So, under beige furniture it will be good to look a contrast dark apron of granite or artificial stone. The apron is very harmonious, identical in texture and color with a tabletop.
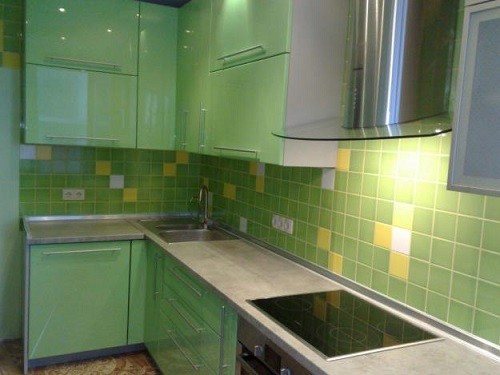
- Blue headset looks good with asphalt-gray apron. You can also use warmer shades (light coffee, beige or cream-brulee), then a warm tone "softens" cold blue notes headset and make the situation more cozy. For a green headset, you can pick up a green apron, but with a lighter or dark tint so that the kitchen does not merge into one spot.
- The aprons of absolute tones ranmed with a bright ornament bounded with a bright ornament or folded from the tile of different colors of one color gamut are very original.
- The bright tones of the aprons are good and the fact that when they are bought, on top of the one can cause painting or stick the interior vinyl sticker.


In most cases, the aprons are made from tile, since it is the most affordable and appropriate finishing material on the market, but if you are not fidgeted in the means, you can make the interior more stylish and original, building a stone or glass apron for the kitchen.
Materials for apron
Consider in more detail each of the materials used to create kitchen aprons. The choice is determined not only by the color category, but also the complexity of installation and operational characteristics. So, even an inexperienced person can cope with the laying of a tile or artificial stone, then with glass panels the situation is much more difficult.
What makes a apron for the kitchen with your own hands:
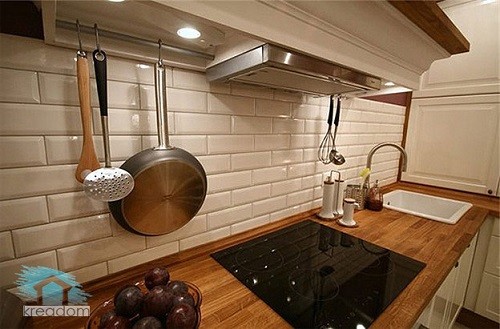
- Tile - among all finishing materials for the kitchen tile remains a favorite and does not collect positions. It is inexpensive, pretty simple in installation, does not require much care, and the choice of colors allows you to realize any designer whim. Ceramic apron for the kitchen is resistant to household chemicals, minor mechanical impacts, temperature drops and, most importantly, humidity. Such a coating will be perfect for more than 10 years.
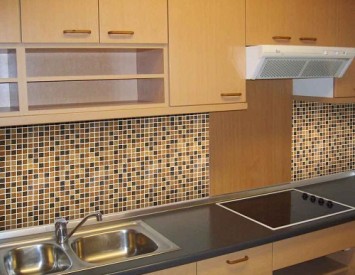
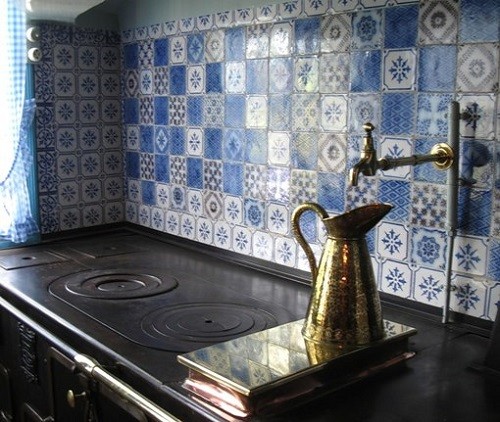
And if in Soviet times the choice of tiles was, to put it mildly, not like, then today you can get to "get roaring" and create real masterpieces of interior art. So, you can combine large elements with shallow mosaic, monotonous tiles with bright painted inserts, to make patterns and ornaments. One of the most remarkable examples is the Metlah tiles. It is a very durable finishing material, which is not only durable, but also with completely stunning textures and colors.
- Stone - If you always wanted a truly luxurious kitchen, your path lies in the department of finishing materials from a natural and artificial stone. Make a tabletop and apron from such a material, and the kitchen instantly transformed. Mostly for laying apron use marble, granite or basalt. When choosing facing from natural rocks, the physical characteristics of the stone should be taken into account. So, granite is distinguished by a very dense structure, practically does not miss moisture and serves several decades. Marble is a more whimping breed and requires constant care. It has a pretty porous structure, so if you shed red wine or acute tomato sauce on white marble, there may be an unwanted stain. Therefore, after laying, the marble apron should be coated with a moisture-repellent protective agent.
Aprons from artificial stone are much cheaper and in many cases much more practical. Such materials are made on the basis of mineral filler (stone dust), acrylic resin and various pigments that give them the appearance of natural stones. The advantages of such a cladding is that it is very dense and has no pores, therefore it is not able to absorb moisture and leave on himself memories of a spraying boosher in the form of scarlet spots. Little leather meter is as easy to install, as well as the usual tile, is even glued with the same glue. - MDF - such an apron will look perfectly only if the adjacent table top is made of MDF slab. This material allows not only to create an original interior, but also align the surface of the wall. At the same time, it is mounted on ordinary liquid nails and kleimers, and the surface does not need to be prepared.
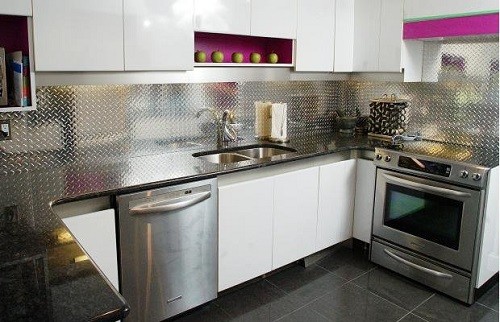
- Stainless steel is a very original and stylish solution that High-Tech lovers like. This material is used quite rarely, and completely in vain - it is absolutely fireproof, not susceptible to corrosion, environmentally friendly and extremely durable. If you decide to install a stainless steel apron, support it with elements of wood, glass or glossy plastic.


Tools for laying
Since in this article we will tell how to put the apron in the kitchen tiles, then tools and materials will be selected according to the installation technique. Before going to the store, make measurements and the calculation of the required amount of tiles. Buy with a margin to leave several tiles in case of repair.

Required materials and equipment:
- tile;
- tile glue (recommended Ceresit CM11;
- primer deep penetration;
- grout for seams (in tone to tile);
- construction level, plumb;
- slab;
- rubber spatula;
- toothed spatula;
- foam sponge;
- plastic bars for tiles.
You will need work skills. For the wall thin tile, you can use the most common manual mechanism.
Laying apron from tile
Before proceeding with work, give a rational assessment with your capabilities - if you are not sure to handle, it is better to hire a specialist and not risking to spoil the materials. For those who want to get a new interesting and useful experience, we have prepared detailed instructions for installing apron in the kitchen.
Marking apron
The first stage is the markup of the walls. This is an extremely important point from which the end result will depend on and the aesthetics of your masonry. To make the right and clear markup, you must be able to use the construction level. Ideally, it is better to get laser guides - they will significantly speed up and facilitate the process.
Another important point - the walls before marking should be as smooth as possible. If with this problem, you will have to apply aligning plaster. Otherwise, it will have to compensate for the discrepancy due to the thickness of the glue during installation of the tile.

There are various standards for laying the height of the aprons in the kitchen, and this parameter should be selected in accordance with the kitchen headset dimensions. On average, 80 cm are deposited from the floor with an altitude of an apron at 75 cm. Thus, it turns out to be putting 7 tiles of standard size 10x10 cm in height, and 5 cm will remain on the seams.
Follow the horizontal line at the place of laying the first row of tiles. He will rely on a special rail. For this you can use a conventional wooden bar or metal profile. Screw to the wall to the wall with a dowel and check the construction level.
Digit a few vertical lines perpendicular to the bar to create additional guidelines.

Glue for laying
Another important moment before starting work. Tile for the kitchen on the apron is recommended to be at the most popular Ceresit CM11 glue among professional builders. Small consumption will allow you to save, if, of course, the walls in the kitchen are smooth, and they do not need to be aligned at the expense of glue. So, by 5 square meters. m is consumed about 12 kg of composition. When laying tiles on the draft walls, the flow rate may increase.

Stir dry mixture with water according to the instructions, using a building mixer or a drill with a nozzle.
To lay the first row of tile, which will rely on the bar, should be labeled with glue with a length of 3-4 tiles and quickly attach them until the composition does not dry. To wait for glue, use a toothed spatula so that there are shallow grooves remaining on the surface - it will improve the adhesion and reduce the solution consumption. Also, for the best adhesion of glue with a wall, it is recommended to make small scratches using a knife-jamatic or edge of an acute screwdriver.
Laying tiles
Before laying, prepare materials that you may need in the process and place them at a distance of an elongated hand: a spatula, crosses, a container with a solution, a stack of tiles.
Progress:
- Make a screwdriver or hammer on the wall.
- Treat the wall of deep penetration with the wall.
- Screw the horizontal bar in accordance with the layout for laying the first row of tiles.
- Start laying out the tile from the corner.
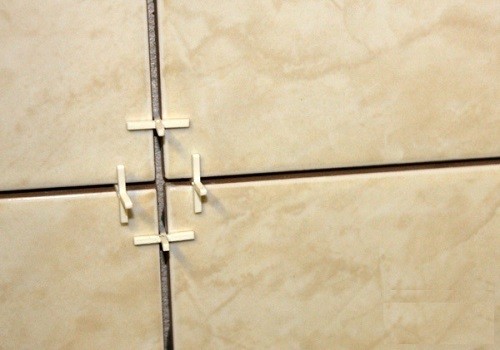
- Between the tiles, install plastic crosses, constantly controlling the position of the elements using a building level. For tiles of 10x10 cm, crosses with a thickness of 2.5 mm are suitable. You can set the cross in different ways, but professionals are recommended not to install one cross in 4 tiles, putting it in the opening, because it is very difficult to get it. It is better not to save and put cross sideways so that it is easy to pull the glue after drying.
- When you were glued 10-15 tiles, remove glue from the seams until it froze completely. If you get up with this, there will be much more time to stripping.
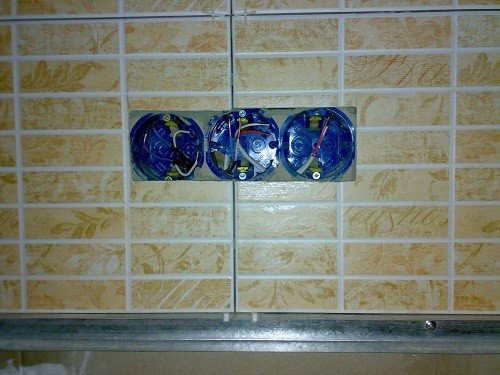
- Special attention should be paid out sockets. It will be very powerful if they are just where simple rectangular cuts can be made in the tile, but sometimes it is quite difficult to do them. To do this, you will need a tile cargo, a couple of test tiles and 5-10 minutes of practice.
- When the last row was laid, leave the tile for a day so that the glue as it should have gripped. After that, you can proceed to the stamps of the seams. Divide the composition to the consistency of very thick sour cream and with a rubber spatula with a slight pressure, fill the space between the tiles. Before that, do not forget to pull the cross.
- When the grout is freezing, grind the uneven seams in small sandpaper, and excess the wet foam sponge (a sponge for washing cars is suitable).


Useful tips:
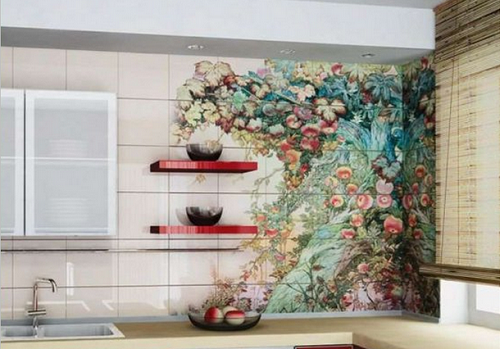
- To create an original design, order an apron for a kitchen with a photo printing from MDF. It can be ornaments, fruit, vegetables, landscapes, etc. You can also put a photo of a photo, make a collage or generally to paint the surface manually.
- Use LED backlight to give originality and organize additional lighting.
- The sizes of the apron for the kitchen must match the working area, capturing the sink, a cutting table, plate plate.
- Choosing a tile, take into account that it is much easier to care for a smooth glazed surface, rather than relief.
- An apron for a kitchen made of plastic can be an excellent alternative tile or MDF. Today in the market you can find high-strength plastic finishing materials that will serve not one year, not losing the original type.
- For creating aprons, any suitable materials can be used - they must be durable, moistureproof and durable. For these parameters, the river pebbles are perfect - just imagine what surface you can lay out of simple pebbles brought from vacation! Also for this you can use old coins or bit tiles.
- It looks original as a mirror and glass tile as a fountain coating. Use a transparent silicone for grouting such a cladding.
Video about laying apron in a kitchen of a large tile:
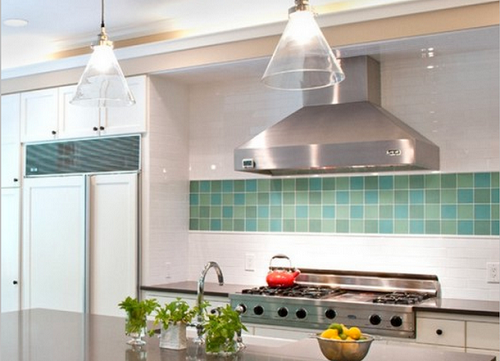
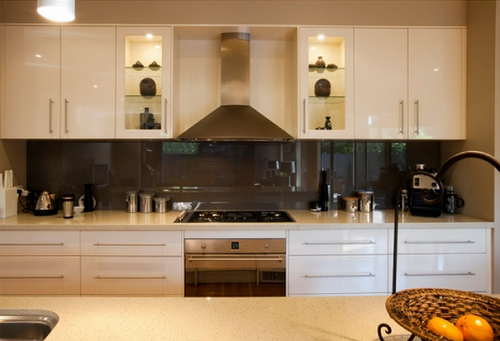
Apron for kitchen, photo
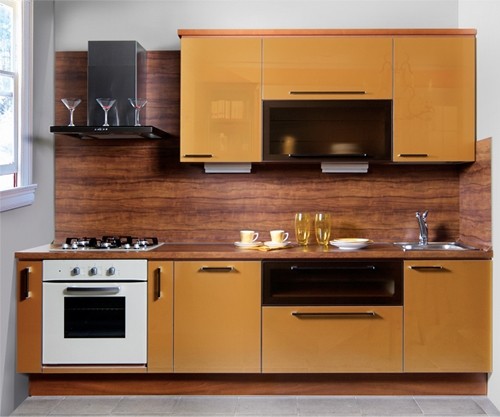
We hope this article helped you figure out how to put apron in the kitchen. Finally, several stylish design solutions.


