In the summer with drying things, there are usually no problems, worse the rest of the time, when it is cold or it is raining. It all dries for a long time, you have to bring wet things into the room and scatter on batteries. Real salvation is a dryer for linen. It belongs to those things that make our everyday life more comfortable, but the price is embarrassing. In our article, we will sign all the stages of manufacturing this device with our own hands.
Content
Types of underwear dryers
Lower dryers are different:
- ceiling;
- floor;
- nasty.
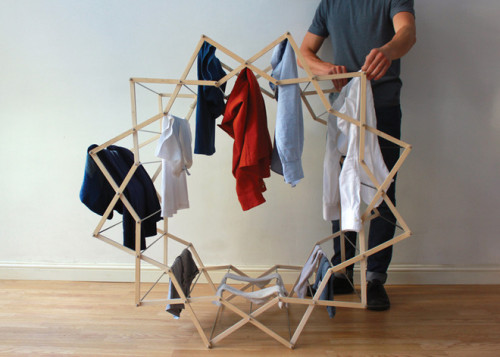
Each mistress chooses for herself the most convenient model in relation to conditions. Any of them can be made with your own hands. What kind of designs do home masters do not come up with! Look at the underwear dryer, the photo of which is posted below:
This is an original and compact linen dryer sliding with 36 seats. It consists of 10 sections. It took each:
- 2 plywood strips;
- 3 metal jumpers.
DIY label dryer
It’s easy to guess how to make it, you just have to look at the photo.
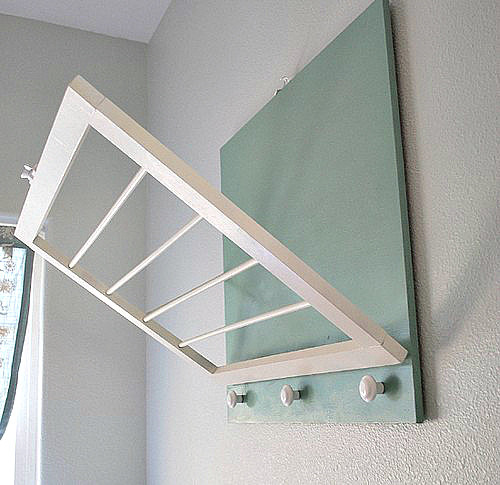
Such a convenient dryer fit on the balcony, in the bathroom. It will not take up a lot of space, and when nothing needs to be dried, it just folds. It will require:
- wood and bars of wood;
- dVP or MDF board;
- furniture loops;
- hooks or furniture handles;
- fixator;
- transformation mechanism;
- screws, nails, paint.;
- drill.
So, for work:
- we make 4 blanks for a frame from bars;
- harvest 4 identical wooden rods;
- we break the side bars into equal segments;
- we drill deaf holes in the bars, focusing on the diameter of the rod;
- we insert the rods in the middle of the frame, having previously sharpened a little ends;
- we fasten the frame with self -tapping screws;
- we process the board so that its width coincides with the width of the frame, and the length remains more than 15 centimeters;
- we connect the board and grate with each other using a furniture loop;
- we primer the product and cover with varnish or paint;
- we fix the lock in the upper part, and on one side, the mechanism for transformation;
- divide the lower part of the wall board into 3 parts;
- drill holes for furniture handles;
- install the pens. It is possible to replace the handles with hooks.
That's all, the wall dryer is ready, it remains only to fix the board on the wall.
Heated dryer
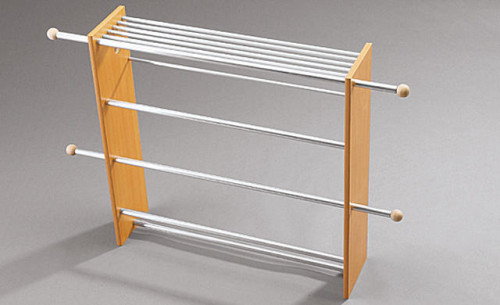
To quickly dry some kind of thing, we put it on the battery. It is much more convenient to do this on a dryer specially adapted for the radiator. To collect it, you need to:
- panels - 2 pcs. from wood, MDF or chipboard. In height, they should slightly exceed the battery;
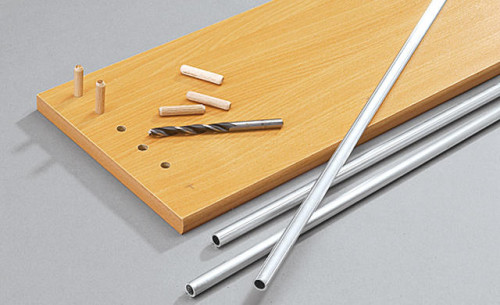
- metal pipes - 5 smaller diameters and 5 larger;
- wooden spikes;
- pipe plugs;
- glue.
We do the work in the following order:
- In the upper part of the panels from the inside, we drill 5 deaf holes under the spikes.
- We divide the front side of the panels into 3 equal parts, having previously retreated from below 10 centimeters, mark the points and drill through the through hole, then deaf, through and again dull.
- Lubricate the deaf holes with glue, and scoring the spikes, let it dry.
- We collect the upper part, fixing the pipes of smaller diameter on the spikes.
- We collect the front part using the pipes of a larger diameter, while we fix it on the spikes, while others are stuck in through holes.
- We dress at the ends of peering pipes, plugs.
- If there is a regulator on the radiator, then we cut a hole on the side panel under it.
Sushilka for linen ceiling in the bathroom
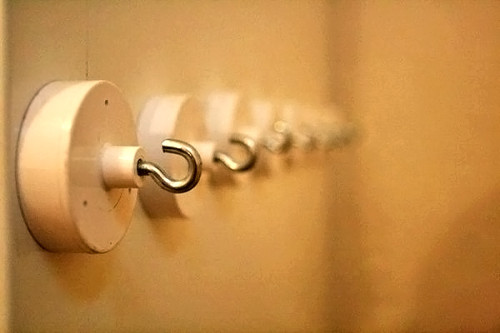
In order to dry linen in the bathroom, a simple, consisting of hooks and ropes dryer is suitable. She will need:
- hooks-self-cutting pieces 8-10;
- a cable or a suitable color, a beautiful rope.
And then:
- make markings and drill on the opposite walls under the ceiling above the bathroom;
- set hooks;
- we pull the ropes.
Comfortable drying dryer with your own hands
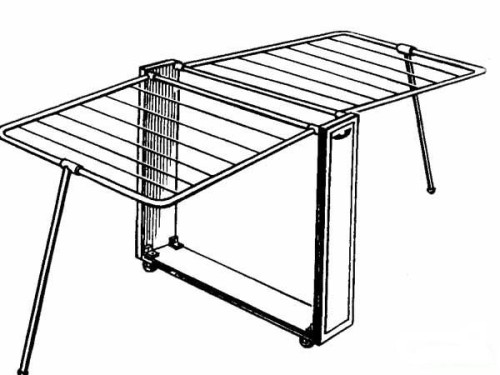
It is convenient to use a portable dryer, it is placed anywhere, and when it is not needed, it simply folds and removes into a secluded corner. There are a lot of such models on sale, but with your own hands it turns out no worse. Material is necessary for manufacturing:
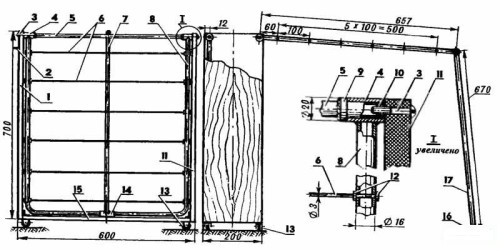
- 20 mm slabs from chipboard or MDF;
- screws and nuts M6 - 4 pcs.;
- nuts m3 - 48 pcs.;
- furniture screws - 4 pcs.;
- furniture wheel - 4 pcs.;
- tubes with a diameter of 18 and 16 mm;
- furniture handles - 2;
- stainless stainal rod with a diameter of 3 mm.
- Cut 2 blanks for side walls with a size of 70x20 cm and one for a bottom of 60x20 cm.
- Having retreated from the upper edge of the side panel of 12 mm, drill a hole with a diameter of 6.5 mm. At a distance of 176 mm from the center of the first hole, we drill the second of the same diameter. We do the same for 2 panels.
- We begin the assembly of the case from below, fastening the lateral strips with the bottom using furniture screws.
- We fasten furniture wheels to the housing.
- In the ends of the screeds cut out of the pipe, insert the M6 \u200b\u200bnuts and weld along the contour.
- We put on the screed the restrictive rings with a width of 5 mm, carved from a pipe with a diameter of 22 mm and a bushing 30 mm long, prepared from the same pipe.
- We weld the restrictive ring to the screed.
- From the 16 mm pipe we make a frame. First, cut off 2 blanks and mark the side sides. In the center of the side of the frame, we put on a sleeve limited on 2 sides by rings welded to the frame of the frame.
- We bend the pipes. It will turn out 2 P-shaped blanks.
- On the long section of the frame pipe from the inside, drill holes for the rods.
- We cut 12 blanks from a bar with a diameter of 3 mm.
- On blanks on both sides, cut the M3 thread. We insert the bar into the holes and fix it with two nuts on each side.
- We weld the racks on the side sides to the sleeve, we put the plug at the end.
- We weld the right and left parts of the frame to the sleeves on the screeds.
- Connect the frame with the body using screws.
- We fasten furniture handles on the side sides of the case.
A practical floor dryer is ready.
Linen dryer on the balcony
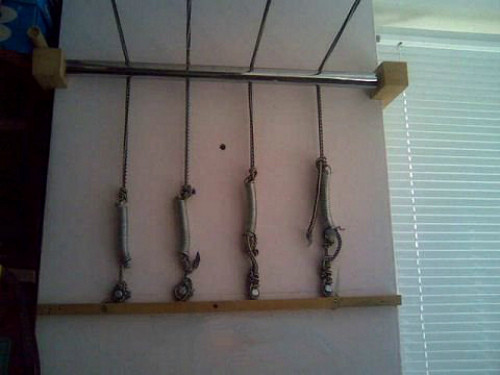
To make the simplest dryer for linen on the balcony, you must have:
- a piece of pipe made of stainless steel with a diameter of 2-3 cm;
- 4 wooden bar with a thickness of 6-8 cm;
- springs;
- rope.
Production process:
- We make brackets from the bars, drilling holes along the diameter of the pipe. We fix them at the opposite ends of the balcony.
- In the right pipe, drill holes under the ropes at a distance of 10-15 cm from each other.
- We tie the nodes on one end of each rope and pass them through the holes in the right bracket.
- We insert the pipe into the holes of the brackets and secure them reliably.
- Under the left pipe, fix the lower end of the spring.
- We throw the left ends of the ropes through the left pipe and each is tightly tied to the springs.
- Close springs and nodes with a decorative panel.
Sushilka for linen, the video about the manufacture of which is placed below, is convenient to have on loggia or balcony.

