Sometimes it becomes necessary to retire and be one for one with nature. I want to live away from civilization, as our ancestors lived before - in dugouts. Build environmentally friendly housing - dugout, everyone will be able to build.
Content
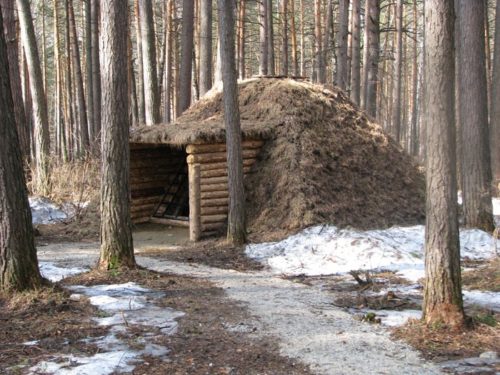
What is earthlock? This is a dwelling underground. Dugouts are of different shapes, but most of all are popular with square or round buildings. You can construct my own dugout with your own hands of any shape and sizes.
The reasons for the construction of the earthquake may be several: perhaps you just recently acquired a country area and took up the construction of the house. Temporary housing, namely, the dugout can be constructed independently, and then use as a cellar. Also, the dugout can be made in the forest, not far from the city to relax in nature. Dugouts are helping both hunters who love winter hunting.
Many people think that the dugout - a small room, which is always cold and damp. Naturally, it is not suitable for habitation. But, if done correctly, in such a room is not hot in the summer, and in winter you can hide from the cold. The advantage of the dugout, built with his own hands, is a big saving on building materials, because it is not necessary to carry out the external finishes. The dugout is hidden from prying eyes, so the inside will always be a comfortable temperature. If you build a lighted room, then the construction of the dugout you can safely select from several days to a week.
Choosing a place for the construction of the dugout
The first thing to decide on the venue for the building. , The place should be chosen very carefully so that the room was not cold and damp. As our ancestors did. They stir the structure on a small hill, and place of the sign (the door), are arranged so that the wind was blowing in the opposite direction. Why choose hilly terrain? The fact is that over time dugout could be flooded by groundwater, and if it is on a hill, then the probability of flooding is minimized.
In addition, prior to construction is necessary to prepare all the necessary tools to do the layout and dug with their hands.
Tools and materials for the construction of the dugout
What need of the materials:
- material for the roof and the floor coanda. For example, roofing, solid polyethylene;
- it is also desirable to prepare bars, boards, pressed board (DSP);
- not prevent insulation and whole board flooring on the floor;
- need more Lutkov door and window frame.
In addition to the materials you need to stock up on fixing materials, as well as prepare all the necessary tools:
- staples, nails - if you work a stapler;
- shovel (shovels);
- construction level;
- hammer and planer, and other carpentry tools (drill, chisel, saw, etc.);
- a ruler, crayon, sharp knife construction;
- axe.
Building a hut with his own hands
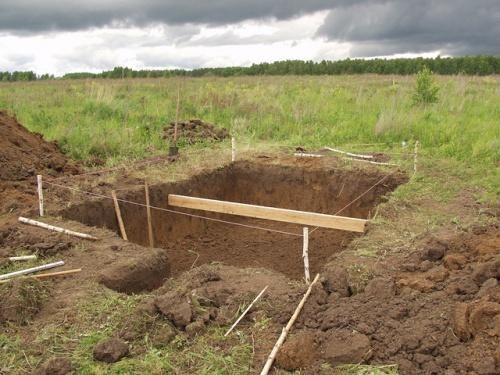
According to the construction technology, it is necessary to begin with digging a pit. But first you need to mark up the selected area. Marking will allow not to be mistaken with measurements and everything is done as indicated in the drawing. If you have planned to dug a rectangular kitty or in the form of a square, then you need to stick to exact sizes. First you need to drive wooden pegs and measure the diagonal of each side. Between wooden carriages you need to stretch the rope. After preparatory work, you can proceed to the most important thing - you need to dug yourself on your own way.
How to cut the pit for building dugouts:
- It is manually removed using a shovel of the upper layer of the Earth - Dern.
- Dern needs to be removed very carefully, trying not to damage it.
- Fold the derm in a separate place, because this natural material will be used to insulate the roof of the earthquake.
- You can and alone cope with the task if you do everything right. It is more convenient to operate with a bayonet shovel, first shifting the earth, and then Sovicova - to throw out an excessive land from the pit.
- Try the land to collapse half the meter to free up space to create the roof.
- The depth of the pit is at the discretion. It usually should not be lower than human growth. Therefore, it is necessary to dug a cutting to a depth of 2 m, plus the floor height.
- With the help of a shovel, you need to form a vertical slope and make a gentle descent to the entrance to the room.
- You will also have to designate the steps, the width of each step must be at least 30 cm. The number of steps depends on the depth of the dugout and location.
Construction of a modern dugout with their own hands:
- so that the dugout served long lines, it is necessary to strengthen the pitual bars (50 per 50 size, and can be 100 per 100);
- the bars must be burned to the ground, leave the gap between the wall and the bars in order to lay the boards. Therefore, leave the space is not big, on the width of the board;
- planks put tightly to each other on the wedges;
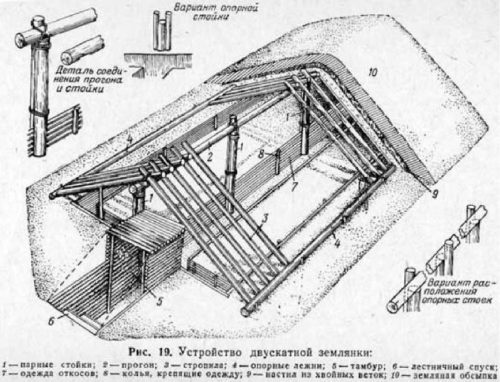
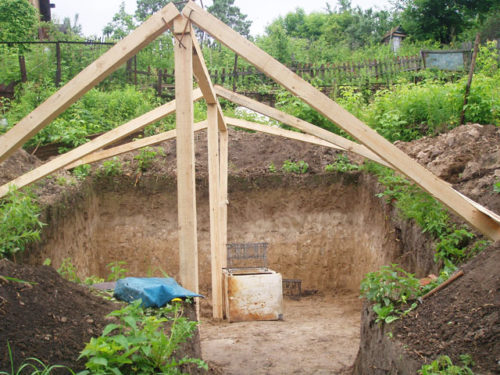
- in the middle of the pit it is necessary to insert the supporting wooden poles. From the side of the observer it seems that the construction of the arbor is underway, since the framework of the structure is very similar;
- and bars around the perimeter, and supporting bars should perform above the ground for a height of 2 m 20 cm;
- supports need to be located at least 1.5 meters at a distance, because they will later be attached to the roof. Therefore, at this stage of construction of a modern dugout, it is necessary to constantly check the supports in the level so that they are located on the same line;
- the guide boards for the run are nailed.
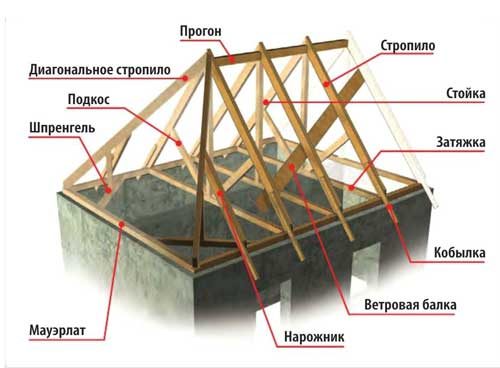
The design of the rafter system is as follows:
The next stage of the arrangement of the earthquakes with their own hands is the roof structure, as well as internal work:
- for the rafter, it is necessary to wear the support logs on the perimeter of the pitted pit;
- fastening - with the help of pegs that you need to drive in the middle and on the edge on each side of the log. Step - 50 cm;
- stacking rafters, you need to consider the dimensions of the door frame;
- when the rafters are installed, you can proceed to the slaughter of the frame by boards;
- you can knit on nails so that they are located as close as possible to each other;
- the only thing you need to take into account is that the bottom board will be difficult to fix if it starts the framework of the frame from above. Then the last board does not fit in the remaining opening. If you start the trim from the bottom, then the adjustment of the top board is easier to do;
- the next stage after the framework of the frame board is the output of ventilation. If you want to install the stove in the dugout, then you need to withdraw 2 pipes. Sewer pipes are suitable, diameter from 10 cm;
- laying insulating material. If the rubberoid was chosen, then you need to put the material first along, then across, and on top to pour the roof to the roof (which was cut when the trenches are digging), pour dry twig and trigger the ground. If there is no possibility to immediately cover the roof over the rubberoid, it is suitable for these purposes.
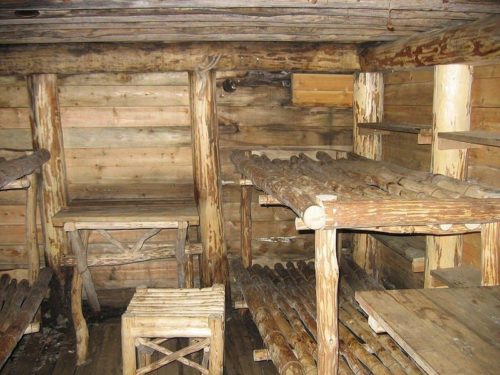
- interior decoration - we are cutting with a dugout with lining, the chipboard is allowed by sheets. If possible, you can warm the room from the inside sheets of foam, which need to be paved between the trim: external and internal;
- as for the floor, it is possible to leave an earthen, but best - put the boards or sheets of chipboard.
How to make the stove in the dugout do it yourself
As for the stove to hear the dugout, the standard "bourgear" will suit, only you have to think about firewood in advance, as well as to prevent dampness to storing firewood.
The furnace must be chosen depending on the size of the room and take into account the heat transfer of this instrument.
Categories of furnaces for heating dusts:
- Low capacity.
- Middle Capacity.
- Big heat capacity.
Furnaces of the first category can be made of cast iron, and a cheaper option is from iron. Such stoves quickly and in a short time warmed the room, but also quickly cooled if the fuel in the tank is over.
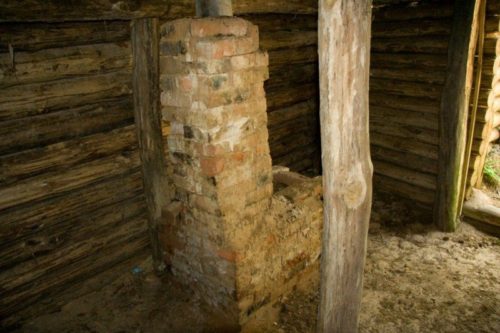
The second, medium-sized ovens for heating of earthmings, is built right on the place of stone or brick. Such a furnace is slower, but also slowly cools.
The last version of the furnace is the average heat capacity, the average heating and the same averaged heat transfer. But for dugouts they are not suitable, because they are used to organize the heating of such cast iron or iron portable furnaces. A second option is possible, especially if the dugout is built for frequent visits. Then it is more expedient to put a high heat capacity brick furnace.
In order to install the oven in the dugout with your own hands, it is necessary to determine the type of oven and organize ventilation, to ensure air flow to the room.
How to make a simple dugout with your own hands
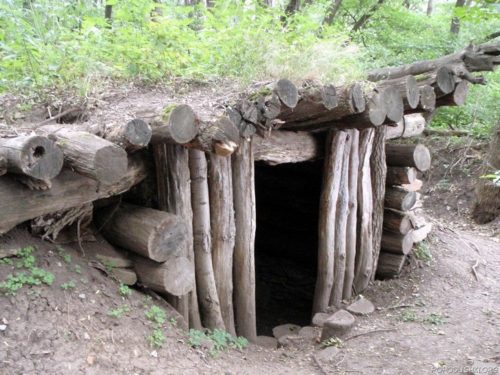
You can build a dugout and without significant costs as such structures were built before. To do this, you must choose the right place for the dugout. And if your goal is a hunting lodge for temporary stay in the forest, then you need to choose a spacious place on the hill to avoid trees of trees.
Since the dugout is a hidden structure from prying eyes, most of the temporary dwelling should be located underground. The walls indoors are desirable to seize logs or lay out thick branches. Inside the middle, you can lay out the fireplace from stone, as well as organize ventilation and make the pipe output to the outside. The front door will also serve as the exhaust hole. When organizing heating inside the room, the door must be kept ajar (if there is no ventilation pipe).
The disadvantages of such dugouts are decently:
- this is a permanent dampness indoors, especially if it is rare there to go there;
- due to damp and stagnant air, quickly rotates the frame and walls, because of which the design can collapse over time;
- raw primer is a bad option for the construction of the dust. Therefore, it is so important to choose a neat holmik located on the sunny side. In such a place, the soil is always dry. If you fulfill all the recommendations, you can avoid dampness in the room;
- in the cold season, if not to ventilate and not to pull the room, the tree begins to rot, the fungus appears. It is possible to protect the room from dampness: to deceive the walls from the inside with clay or clay and the sand solution + sand. The floors also fall asleep clay, laid lags, and on top of a wooden boards;
- an overview of such a room is significantly limited and will depend on the selected area;
- flooding of groundwater;
- the minimum level of natural light (only with an open door in the warm season) and the availability of windows.
Advantages of building earthlings
If you are still in doubt whether to build a dugout, we suggest familiarizing yourself with the advantages of this type of room:
- Saving energy consumption. It is known that the thermal conductivity is low in the thickness of the Earth, so if it is competent to ensure the heating of the room, then the stable temperature will remain inside the dump farm. This suggests that the temperature of the room is not higher than +18 degrees can be expected in summer, and in the winter - not lower than +8.
- Good sound insulation. The buildings are allowed and not far from the motorway and other noisy places. You can not worry about what someone will hear you - sound insulation in the dugout provided that the door is tightly closed - it comes down to a minimum.
- Savings on building materials and saving time to build a house. All this can be avoided if competently approach the construction of the dugout with their own hands.
Features of the construction of the dugout you can visually see in this video material:
