If you like to make useful things for your home and have experience in handling tools, then making a bathroom for a bathroom will not be difficult. Of course, today you can find a lot of options for convenient and functional furniture, but often the prices for it are unreasonably high. Why spend money when you can collect the cabinet under the sink yourself, making it in accordance with your needs and the design of the room.
Content
General information
The best option for mounting the sink is in the niche of the countertop. The easiest way to do this in the process of overhaul of the apartment or building a house, because then any idea can be “beaten” in accordance with the design of the bathroom. One of the options may be the construction of a countertop made of moisture -resistant drywall and profile. The material should be durable and withstand a high level of humidity well, otherwise the cabinet will not last long. For these purposes, MDF plates are ideal, from which furniture for the bathroom and kitchen is made. Glass counters for the bathroom are also quite popular, but it is very difficult to make them at home, so it will not dwell on this.
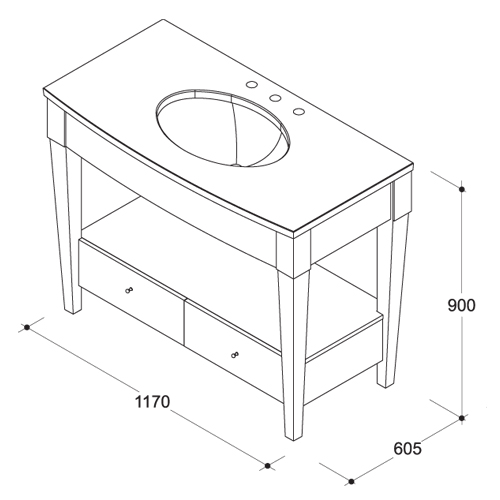
Any construction work, including the construction of a countertop, must begin with a detailed plan-drawing and clear measurements.
There are a number of rules for building a countertop under the bathroom sink:
- it is necessary to install a countertop on a frame mounted on the adjacent walls;
- the height of the countertop is calculated for considerations of comfort of use (growth of family members), as well as taking into account facing materials, which can also affect the dimensions of the structure;
- if the shelves are located under the countertop, then the first level should be 25-30 centimeters from the lower part of the countertop;
- putting the doors or not is a purely personal matter, but if you plan to store detergents, powders and other household chemicals in the cabinet under the sink, then it is better that access to them is closed. This will extend the shelf life of funds and protect from contact with children or animals.
Preparation of the countertop
When all measurements are made and a detailed drawing was created, you can begin to build a multifunctional cabinet with a countertop.
Procedure:
- designate the place for the niche on the surface of the future countertop, where the sink will be built. To do this, take the sink, turn up the bottom up, attach to the countertop and outline the contour with a pencil;
- cut the marking hole;
- pour the edges of the countertops with rails or a self-adhesive thermal-tape to protect the edges from swelling from moisture. If you have chosen rails, use only moisture -resistant glue, otherwise they will simply fall off;
- when the glue dries out if necessary, polish the edges of the countertop with sandpaper;
- cover the edges of the primer mixture for wood.
Installation of walls and facing work
If you make a countertop from MDF, the walls should be made of the same material.
Procedure:
- cut the walls for the future cabinet, guided by the drawing;
- attach the walls to the wall under the corners on which the countertop;
- install the doors with a hinged method.
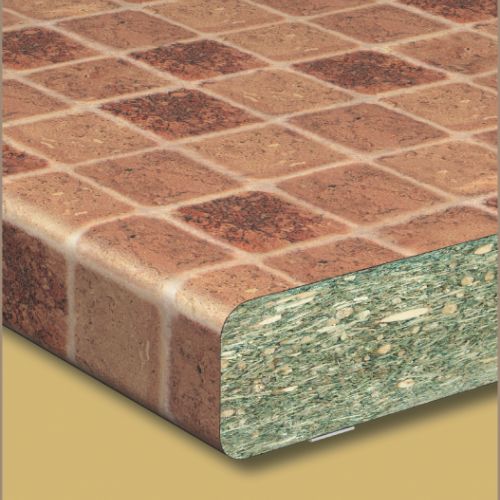
The facing can be performed by any moisture resistant materials, the most common of which is tile. You can use mosaic tiles or a regular tile. Consider the version of the countertop for the bathroom from the mosaic.
The course of the facing work:
- the countertop and all the outer parts of the cabinet are covered with moisture -resistant glue;
- apply and tightly press mosaic tiles to the glue. If there is a protective paper layer on the tile, it must be moistened and carefully removed;
- mask the docking seams between the tiles using a moisture resistant grout and a rocket - a special rubber tool;
- if you first built a cabinet, and the countertop has not yet been installed, attach it to the crate and corners and set the sink into the niche;
- fasten the sink with a sanitary sealant, filling them with the space between the edges of the washbasin and a niche.
Useful advice: with a modest quadrature of the bathroom, you can visually increase it by hanging a large mirror over the sink.
Stone countertop
For the manufacture of countertops, not only MDF or drywall is suitable. Stone structures are very popular due to their durability and practicality. Ordering such furniture or buying the finished is quite expensive. The cost of the bathroom countertop depends on the stone breed, however, such a pleasure will “fly into a penny”. But we gathered here not in order to monitor furniture prices, but in order to learn how to do it with our own hands. The bathroom for the bathroom will decorate the interior, give it noble and quality.
Before starting work, you should decide on the materials.
So, a stone countertop can be made from the following materials:
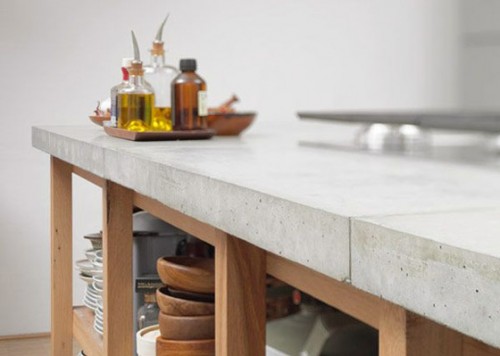
- concrete - the most ordinary building material for capital construction can serve as an excellent basis for creating a beautiful countertop. And to give it a pleasant appearance, you can add special dyes or stone crumbs to the solution;
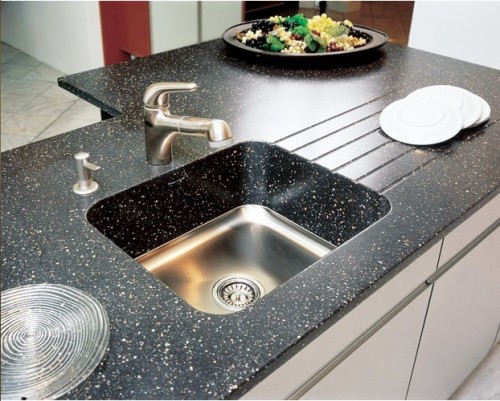
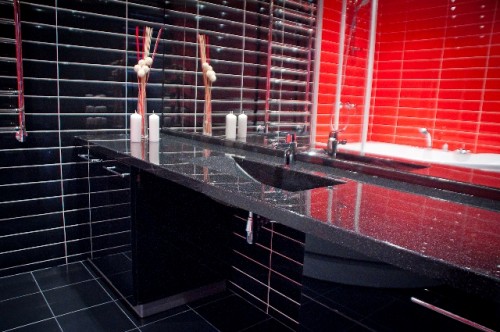
- artificial stone - acrylic artificial stones can be bought in the form of sheets, the thickness of which varies from 3 to 12 mm. The material is based on acrylic with the addition of granite or marble chips. The plywood countertop is covered with such a stone leaf and installed on the cabinet;
- ceramic tiles are one of the most popular ways in view of its simplicity and accessibility. Tiles a priori look better in the bathroom than in any other room, but it is worth choosing it correctly, especially for facing the countertop. As in the case of an artificial stone, a tile facing is attached to a plywood base using moisture -resistant glue. If you connect imagination and use multi -colored elements, you can make an original beautiful tabletop for a bathroom of tiles.
Concrete countertop
Concrete has long ceased to be an ordinary building material. Today, it is made of beautiful durable elements for benches, fountains, landscape jewelry, decor elements, use in modern sculpture, etc. Concrete countertops also gain more and more popularity, mainly, because making them is quite simple, and such furniture serves almost forever.
To make concrete for countertops will need:
- cement (brand 400 or more);
- filler (it is better to take fine -grained - granite flour or river sand);
- coarse -grained filler (gravel, marble or granite crumb);
- plasticizers.
Useful advice: to make a designer miracle from a “boring” concrete counterattack, add a fibilled fiberglass to concrete. It is important that the edges of the glass are not sharp. As a result, you will get a unique pattern. You can also add dyes or collars. If you pour them while pouring concrete into a special form and distribute unevenly, you can get an interesting original pattern. If you are familiar with the technique of drawing Ebru, you can apply your skills in creating a unique bathroom countertop.
Method of manufacture:
- take a strong base with a glossy surface. It can be laminated plywood or chipboard. It is imperative that the surface is moisture resistant. Pull the outline on the layouts and fasten the bars. If you already know where the technical holes will be located, then keep in mind that they should not be filled with concrete. It will be more difficult to cut concrete, but there is nothing impossible for skillful masters - some holes can be made already in the finished countertop;
- to avoid a painful finishing of the edges, make a chamfer around the entire perimeter of the base at an angle of 45 degrees. You can make it from ordinary plasticine with a spatula;
- pour the resulting frame with concrete. In order to evenly distribute the material on the surface, especially if it has a fiberglass, shells or other decorative elements, it is better to use a vibro -stop. You can also use special vibrators with long pipes that penetrate into the thickness of the solution. If you have the necessary tools, you can be sure that all the air will come out of concrete, and the countertop will be as strong as possible. If you decide to strengthen the countertop, then you need to fill the base in two stages with a frequency of 24 hours. When the first layer dries, put the reinforcement on it, and then pour the remains of the concrete mixture;
- when the concrete is completely dry, carefully remove the frame, turn the countertop turn over and install it on the bars. Using a grinding machine with a coarse -grained nozzle, remove about 1 mm of the upper layer;
- clean the surface with a vacuum cleaner and a damp cloth;
- sour the surface with a cement mortar to fill all small pores, and leave again to dry;
- the last stage is the grinding of the countertop with fine -grained nozzles as it descends up to the zero.
The concrete countertop will last more than a dozen years. It is protected from burnout, fading, mechanical damage and damage to chemicals.
Artificial stone countertop
The acrylic countertop does not need to be processed, but you should not think that it will be possible to save significantly on this - the cost of artificial stone slabs is sometimes impressive. So, a marble bathroom for the bathroom can cost several times more than granite. But any money is justified by the beauty and functionality of this material. You just need to choose your favorite coloring, thickness, size and cut the countertop.
And if a table made of artificial stone can suffer in the kitchen from the blows of a knife and hot dishes, but nothing threatens in the bathroom. All that is required of it is high moisture resistance, and this quality has always been one of the most powerful.
Method of manufacture of artificial stone countertops:
- collect the frame-Osnov. The sheet of artificial stone itself is not thick enough to become a full -fledged countertop, so it needs to be attached to a strong base. An ordinary plywood is perfect for this. If you cut it with stripes 7 cm wide, you can form a good frame. Make a tabletop layout in advance and use it when assembling. If you bought a sheet of artificial stone 3 mm thick, use a whole base;
- fasten the artificial stone based on a moisture -resistant two -component glue that can cope with both acrylic and wood. Epoxy resin is perfect for this purpose, but it is quite toxic, so do not neglect the safety rules. Distribute the adhesive composition on the surface of the base using a spatula. It is necessary to apply glue on the wrong side of the sheet of artificial stone only where the sheet will touch the base. It is better to press the materials from the center to the edges;
- when the glue dries, equal the ends of the countertop with a milling machine or bar with large sandpaper. Cut the strips from a sheet of artificial stone and pushes the ends of the countertops, previously peeled and low -fat.
Useful advice: if the shape of your countertop involves bends, then in this case the end strips must be pre -heat to a temperature of 165 degrees. This can be done using a construction hair dryer. Heat the strip and quickly bent it at the right angle. The material will hardly harden and retain a new shape. After that, you can apply glue and fix it at the end.
To disguise the glue, add a pigment close in tone to it with the color of artificial stone.
To install the sink, it is necessary to make the hole with an electrician, and glue the perimeter of the niche with a construction foil with adhesive tape.
