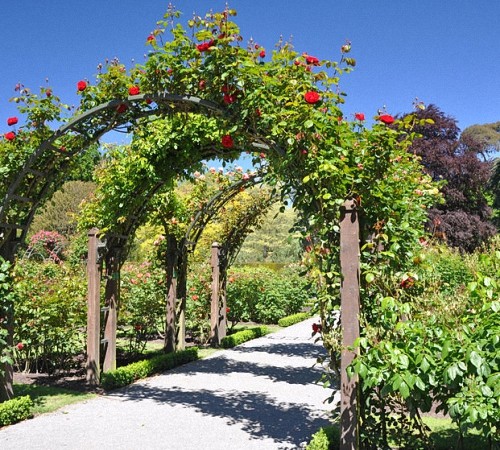
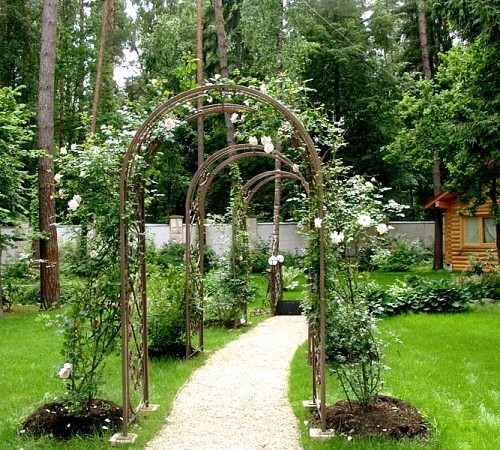
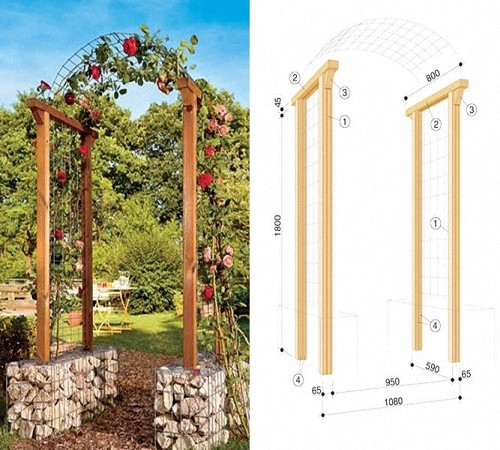
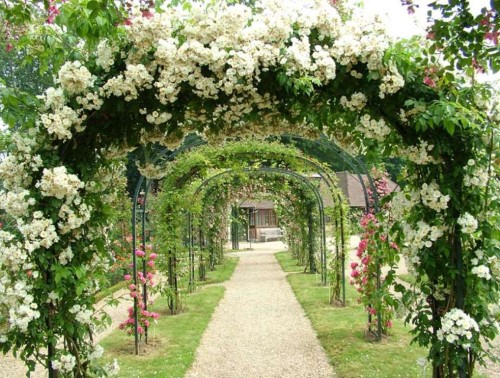
The garden arch, stained with branchy roses, clematis or vine - one of the best decorations of a suburban site or cottage. The arch can serve not only a support for climbing plants, but also as a decoration of the gate at the input or for zoning the landscape. Several light arches of the same design along the garden alley form a picturesque labyrinth. Do -it -yourself garden arches are made of metal or wood, depending on the purpose.
Options of garden arches
The garden arch can be made of metal if it is not visible under plants that fully wrap the vault and support. The arched gallery along the garden paths, for example, from a summer house to a barbecue, is most often made of lightweight metal structures. The photo of the garden arches shows the most successful options for metal structures.
White wooden garden arches look most spectacular, especially the thorough design, complemented by white garden furniture or in an ensemble with another garden decor. Natural wood also looks good if the arch is in harmony with wooden grilles, fence or gazebo when their design is made in the same way.
The arch for the garden can be part of a brick or masonry dividing the summer cottage into a rosary, garden, raspberry, a berry front garden, etc. The shape of the garden arches is different. The arch of the arch can be made in the form of an oval, triangle, square, semicircle or peaks.
The main types of arches:
- The arch at the entrance to the garden above the gate is, in fact, the face of a summer cottage, therefore, the external appearance and thoroughness of the design of such a structure is given the most attention. Such an arch should be quite high, more than 2 m at the highest point of its dome so that you can freely enter people of high stature, make furniture and volumetric items. It is also important to consider the total weight of the rose, grapes and other plants that will hang over the passage into the gate. The garden arch at the entrance should also be in harmony with a fence or fence adjacent to it.

- The decorative arch in the form of an element of landscape design in the garden can be arbitrary or size. For example, at the end of the garden alley behind the arch, a picturesque flowerbed or climber with benches or a small pond can be located, and then, following the same arch, the path goes deep into the garden.
- Gallery from light garden arches along the path can perform different functions. For example, a trellis can be stretched between them to form a peculiar indoor passage from climbing plants. It can be the simplest vegetable crops: cucumbers or beans of special decorative varieties. Another option is the collection “showcase” along the garden path of 3-6 identical arched structures, on both sides of which rare varieties of curly roses with petals of different shade are planted.
- The arches for grapes that support the vine are no less interesting, especially when they form an indoor passage in the yard. Such designs are the simplest, consist of light arched rods, which with the ends are inserted into the rows of dug pipes.
- The arch can be an independent element of garden design if, for example, it has an original shape or is made of non -traditional materials. This design resembles a sculpture or installation.
- The garden arch with a crossbar becomes a full -fledged bench with shading from flowers weaving according to its bases. Three arches set by the letter “P” form the simplest design of the summer gazebo.
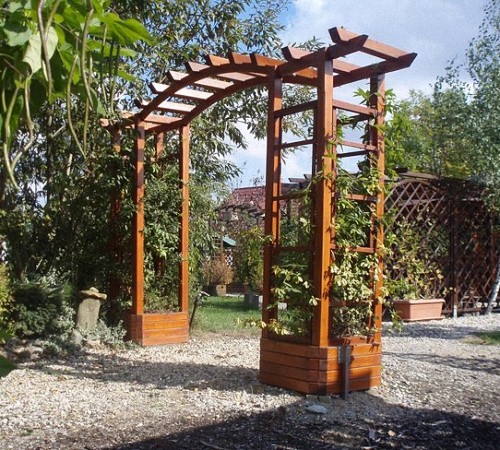
- A metal garden arch with a crossbar, having a reliable mount, can be used as a basis for children's swings or hammock, other options are possible. Such supports are important to dig deeper and concrete.
- The arch can serve as a support for other elements, for example, under the lantern at the entrance to the barbecue or barbecue site. Electricity is brought to this design.
- Watching exotic vines with large colors, requiring high humidity, can be placed on the arch above the fountain to provide the microclimate necessary for their flowering.
Tip: Remember that the size of your arch should correspond to the growth of the highest family member with a margin of sagging branches of flowering and fruiting plants. Do -it -yourself garden arch should decorate your garden at any time of the year, when the plants wrapping it up, so it is important to think over the design and color of the structure. The garden arch should be all -season, that is, resistant to any weather conditions. Sometimes it makes sensebuygardenarks, for example, white plastic, the same shape and size. Sometimes a good masonry of the arch is not always possible to do good masonry of the arch, and this type of work is better to entrust the professional. It’s easiest to make a wooden or metal garden arch with your own hands.
DIY Metal Garden Arch
The easiest way is to make metal glowing arches when bent arches are simply inserted with the base in the form of structures from pipes. Make drawings of the simplest arch, which will look like two light metal ladders, which are parallel on both sides of the garden alley, and a semicircular vault, which is inserted into tubular bases. If the shape of the arch is not semicircular, but oval, then the height of the racks is needed a little more - for the free passage and transportation of garden equipment. By the way, the arch of the arch can be made from curved transparent plastic or plexiglass.
On the drawing or sketch of the future design, mark the distance between the two supports of the arch (the width of the garden alley) and indicate the distance between the tubular supports of each “ladder”. This is the so-called “depth” of the arch, which should be 20-50 cm. The height of the tubular racks should be approximately 150-170 cm, plus an additional part for heating and concreting.
- To make such an arch, you will need 4 pieces of pipe about 2 m long and steel rods.
- From a steel rod, you will need to make two segments under the semicircle of the arch. The length can be calculated by the formula for the ratio of the semicircle of the arch of the arch and the diameter of the circle, it is equal to the distance between the racks of the future structure. To this length, add 5-10 cm on each side of the rods, and these segments of the arch of the arch will be inserted into the holes of the pipes.
- Cut scissors into metal or on the machine, the pond segments equal in length between the racks and arcs, which must be welded to them.
- Next, you will need welding, but first, decide what is more convenient: make rack welding, and then dig these bases of the arch and concrete, or vice versa. That is, you can first fix the tubular supports in the ground, check their vertical position with a plumb line and tie with a steel wire on top. Next, welded a metal rod at an equal distance from each other-after 15-25 cm. It is more convenient for some masters to dig the finished welded “ladders”.
- By the way, the intervals between pipes are not at all necessary to make a ladder, and filling in the form of a rhomboid grate looks beautiful. We remind you that this filling between the tubular base should be located on the outside of the arch so that you do not cling to clothes, passing under the structure.
- If the basis of the design of the garden arch is ready, then proceed to the manufacture of the most responsible part - the arch, on which the face of the structure largely depends. To do this, give the pipe -bend or other tools the pelum of the arch is a semicircular (or other required) form. Released semicircles, fasten with each other so that the distance between them is equal to the width between the tubular bases on both sides.
- Next, weld several rods at equal intervals. You should get something like a curved ladder. As already mentioned, filling between the rods can be in the form of gratings.
- The finished arch of the arch can be inserted into tubular bases and welded. But the easiest way is to fix them differently - to score the wedge -shaped wooden choi. If there is a need to disassemble the arch for the winter, then it is not necessary to weld, and the chokes will help to extract the top of the structure.
A whole gallery of arches in the courtyard or in the garden can be made in the same way: under grapes, for example, or under climbing plants along the garden alley. Remember that the unprocessed metal is subject to corrosion, so the finished design must be covered with a primer for metal and painted. And the concrete base of the racks can be decorated with stones or covered with expanded clay.
Wooden dIY
The garden arch made of wood can be made like the metal structure described above, with filling in the form of a light lattice or in the form of a ladder, but instead of tubes, wooden bars are used. For those who have wood work skills, the manufacture of such products will not be difficult. However, the upper part of the rounded shape can cause some difficulties in work - the accuracy of the execution and parallelity of rounded parts is important here.
The simplest way is to make an ARCA P-shaped, and the vaulted appearance can be given by internal semicircular elements that are nailed between the racks and the upper crossbars.
In order to make work high -quality and beautiful, you will need to view several photos of garden arches to determine the size and shape. In your favorite version, it is necessary to make some adjustments, noting the exact dimensions of the future design on your sketch or drawing. When all the calculations are ready, you can proceed to the selection of suitable wood, some of which may already exist, and inexpensive processed trimming for crossbars and fastening elements can be bought inexpensively in any carpentry.
Tip: The classic arch should have a perfectly semicircular vault, then it looks impressive, especially if it is made in white. For a wooden garden arch, 3 types of wood can be used. The basis is from a moisture -resistant beam, the vault is from light strong wood, bars on the sides - from a chopped graduate or from ready -made lattice panels, purchased or made in advance. Filling between the arches can be made of other materials or contain decorative elements, for example, manual thread, bamboo or branches of an unusual shape.
- For the strength of the design of the wooden arch, wood must be treated with an antiseptic, then covered with impregnation and stain, then coated with moisture -resistant varnish or painted. For connecting parts, it is easiest to use screwdrivers and screws.
- The manufacture of the arch begins with the basement of the bases - prepared wooden bars of the required size, which ideally should be higher than your height by at least 1 m. This will be enough for digging and fixing the arch.
- The bases when dug up are additionally sprinkled with rubble and tamped, but it is best to concrete. The walls of the supports are fastened on top, hanging the verticality of the structure with a plumb line.
- The most difficult part is parallel arches. Available method is to cut the base from moisture -resistant plywood, and then strengthen in pieces of timber, which are cut from trapezoid pieces. Ready -made wooden arcs are easiest to order in a carpentry workshop. If you have to use the carpentry glue, remember that it falls well only on dry wood.
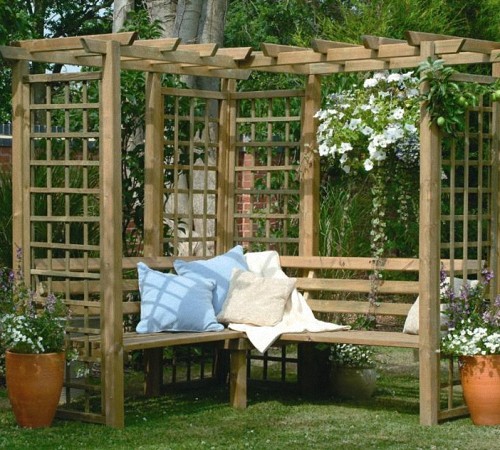
- After fixing the arch of the arch, you can proceed to the design of its lateral grilles. If the arch is located not on the sides of the path, but at its end or in the depths of the garden, then it is advisable to place a bench for relaxation there.
Tip: When your arch is completely ready, decide which plants should turn it in the future. Much depends on the functionality of the arch. If it serves as a support for the landing of a winding large plant with abundant flowering, then the structure should be thorough so that as the culture it grows, it can withstand the overall weight. Allergies are not recommended to plant strongly smelling flowers near the arch with a bench. Medonos flowers that attract stinging insects are undesirable at the arch in the dining area-at the barbecue or barbecue with a table.

