Despite the external monolithism and durability of plastic PVC windows, over time, their condition deteriorates. Most often we are talking about the gaps that have appeared, the backlats of the handles and the like phenomena, to get rid of which you can only conduct regular prevention of the design.
Content
Sometimes there is enough small adjustment, which does not take more than a few minutes of free time. In some cases, if the window was established with violations of technology, you will have to pay a bunch of time in order to correct the situation, since it is often necessary to venture again and from the very beginning.
However, unlike wooden windows, PVC double-glazed windows create much less difficulties and problems.
In this article, we will analyze the main problems that arise with PVC windows during operation, as well as ways to resolve various difficulties, including elementary adjustment and the most complicated repair of plastic windows with their own hands.
Tools needed to adjust PVC windows
Most often, you can limit the following list of devices:
- cross screwdriver (size 3 or 4);
- hex key on 4;
- set of screwdriver nozzles;
- pliers;
- machine oil.
To date, the windows manufacturers are so many that the size and other parameters of products can differ significantly, therefore it is necessary to analyze the double-glazed windows personally and make sure that there are specific parameter tools.
Plastic window adjustment points
- Adjusting the sash horizontally and vertical.
- Adjusting the clamping of the sash (in two places).
- Setting the lower corner of the sash horizontally.
It is important to draw attention to the fact that the manufacturer of plastic windows can use sufficiently specific accessories, or apply some illogical solutions for the buyer in the production of products. Therefore, it makes sense to study the documentation for window products that will make some conclusions, thanks to which the setting and repair of the plastic window will be held as quickly as possible.
Adjusting window handles of plastic PVC windows
- The pen shall be loosened. Unfortunately, this phenomenon is not uncommon, since with regular disruption, any mechanism is wearing, and it must be repaired. Under the handle there is a rectangular overlay that needs to pose and turn this element by 90 degrees. Under this pad, you can detect two bolts that should be promoted using a cross screwdriver. Another tool should not be promoted, as you can scratch fasteners, and its appearance will not be the most attractive.
- Replacing the handle. It should be borne in mind that in children's rooms where small children live, windows are not the safest component of the space. The younger generation can easily challenge the window and make something fatal or just harm someone. Therefore, it makes sense to install a protective mechanism on the handles. It's just enough to replace, you don't need to fully change the window. For this, as in the last paragraph, you need to remove the handle by unscrewing the fastener under the plastic plug, after which it is exactly the same, but in the reverse order, screw the new handle with a protective mechanism. Also, any other handle is replaced, but in the case of the presence of a protective mechanism, it is possible to turn off the window only to those who have a key to him so that no one, first of all children, cannot open the window with the usual way.
- Singing the handle on one position. Despite the simplicity of the window turning out the window, the handle often begins to eat. The problem may be hidden immediately in two things. The first is that the mechanism has been used for a long time, and during the operation he has been driving mud or garbage. In the second case, the handle may not turn to the end due to the too strong clamp of the responding mechanism, so it is enough to produce not the most complex manipulation with weakening. To lubricate the handle, you first need to dismantle it, as described in the past steps. Next you need to arm a small tassel to try to clean the mechanism from pollution. In some cases, it will not be superfluous and strong traction of the vacuum cleaner. Sometimes the detergent for glass, which is washed with the mechanism. You can also use WD-40 lubricant, which is capable of even the most perfect handle mechanism to force work without complaints. As for the configuration of the mechanism to reduce turning efforts, it is necessary on the end of the window sash to pay attention to the eccentrics, as well as on the bolt connections on the loops from the opposite side.
- Switching handle. Such a phenomenon is not rare. Often, the problem is incorrectly triggered by the blocking mechanism, and to resolve the problem there is no need to replace certain elements of the window. To cope with this trouble, you need to open the lock lever and release the movement of the handle. This most lever of the blocker is on the end of the sash on the side of the main handle of the window. Now the windows are available in two different versions, one of which is a plate in the form of a lever, and the second is a lever in the form of a clip that is located on a sealing gum.
Specifications setting down the PVC window mechanism
Unfortunately, many PVC-windows owners faced the situation at which the seal that is present around the perimeter of the sash begins to show itself not from the best side. Ultimately, it is possible to face the fact that the tightness of the window is lost, sound insulation is worse, cold air from the street comes into the room. This can occur either just with time when the window is operated for many years, or because of the thermal deformation between the seasons. Fortunately, modern window solutions allow you to correct this situation without acquiring additional components.
- First of all, it is worth paying attention to the clamping force of the window mechanism. It must be changed about 2 times during the year. It is especially important to spend it when the air temperature outside the window dropped too much, or vice versa - rose. This simple action will significantly reduce the stress in the design of the fittings, and thereby increase the period of using the standard rubber gasket, located around the perimeter.
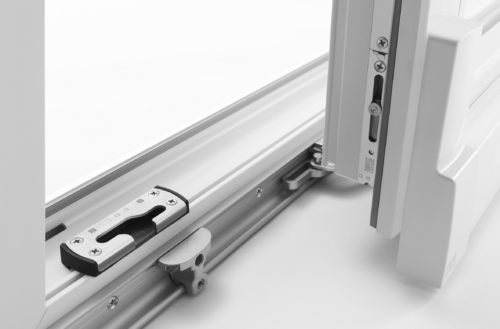
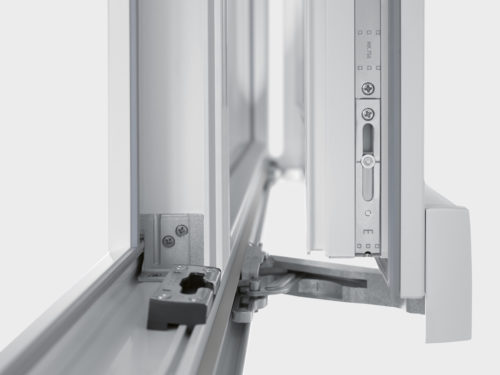
- At the end of the sash, cylinders can be detected, which have an oval shape and protrude a bit outside the design. These elements are called eccentric. Directly on the frame you can detect the retaliatory hooks, to which, when turning the handle, clamping is taking place. If you scroll the eccentrics, then you can get this or that strength of the clamp.
- To adjust the closing of the sash, you must turn the most protruding part of the eccentric towards the inside of the window. For weakening, obviously, the same thing is done, but the movement side is shifted to the outside of the window design. But at the same time it is worth it in mind that directly manipulation with the eccentric may depend on the design of the window products, because this or that manufacturer can implement the design differently. However, everything is often carried out in accordance with the next logical chain: the eccentric assistance of a flat screwdriver needs to be checked (there is a slot on the eccentric), then you need to remove the pin with the pliers, well, and ultimately with the help of all the same pliers to make turning.
- In the event that the cylinders at the end do not allow setting the mechanism, it is necessary to loosen the bolts and move the hook towards the room. This should reduce clamps.
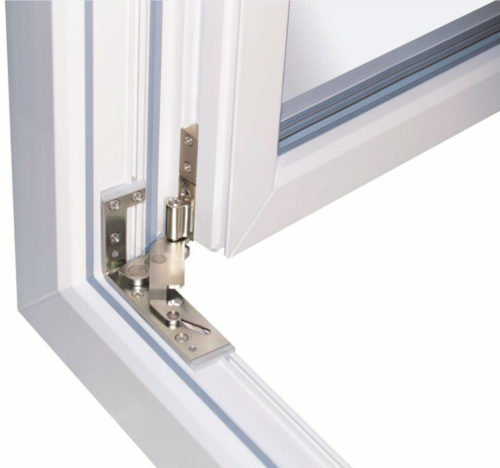
- Next, go directly to the side with the canopies. It is necessary to remove from the bottom of the canopy plastic cap of the so-called platband. And in the canopy itself you can find 2 visible bolts, which are under the hexagon, as well as one hidden fastener. On this basis, it is possible to change the position of the sash, thereby making a change of position in relation to the frame.
- To configure the clamping force, you will need a bolt that comes out perpendicular to the plane of the window. The exact setting must be performed only when the sash is closed. After inserting the hex key to the bolt head, the fastener is scrolling clockwise to enhance the clamp. Scroll counterclockwise, obviously reduces the clamp.
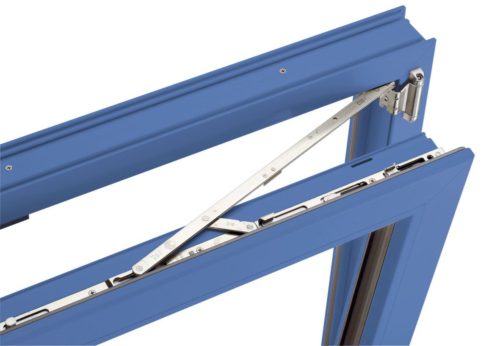
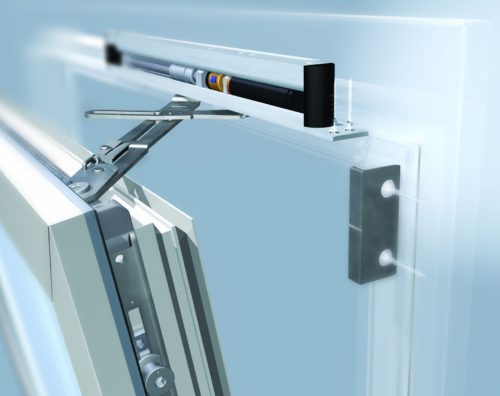
- It should be borne in mind that the upper part of the sash is attached not to the design of the canopy, but directly to the part that is called "scissors". In order to start adjusting, you need to open the window sash, after which on the side end from the handle side to find a clips or lever of the blocking mechanism, most often they are located at a certain angle to the seal and spring. When the block is pressed, you need to check the handle of the sash, it should exit the groove with the upper angle, after which it will hang in the mechanism of scissors. Thus, access to the head, which allows you to adjust the clips of the top of the sash. This head is located right from the bottom side of the lever, which ensures the hold of the sash, and in the usual position it enters the end. With a small turn of the bolt head, it is possible to configure the clamp, all this happens in about the same way as with the pin.
Adjusting plastic PVC windows. The sash hurts the frame
This trouble occurs at the owners of PVC-windows often, and in most cases this is due to the fact that the window is too often in the open state or the design is too often open and closed. Parts of the sash that hold the accessories, we begin to break off, as well as give in to the deformations. It should be understood that nothing with the sash cardinal can happen can happen, so it is enough to adjust the position of the entire sash.
- In the event that the sash touches the frame with its lower end, then there is a need to rise in its lift and turning the upper part towards the mount, which is located on top.
- Sometimes it also happens that the sash is tiled in the middle of the side end (side of the handle). With such a situation, it is necessary to shift the sash towards the canopies up or down, as well as turn the sash towards the lower or upper canopy.
- If the sash hits the frame with its upper end, it is necessary to make a turning of the sash to the side of the lower canopy. If all this is not enough, it is necessary to lower the entire sash evenly down.
It is important to draw attention to the fact that the setting of the location of the sash often occurs with the help of adjusting bolts that have a head under the hex key. In addition, if we are talking about metal-plastic doors, then there are closers in them, which are able to raise the sash at the time of closing, which makes it easier to load on the canopies. If the sash at least minimally changed its position, you need to correct the position of these closers.
- To adjust the height of the sash, use tuning bolts located on the bottom canopy. It is necessary to remove the platbands, after which it will be possible to insert the hex key into the hole, standing on top of the canopy. When scrolling the key clockwise, the sash is closed, and counterclockwise.
- If you need to move the sash to the right or left, you need to pay attention to the bolt, which is located parallel to the window at the bottom of the canopy. This area has two exits with special deposits for the key. Makes scrolling to the left or right of the bottom of the sash makes moving to the left or right accordingly. It is imperative to do everything possible to check the windows efficiency at each side. If no effect turns, you need to repeat the action.
- As for the configuration of the mechanism called "Scissors", here it is necessary to fully open the window of the window, after which there is a bolt head on the mechanism, which is slightly recessed into the design. For it, a hex key is suitable, which allows you to perform the adjustment of the shift of the sash to the right or left.
