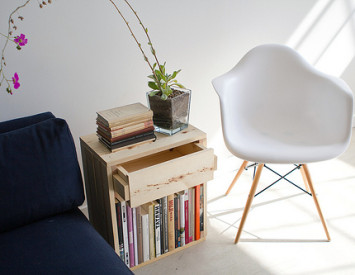
Bedside table - an integral attribute of any bedroom. It performs several functions, including decorative and practical. For example, the bedside tables are used to accommodate bedside lamps, as well as to store various useful things that should always be at hand. Most often, the couches are made of wood or chipboard. This subject of the interior can be purchased in any furniture store, but if you wish to make a note of originality in the interior of your room, you can make a bedside table with your own hands. In addition, making this subject of the interior alone, you can save a lot. Next, we'll tell you how to make a bedside table with your own trees.
Content
How to make a bedside table
Selection of materials

Imagine your attention the most economical option of the bedside table. Its foundation will be pallets from the construction materials. Their main goal is the carriage of goods, so pallets often have a rather strong foundation made of wood, plastic or metal. In our case, we will use wooden pallets in the work. They are several species, each of which is distinguished by its size. Thus, the pallets of the form "American" have dimensions of 1.2 m per 1 m, "eurolets" are released slightly less, their dimensions are 1.2 m by 0.8 m.
Before applying pallets, they should be pretty dry.
In addition to pallets, you will need the following materials and components:
- Hammer, nails, screws.
- Adhesive composition.
- Water soluble wood varnish.
- Saw, drill, mount.
- Sander.
- Sheets of plywood.
- Smart power screw.
- Vice.
- Screwdriver, pencil, line.
It is worth saying, a more reliable connection of elements with each other gives PVA glue. Therefore, it is recommended to use it.
Preparatory work
As mentioned above, the use of pallets significantly reduces the final cost of the product. Therefore, in our case, this particular version of the bedside tables with drawers will be considered. If you have sufficient financial resources, you can use not old pallets in your work, and new wooden or make a bedside table with your own hands.
The process of manufacturing the cabinets start with the disassembly of old pallets. Pre-weaken and loosen the boards so that when disassembling it is not damaged. To remove slats, we use the hammer and moth. Connections between the boards can still be cut through the electric saw. Thus, wood damage will be minimal.

Bedside table: Drawings and schemes
Next, you should create a schematic drawing of the product, according to which to cut the main components of the skeleton chambly. Each side of the frame consists of a certain number of boards interconnected. Side sides of the bedside tables are 3 pcs bonded straps, and the rear - 4 pcs. The boards are connected by rectangular frames.
According to the measurements, cut the planks of 50 cm. They should be in the total number of 10 pcs. Those boards that have a more accurate look, we will use for mounting the side walls of the product, and the rest will go for the manufacture of the back. Then collect the sliced \u200b\u200bplanks together - 3 pieces together for the side parts, and 4 pieces for the back. Next, we make measurements of the resulting walls. According to the data obtained, select rectangular corners for fastening. It should be used to create a bedside table drawings and schemes that were prepared earlier. For more accurate drinking parts, it is best to use a manual saw or hacksaw.
Assembly of the carcass

Go to the frame assembly stage. All previously cut blanks are used for this. To create a framework, rails are used 7 cm wide. Planks with each other are attached with the help of screws. After assembly, check the configuration and sizes of the framework. They must comply with the data that are specified in the product drawing.
After assembling the frame, go to the cutting of blanks for the table top. This will require a circular saw.
Next, it is necessary to preach to polish all the boards that will be the foundation of the product framework. The grinding is better not done manually, but with the help of a grinding machine. Then it is recommended to "walk" on the surface of sandpaper. If you wish to give the bedside table, the original flavor and make it "under the old old", then you can take sandpaper with rude grains, which will create artificial irregularities on the surface of the product. Note that before collecting the frame, all the wooden boards should be pretty dry. Otherwise, wet wood is necessarily deformed during the operation of the product, giving it an unattractive look.
All frame elements are bonded with a nail. Initially, fasten the upper part over the rectangular frame. If the boards protrude beyond the edges of the frame, they can be written, and then polished with a grinding machine or coarse sandpaper. For reliability, you can cross the joints between the boards to deal with any adhesive composition, for example, PVA glue. Make sure that the collected frame is really stable and strong.
After the upper part is collected, it is necessary to build the side sides of the cabinet. The rear and front wall is going to the very least. During the build assembly, be sure to ensure that it has the right rectangular shape. When detecting defects, they should be corrected immediately until glue froze. It is worth saying that in some cases it is more expedient to use non-nails for fastening boards not nails, but screws.
Build a box

Next, go to the next step of installing the bedside tables with your own hands, namely, to the assembly of drawers. To start on the inner side of the frame, you should fill small thin strips. They will facilitate further sliding drawer.
The box itself consists of several parts: 5 wooden boards and one plywood sheet.
The process of assembling drawer is as follows:
- We perform measurements of the future design.
According to the measurements made, cut the lateral details. For cutting we use a saw. - Next, go to the trimming of the sheet of plywood.
- To fix the plywood sheet in the side parts of the box, we make slits, the width of each of them should be 7-9 mm.
- Connect all parts of the design with each other. We fasten with nails. For reliability, you can miss all the joints between the boards and plywood by any adhesive composition.
It is worth saying that it is boxes and a door during the use of the bedside table. Therefore, to the attachment of this part of the product should be considered specially liable. To give strength drawers, all components of the structural elements can be copper from the inside with metal corners.

Next, on the side of the inner parts of the walls, thin rails on which the shelf will be mounted, separating the main part of the couch and the drawer compartment. Cut on the specified size of the shelf. We install it on the rails placed on the side walls of the product. Fix the shelf and fix with nails.
Go to the manufacture of the front wall of the box. As a decor, this design element will be decorated with a heart-shaped hole. If you find it difficult to make a hole of such a form, you can cut some other ornaments and geometric shapes (circles, triangles, squares). For cutting, we need a drill and a ring saw. By the way, if you wish to update the decor of the finished product and remake the bedside tables with your own hands, then you can make curly holes on the front wall of the door.
The order of work is as follows:
- To work, we need a board, which will serve as the front wall of the drawer, as well as the ring saw for cutting and drawing pencil. First, a pencil on the board depict the contours of the figure, which we plan to cut on the drawer. In our case, it will be a heart image.
- Next, neatly along the drawn scheme cut out the heart. For cutting, use an annular saw.
- Lobzik Less outlines of the shape. Then sandwith.
- After you have finished with cutting out the shape, you can attach the front wall of the drawer. For this you will need nails. If you do not plan to redo the table decor, then you can all joints between the details of the box to be treated with glue.
Decor bedside tables do it yourself

Our product is collected, now you need to do it with decor. Initially, we process the wood with a protective composition. Next, we clean the bedside table from pollution, sawdust, dust that was formed during the assembly. We process sandpaper. After that, we remove the construction trash again. Cover the product with varnish. We give mixtures to frozen. Carefully "pass" on the surface of fine-grained emery paper. We remove the dust formed. Cove the bedside table with the second layer of varnish.


