Essles in private houses are often used for various purposes, mainly for storing things that are not needed in the near future. Access to this room is provided through a special hatch in the ceiling of one of the rooms of the house. To climb the attic, stairs are used.
Content
Stairs structures
There are several types of stairs:
- Elections. The easiest option. Making this design with your own hands will not take much time and effort. It is enough to connect two boards using several bars (steps) and the staircase is ready. However, at the same time, the ladder should have a reliable emphasis on the design of the hatch, which requires its significant height. To store it, a lot of space is needed, and if you use the attic often, it must be stored nearby. Typically, such stairs have a fairly large weight, which limits its constant movement.
- Strengers. They are used not only for access to the attic, but also for other work. The ladders are more convenient, however, very high models are needed for these purposes. Compared to the ladders, they have greater weight, and a more complex structure.
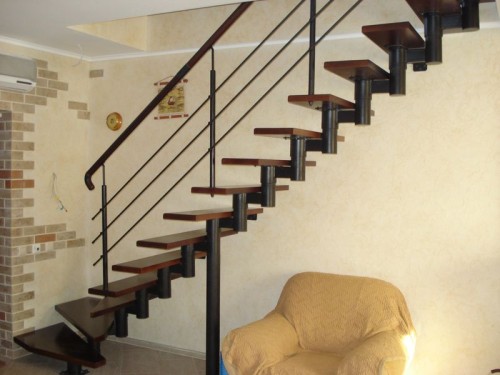
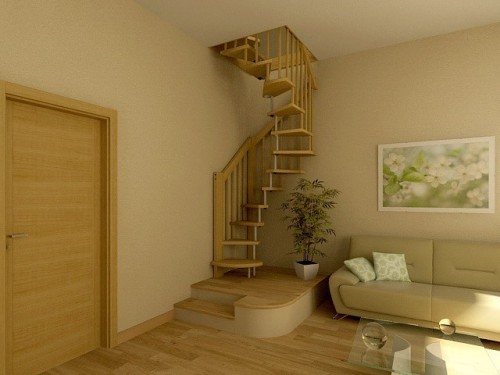
- Monolithic stairs. If the ceiling height is more than 3.5 meters, no design except monolithic is suitable. Providing sufficient strength and rigidity with this length will simply not be real. In such cases, a screw or step -by -step staircase marches are made.
- Folding or "ceiling stairs". A more modern and complex device. Such a staircase is installed on the ceiling hatch. When opening the latter, the staircase is laid out, providing free access to the attic. Such models are the most preferable, since they do not take up much space (in fact, the staircase is hidden), are easily brought to the “working” position.
Now buying a ceiling staircase is not difficult. In almost every construction hypermarket, stairs of various sizes and technologies are sold. If the ceiling height is not standard, the staircase can be made to order.
If you have the necessary tool and skills of locksmith and carpentry, such a product can be made independently. About how to make a ceiling staircase with your own hands - further.
Types of ceiling stairs
Ceiling stairs exist several types, depending on the structure.
- Scinteling staircase. It got its name thanks to the similarity of its mechanism with home tools. Outwardly, such a staircase is more like an accordion that is being laid out. Such stairs are made only of metal. The disadvantage of such a model is that the metal begins to creak over time, and with a poor -quality assembly, the creak appears from the beginning of operation. The advantage of such a staircase is the price, it is not too high in comparison with other models.
- Telescopic staircase to the attic. It is made of many aluminum sections that are folded one into another. Thanks to the use of aluminum, they have low weight and sufficient strength. However, they are not very popular, so finding them in the domestic market is quite difficult.
- Leaning staircase. These are quite exotic models. The meaning of such a staircase is that in a collected state it is hidden in a niche in the wall, and if necessary, it just gets from there. The low popularity of such models is determined by the complexity of manufacture, and, accordingly, a high price.
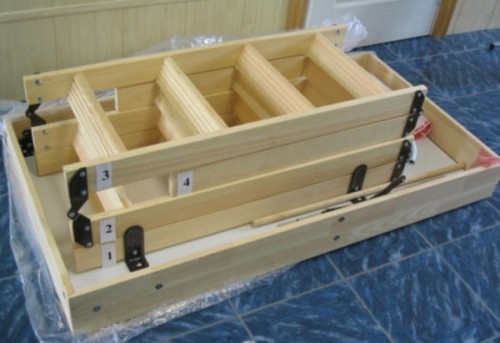
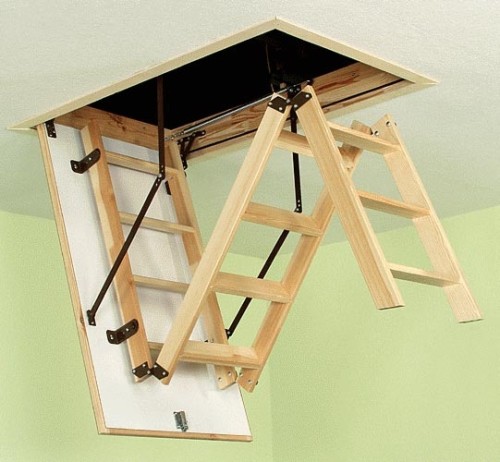
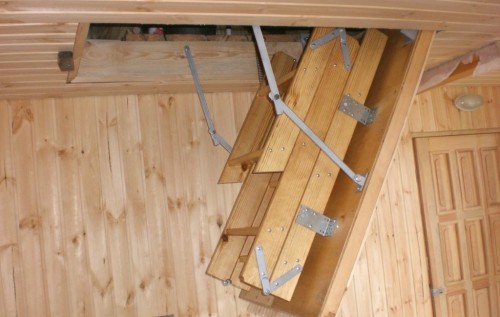
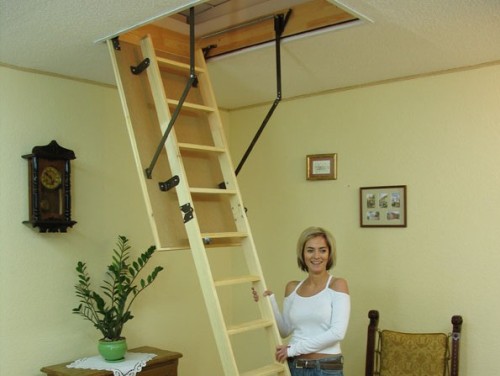
- Ceiling stairs (folding) and articulated stairs. They consist of several sections that are laid out when the staircase is brought into working condition. The first section is motionlessly attached to the hatch cover, and other sections are already joining it. The mobility of the sectional staircase is provided by hinges and special loops. Such models are the most popular, as they are relatively inexpensive, have a margin of strength and a long service life.
Making a sectional staircase with your own hands. Luke
Luke is the main detail of the sectional staircase. He is the basis for her and hides it under the ceiling.
For the manufacture of the hatch, you will need:
- Wooden beam with a cross -section of 50x50 mm.
- A piece of plywood 8-10 mm thick. It is desirable that there is a whole sheet.
First of all, the hatch frame is made. To do this, two long pieces and two short bars are interconnected. The connection is made in the groove. To do this, at the ends of the bars, drifts are made at half, they are lubricated with PVA glue or others, which is used to adhesive wood, and fixed with self -tapping screws. In order for a right angle between the bars, they are fixed with temporary brackets from fiberboard.
The size of the hatch should be 7-8 mm smaller than the size of the stairwell. This gap should be enough for its normal closing, but its size will not affect the heat in the house.
In order for the hatch to be fixed in a closed position, a latch is installed on it. The usual latch that is used for interior doors. It will open with a long hexagon, which will hold the hatch from the fall and help to close it.
Making a mechanism for opening a ceiling hatch with a staircase
This mechanism should not only help the hatch open, but also fix it at a certain angle. The opening mechanism can be bought in a construction store, but if there are several pieces of a corner and a steel strip in stock, it can be made independently.
Work order:
- A hinge pair is made, from two segments of the corners, which are joined by one shelf, while others are directed in different directions, and two steel stripes of various lengths that directly connect them. The connection is bolted, the m10 bolt, the nut is located on the hinge. The bolt pair is not fully tightened to ensure the hinge of mobility.
- The stripes are cut so that their ends do not interfere with the installation.
- Next in the corner, which will be attached to the ceiling beam, it is necessary to make the neckline at an angle. The angle should be equal to the corner of opening the hatch cover. This work is carried out using an electrician or grinder. Now the corner, which will be attached to the hatch cover, will turn around and rest at another at the required angle.
- When the first hinge pair is ready, the second is made. The details for her are cut and drilled along the template of the first part. To do this, they can be fastened with clamps.
- Now that the two parts are ready, they are installed on the hatch cover and fastened to the beams of the ceiling. Thus, the normal operation of the cover is checked.
- Next, another articulated mechanism is made, which will work to maintain the entire structure. For its manufacture, two strips of steel are needed. One of them will be connected to the hatch cover through a stubborn corner, the other to the beams of the ceiling.
- By the end of one of the stripes, a piece of metal is welded, which will serve as an emphasis for the other strip. Then the stripes are in pairs are connected using a bolt connection. Thanks to these mechanisms with an open hatch, the load of its weight will be distributed to both hinges evenly.
- After that, hinges are installed on the lid. Then the fully assembled mechanism is checked for performance.
Making a ceiling stairs to the attic
For the manufacture of the stairs, it is necessary to choose the right material. It is better to use a solid board with a thickness of at least 25 mm and about 100 mm wide.
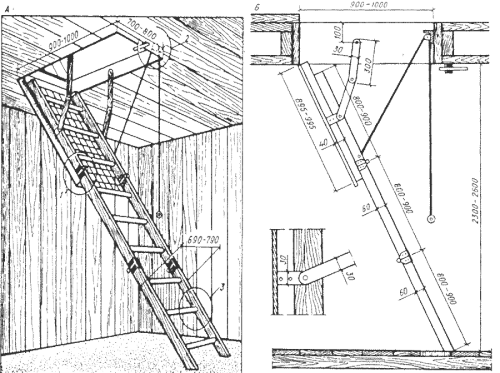
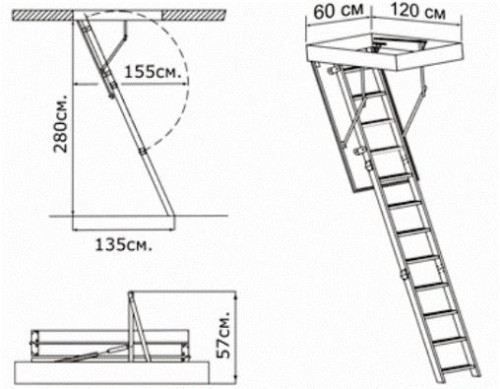
The size of the stairs depends on the distance from the ceiling to the floor, and the angle of its inclination. The first section of the staircase should be the length of equal length lid. The second section is equal to the first or slightly smaller, however, when folding, it should not rest against the ceiling. The length of the third section is calculated by the residual principle.
Installation procedure:
- On the board, the installation sites are marked. The angle of inclination of the step should correspond to the angle of inclination of the hatch cover. In this case, it will be convenient to rise on it. The steps are marked on two bowstring, for which the boards are fastened together with tape. Then, holes are drilled in the sections of sections using the pepper drill. It is in this place that the joint will be installed.
- Next, in places of installation of hinges, the boards are cut. Thus, three pairs of shields for assembling sections are obtained. According to the marking on the bowstring using a chisel, recesses are made to install the steps. The step is installed in the recess and is fixed on the back of the screw. To give the stairs a pleasant appearance, chamfers are removed using the milling cutter.
- When all three sections of the march are ready, they must be connected together using hinges. For their manufacture, 8 small steel stripes (pair per hinge) are needed. By four of them, a small segment of the same strip is welded. In each strip, three holes are drilled: two with a diameter of 4 mm for attaching a strip of hinges to the staircase section, and one with a diameter of 8 mm to connect the stripes into a hinge.
- When all sections of the march are connected together, they must be checked for flexion.
- The next step, the ceiling staircase is attached to the hatch cover with metal corners. After the installation is completed, it is necessary to check the performance of the mechanism, the length of the stairs, so that in the unfolded state it stands on the floor.
- If everything is in order, the structure is completely disassembled and anti -corrosion treatment is carried out. The tree is necessarily treated with an antiseptic, after which it is opened with olifa, and then varnish. Metal parts are primed and painted enamel. During operation, articulated mechanisms are best lubricated with lithol. Then even under adverse operating conditions, they will serve for a long time.
Ceiling hatches with a staircase: photo

