It would seem that it could be easier than gluing wallpaper on the walls? But here you need to not only do everything carefully and slowly, but also correctly prepare the working surface. One of the most important points is the preparation of walls for wallpaper. How correctly you do this work, the final result will depend.
Content
Even if you have never been engaged in repairs, there is nothing complicated in this, you just need to be patient and get acquainted with the rules for preparing walls. Why is it so important to fulfill this requirement? Since the final result we expect to see excellent, that is, even walls without tubercles of protrusions, with ideal joints, then all black work must be performed responsibly. The best option is the use of the so -called multi -stage method. First you need to put the walls under the wallpaper, then plastered the surface, apply a primer layer and, after completely drying out, clean all the irregularities. Hudbing - this is the name of the last preparatory stage of the walls under the wallpaper, but since it is considered very time -consuming and dusty, this can be avoided.
Of course, the technology of walls to wallpaper is currently very different from Soviet methods. Previously, the wallpaper was glued directly onto the concrete wall, and instead of primer it was customary to use newspapers. Imagine, first it was necessary to glue the walls with old newspapers and only then proceed to the final stage of repair. By the way, most Soviet women cooked glue themselves. We do not need this, since our task is to prepare the walls for gluing wallpaper.
How to prepare walls for wallpaper
If the walls are painted with paint, the remains of old wallpaper remained on them, then here you need to approach the preparation of the surface individually. Let's first find out how to prepare walls in a new building.
The easiest way to stick wallpaper on new walls, but here, when arranging housing, certain difficulties arise. For example, as soon as you get an apartment in a new house and get inside the future dwelling, you are embarrassed by concrete floors, crookedly installed sockets and uneven walls. Naturally, in order to put everything in order as you would like to, you need to try. It will not work to quickly stick wallpaper on the walls, so we will act in stages.
Where to start:
- Apply a special liquid solution to the wall (it is called "spray"). The thickness of the layer is from 3 to 10 mm. The consistency of the solution is like mayonnaise to well fill all the hollows of the new wall. Subsequent stages will depend on the density of the solution.
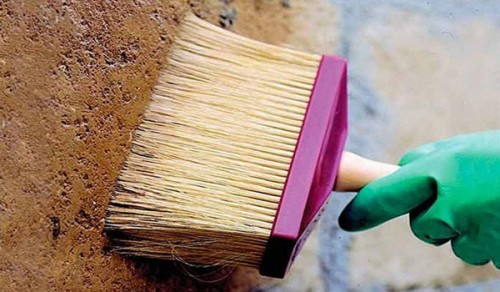
- Primer processing. If necessary, the solution can be applied several times, and with the interval so that the primer is well absorbed.
- One of the subsequent stages of preparing walls for gluing wallpaper is the application of the shelter layer. That is, it is necessary to apply a thin layer of plaster (from 2 to 4 mm) in order to smooth out irregularities.
- The final stage is the grinding of walls after the putty completely dried. This part of the work is performed using fine sandpaper and a special device. Since the work is very time -consuming and dusty, you can periodically moisten the surface from the spray gun (just not too abundantly). It is advisable to open the windows, since all the dust will settle on the floor and ceiling.
For work, we need:
- primer;
- starting and finish putty;
- 2 spatulas;
- rubber spatula;
- a bowl for kneading the solution (you can buy ready -made putty in buckets);
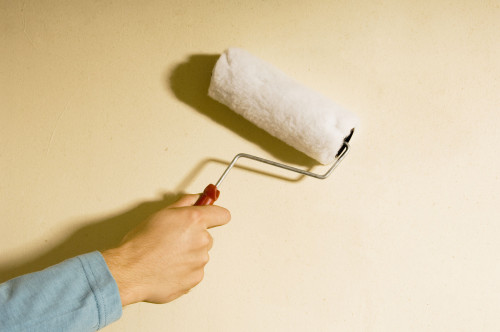
- a roller for applying a primer;
- sandpaper.
At first glance, beginners may seem difficult to seem difficult, but in fact everything is not as difficult as it seems. It is much more difficult to prepare the old walls.
Preparation of walls for wallpaper with your own hands
How to remove wallpaper
Most people have to cross the wallpaper in their dwellings several times in their lives. Many are already getting old apartments with wallpaper on the walls. Naturally, they need to get rid of them. For you, this procedure will seem boring, but it is better to try to gain patience and still get rid of old wallpapers than to stick new new ones. This can be fraught with the fact that you will have to redo all the work again, because as soon as glue comes to the surface, they will get wet and will disappear soon.
Prepare first everything you need, so that then not to be distracted in search of the desired subject:
- average spatula;
- spray;
- foam roller;
- ordinary water;
- vinegar.
So, in order to quickly and easily remove the old wallpaper from the walls, you need to familiarize yourself with these recommendations:
- It is possible to simplify the task, respectively, and save precious time when preparing walls, you can, if you previously moisturize the surface. To do this, use the spray gun, only fill the container not with cold water, but hot. By the way, you can moisturize the old wallpaper with an ordinary roller, just make sure that during operation the water does not spray around. To protect the floor from moisture, think about this moment - the parquet and linoleum can be covered with a construction film, and the edges should be fixed with paper tape.
- Remember that near the batteries and under the windowsills, the wallpaper always hold stronger than on the walls. In order to remove wallpaper in these places, it will take more patience and time. Do not try to take off the paper with your hands, better use the spatula. You can add several tablespoons of vinegar or other remedies to the water that will dissolve glue.
- Remember, if you wet the walls, then the electricity in the room needs to be de -energized. Water can get on the wires, and this is already dangerous for humans.
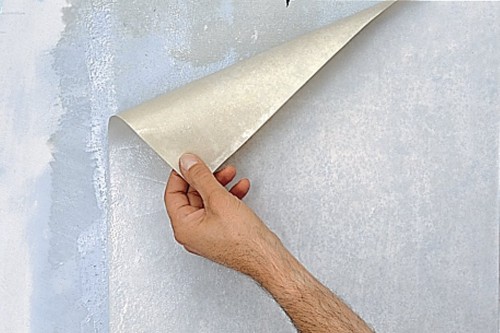
- After moisturizing the walls, wait 3-5 minutes and only then carefully, remove the wallpaper with a spatula.
A layer of primer for walls under wallpaper must be applied to the purified surface. After it is absorbed, you can put the uneven areas. Next, you need to wait for the solution to complete the solution and again apply the primer layer, after which you can start gluing the wallpaper.
How to prepare a painted wall
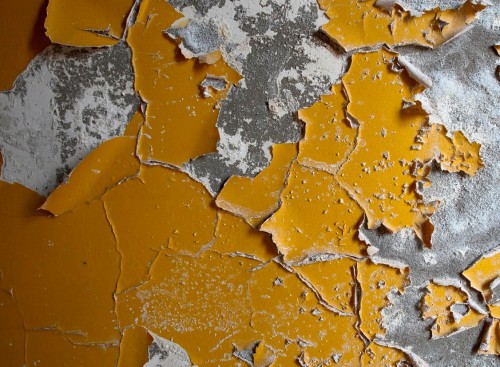
Sticking wallpaper on a previously painted wall is very difficult. The wallpaper on slippery surfaces hold is very bad, so you need to get rid of the paint layer and only then start work. This is a very laborious work, since the paint is very difficult to lag behind the surface. What people do not try to come up with to remove paint from the walls.
Let's get acquainted with the most effective ways:
- you can skip the surface and make several notches in the wall, and then glue the wallpaper. Perhaps this option will be fast, but it is not known how, after such preparation, wallpaper will be held on the walls;
- paint processing with a layer of primer. This is useless, because the wallpaper can stick, but how much they will last, no one guarantees. With the slightest temperature fluctuations and a humidity increase, they can lag behind the wall;
- warming the paint using a building hairdryer. This method is effective, but not harmless. The paint heats up and becomes soft, it is easy to remove the spatula from the wall, but at the same time it emits harmful pairs unsafe for human health. If you choose this method of preparing the wall for painting, then you need to open the windows so as not to be poisoned by chemical pairs;
- removing paint using a grinder is an effective method, but very dusty. It is necessary to close all the cracks and doors, otherwise there will be a lot of dust in the neighboring rooms;
- using a special solution - washing should be applied to the entire surface of the wall, and when it softens, removed with a spatula. Be careful: ventilate the room, put on protection.
If it is not possible to clean the wall of the paint, then you can take a primary concrete primer or wallpaper glue. But even then to guarantee that the wallpaper will be held for a long time, even experienced builders cannot.
When you remove the old paint from the surface, you need to level the walls under the wallpaper. To do this, first clean the surface, then apply a primer mixture and only after that you can start putty walls under the wallpaper with your own hands. This is an important and crucial stage in the preparation of the surface, so the work must be done correctly and efficiently.
How to put the walls under the wallpaper correctly
With the help of putty, you can align shallow cracks (up to 5 mm). Work is performed at temperatures from +10 to +30 oC, air humidity - not higher than 50%.
To prepare walls for wallpaper, you can buy a ready -made universal putty. It is sold in small containers. Its cost is more expensive than the price of a dry mix, but you do not have to look for a construction mixer and a container to correctly prepare the solution. Each type of building material has its drawbacks and advantages. For example, a dry mixture is stored for a long time, and the finished putty after you remove the lid, you need to use it right away.
Since the finished putty gives shrinkage, it cannot be applied with a thick layer. Make sure that the surface is clean and dry. Before starting work, soak the walls with a primer, this will improve the clutch of the solution with the surface.
How to put a putty:
- Wall preparation work can be divided into 2 stages: first, a layer of starting putty (it is larger) is applied, and then put the finish putty (fine -grained) with a thin layer (after drying).
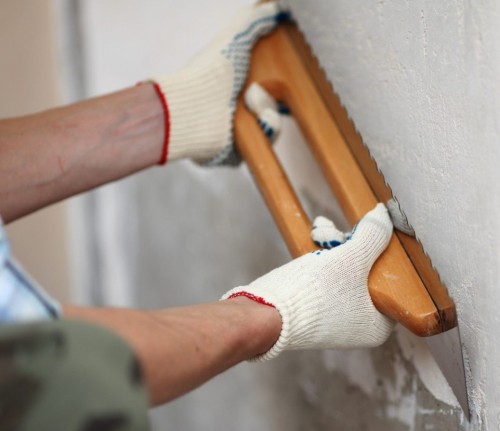
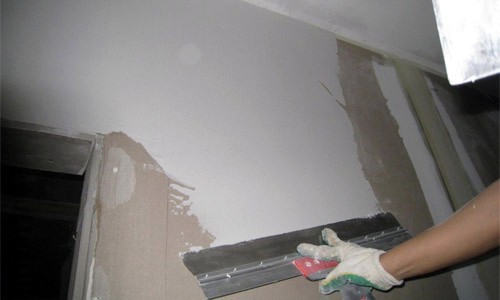
- If it is not fundamentally important to you, you can immediately pass the walls of the starting putty. For work, use a wide spatula. It is necessary to put a little putty on a thin blade (with a narrow spatula) and draw a wide building tool along the wall. Movements-from above-down. After the layer is evenly distributed, you can continue to work.
- If your wall is porous, then you can facilitate your task and put their putty on a special net. To do this, you will have to putty the wall completely, but the mixture will go to bed well, and the wall itself will become even and its strength will improve.
- Approaching a putty on the wall, keep a spatula at an angle of 30 o. This advice will help you to avoid hillocks and differences: block the previous layer with a new one, smoothing the differences with a spatula.
- To make a beautiful even angle, you need to use a corner spatula. First, you need to put putty on the corner or slope with an auxiliary spatula (small), and then level it with an angular spatula. A layer of putty should dry over a day.
- When the starting putty dries, it will be possible to apply a layer of finish putty. After 12 hours, the wall can be primed, and after 2 days, when the walls are completely dry, it is time to start pasting the wallpaper.
Preparation of walls from drywall for wallpaper
Putting the walls for wallpaper is necessary only if they are not very crooked. If the differences are large, it is best to align them with drywall. Preparing the walls for gluing wallpaper will give you pleasure, because the work is not dusty and not hard:
- First, it is necessary to primer the surface. Wait when the primer dries (from 8 to 24 hours).
- Plush the two sheets of drywall with a special ribbon (Serpyanka), and then apply a thin layer of putty on top.
- Now you can apply a thin layer of putty and, after drying, walk along the surface first with a large sandpaper, and then small. So you can achieve smoothness.
- Now it remains to apply another 1 layer of primer and wait again until it is absorbed. You can start gluing wallpaper only when the walls are absolutely dry. If you are not sure of this, you can make a test: glue a small piece of polyethylene into the adhesive tape. In the morning you can see the result: if polyethylene remains dry, it means that the wall is dry and you can glue the wallpaper. If droplets of water appear from the inside, then you need to dry the surface.
Remember that it is forbidden to glue the wallpaper directly onto the cardboard, so you will ruin all the finishing material. Wallpaper will be held, but with the slightest mechanical effect in the wall, dents will remain, and it will not work to re -roll, since it is impossible to remove wallpaper from the wall.
Humidity, smoothness and strength - these requirements must be observed. If the wall is pouring, then the wallpaper will begin to lag behind the wall over time.
How to prepare walls for wallpaper, you can watch this video:
