Is your dream - a shower cabin of tiles? With this task, you can cope on your own - your bathroom will be transformed, and you will save a family budget, because the purchase of a pallet or one-piece shower box can be postponed to better times. If you finish the floor and walls in the bathroom with a tiled tile, then you can make a beautiful and stylish shower room.
Content
Laying the tile instead of buying a shower cabin will save a family budget and make the size of this necessary attribute in the bathroom at its discretion. You can do even without a pallet, it is easy to make from the same ceramic tile or not to do the side. The place for the pallet will still have to do or provide in advance (during the construction of a house or a bathroom finish) or a bias in this place so that water flows into the drain hole, and not spread through the floor of the bathroom.
What are the advantages and disadvantages of shower cabins from tile without pallet
If carefully study the history, it becomes clear that in the last century, and long before people settled in the bathroom that way. After all, modern gidroboksom and showers at the time was not, by the way, the bath is also not installed in each apartment. It was possible to do without a bath, but no place where we could take a shower - no way. Therefore, the enterprising owners settled in the room for bath treatment alone. They were isolated part of the room in the bathroom, laid on the wall and floor ceramic tiles, pre-thought through, where will take place the pipe, and how best to connect the mixer. So it was decided to equip the shower in private homes or cottages. In apartment buildings this idea become a reality only recently. By the way, this is a great option to save space and do not buy bulky walk-in shower. You can do without the pallet and thus save money and buy a nice tile. In addition, an undeniable advantage of self-construction of the shower stall tile is a comfort and convenience. This shower is suitable for people with disabilities.
What are the benefits under the shower tiles:
- long service life;
- reliable construction;
- ease of operation and maintenance. Tile is easy to clean, it withstands any cleaning agents, which is not the capricious shower. Tiles do not attract dirt and will not absorb moisture;
- durable surface. If we compare the materials of construction for modern showers with tile, it can be concluded that the material is durable, and even after 10 years of operation, nothing will happen to tiles (with proper care);
- make the shower tiles could be anyone, because they do not need to buy expensive materials. You only need to choose the right tile and faucet.
And now you need to know about the shortcomings of the shower stall made of tiles:
- in comparison with the expensive shower box in your nook for showering will be only one watering;
- replacing water and sewer pipes can be accomplished only during overhaul. We'll have to tear the tiles to replace the portion of the pipe or put a new mixer. This should take care in advance and select only high-quality materials ";
- difficult to connect to the sewage system.
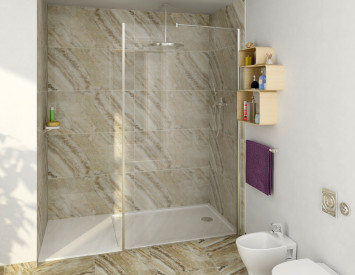
Shower stall tile. Photo:


Tile shower
As it has already become clear, the shower cabin of tiles is a simple solution. But even such an idea can be turned into a small masterpiece, if you correctly pick up the facing material. A popular finishing material for bathrooms is a tenth of the tens of years old.
When choosing this finishing material, it is necessary to take into account the main characteristics of the tile. Namely, the tile can have a glossy surface (smooth and slippery on the touch), matte (without brilliance), smooth and also relief. What tile is best to purchase?

Let's focus on this issue.
- if you pay attention to the glossy and smooth tile, you can find that the tile is capable of reflecting the light. If you competently arrange the lighting devices, then the small space of the bathroom will turn into a fantastic underwater world. Watch the game of light - the tile reflects the rays that play in the jet of water and blurred beautifully on the wet walls. Such a tile is easy to contain, since the contamination is not delayed on the surface. There are also cons of the product: even if there will be some water on the floor, the tile becomes very slippery as a rink. Therefore, it is necessary to think carefully all the details and if you decide to make a shower cabin from such a tile, then on the floor you need to immediately buy a rubber rug that prevents the slide on the surface;
- excellent alternative to slippery surface - laying of matte tiles. In large building supermarkets there are separate showcases with ceramic tiles intended only for laying in the bathroom. There are many collections of such tiles, for wall and floor decoration. You can not worry about your safety, even if an extra liquid will accumulate in the pallet;
- relief tile is not only the most practical. With the help of this material, you can implement the most bold ideas in reality, for example, make a shower room under a tree or natural stone.
What color of the tile remains in priority? Designers will advise you to stay on calm colors, always in fashion tile of gray tones (all shades), brown, as well as white and black.
If you want to finish the shower tile and get closer to the water element as much as possible, it is worth paying attention to blue or green (all shades starting from gentle and ending with saturated). A blue palette of tile, beige and green looks in the shower cabin.

If your idea is to make a shower cabin original, pay attention to the juicy colors of the tile. Bright elements on a monophonic wall will revive a small space. Think about mosaic techniques, you can lay out a fine mosaic tile with a beautiful pattern and thus make a shower room individually and unique.
Shower cabin of tile do it yourself
We start with preparation. First you need to think about how the ladder will be. This nuance must be taken into account when developing a project. If you decide to make a shower cabin without a pallet, then you need to take care of the floor arrangement in advance. So, to make a shower room with a smooth floor (visually), the trapp itself must be mounted at a height of 15 cm from the floor level.

If there is a desire, think about the step - the pallet for the shower can be from the tile, but better, as well as safer for the further operation of the shower cabin to make floor thickening.
It should consist of 5 layers:
- polystyrene foam (thermal insulation layer);
- cement screed;
- waterproofing layer;
- layer of cement screed;
- tile.

Place the ladder is needed by such rules: in the center or at the entrance to the cabin.
Do not forget about the need to build a slope for removal and flowing water. Another point - the sizes of the shower cabin from the tile can be different, depending on the area of \u200b\u200bthe bathroom and your personal preferences. And an important detail, what will the door have a shower cabin? You can buy glass, matte plastic or transparent. The door will help avoid splashing water on the bathroom. By the way, you can save and not install doors, and limit ourselves only to the shower curtain.
Tools and materials for laying tiles in shower
To work on laying tiles, you must prepare the following:
- tile;
- glue for tiles;
- mixer with shower watering can
- roulette;
- pencil;
- construction level to determine the slope;
- kelmu;
- set of spatulas;
- capacity for mixing the solution;
- knife for cutting tiles.
How to lay out a shower cabin
Let's start with the structure of the ladder - this device is a design of durable material (cast iron or plastic) in which there is a grille with a housing, a siphon and a seal, as well as a presser device to ensure the sealing of this site. The sewage ladder is embedded in the floor and connects with the sewer pipes to ensure the outflow of water from the shower.
The next stage is the laying of waterproofing material not only on the floor, but also on the birds. Let's start with the floor - you need to remove the old screed and lay a layer of waterproofing material (liquid waterproofing is represented in the photo).

Liquid waterproofing is a special powder that divorces on the principle of preparing a concrete solution. So that a homogeneous mass is obtained, you need to dissolve water powder (proportions according to the instructions) or buy a finished waterproofing mixture. So that the moisture does not penetrate inside, it is enough to apply a thin layer of the material with a wide brush or roller in the place where the arrangement of the shower cabin is planned (on the floor and walls).
When the insulation layer will dry up, you can lay out the base of the brick (it is better to work with silicate brick, it is more hardy). The brick laying solution will prepare from the cement bucket and 3 buckets of river sand, add 1 water bucket and a little plasticizer (only 70 g). You can buy a ready-made mixture for masonry in a construction store.
How to make a brick pallet:
- on the base, lay a metal mesh and a layer of cement;
- we put brick. The size of the pallet may be different, depending on the size of the room. Observe the condition so that the pallet in the finished form is higher by 5 cm than the sewage pipe;
- in the process of laying bricks, you need to decide on the location of the drain hole, to make the ladder to connect it to the sewage pipe;
- pipes located under the slope so that water flow down and not stood. If there is no slope, then under the pipes it is necessary to put a bar (angle of angle of 3 degrees);
- i fix the sewer pipe on the floor, pre-insert into a solid metal base, so that under the weight of building materials, the pipe is not damaged or we buy and install a solid design (orange color);
- we establish construction lights and pour the prepared base of cement. The solution is kneaded together with crushed stone and sand. To remove the surplus of air, we insert into an even unknown solution of the trowel;
- after drying the screed surface, we proceed with a waterproofing mixture;
- the next step is to apply a self-leveling mixture. In the place of draining the hole we deepen so that water flows without difficulty. The floor level must correspond to the level of the tile (the height is equal to the lattice of the lattice);
- when the screed grabbies, it is possible to put the tile on the pallet, taking into account the tilt for the drain hole. Buy special glue for tiles with water-repellent properties so that the tile is well kept in a wet room;
- carrying out water pipes, installation of the mixer, laying electrically conductives for lighting and arrangement of forced ventilation - all this needs to be done before the tile will be laid;
- the final stage - laying the tiles on the walls and the floor is the most important and responsible part of the work. First you need to make a solution (or order ready-made in the construction store). Tile laying should be started from the bottom from the corner of the wall, gradually moving up. First, we put the cement layer on the wall, we carry out a wide wave-like spatula on the wall, we appline a solution to the tile. Machine with a wide spatula solution and attach the tile on the surface. The next tile must be planted in the same way. Between the tiles, while the solution is still fresh, put the beacons so that the distance was the same everywhere.

How to make a shower cabin with your own tiles, see this video:


