Kitchen wall panels are made of polyvinyl chloride. This material is universal, hygienic and PVC mechanical indicators make it available for use in residential premises. Another feature that makes PVC suitable material for use in kitchen premises - a variety of colors and textures. Panels are covered with laminate to which any image is applied.
Content
- Types of kitchen panels
- Preparatory work before installing kitchen panels
- Calculation of the material required for installation
- Installation of kitchen panels glue
- Installation of kitchen panels on a wooden frame
- Mounting glass panels for kitchen
- Rules for installation of kitchen panels and recommendations
Types of kitchen panels

There are three types of PVC panels that allow you to quickly and easily repair:
- Set of narrow panels. Such a wall panel for kitchen sizes has from 25 to 50 cm. Usually they reach a length of 2.6-3 m. Such panels are similar to ordinary lining, there are similar traits in the installation method. The best installation option is a fastening on a wooden or aluminum crate. If the kitchen size is small, then the walls align the walls before mounting the frames to minimize the residential space. Shakes in the corners are made up with moldings.
- PVC Square tile. The dimensions of this product range from 30x30 cm to 98x98 cm. With the help of such panels, there are various motifs or patterns, according to the principle of laying a conventional tile for walls, combining various sizes and color solutions. To install such tiles, a frame of a wooden base is also installed. Between themselves, tiles are assembled according to the principle of "comb-groove".
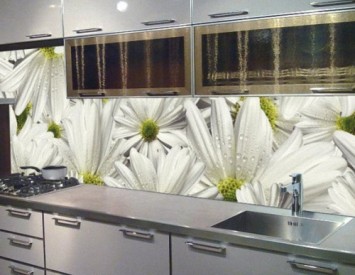
- Kitchen panels leafy. Such a material is a large-size monolith, on average it is about 1.22 m by 2.44 m. On its surface, various images, prints and patterns also apply. The thickness of this material is less, which makes it more suitable for mounting in small rooms - 3-6 mm. For sheet panels there are no special butt accessories, all the seams are filled with ordinary sealant or covered with a net profile. All wall panels will be varied and the price that depends on the quality and type of material execution.

Preparatory work before installing kitchen panels
At the beginning of the work, it is necessary to take care of the presence of materials that will be needed for installation. This applies not only to panels, but also tools. The list of purchases will include:
- wall panels selected type;
- corners;
- woody rails;
- dowel;
- construction level;
- brackets;
- roulette;
- profiles;
- pencil for marks;
- self-tapping screw;
- impregnation for protection.

Before installation, it is estimated by the degree of flattening walls to which panels are planned. If the walls are smooth enough, and the room itself with a small level of dampness, then it is possible to mount the panels directly on the wall using glue. In rooms with high humidity, installation is carried out on a frame of wooden plates. In this case, the price of the kitchen wall panels will increase slightly, as expenses for additional materials will increase. Also, the frame of wooden plates will allow to align the walls without plastering.
When mounting the frame remains some space, which is filled with insulating material. This measure is not obligatory, but it will not only reduce the level of noise entering the room outside, but also to make it warmer, since noise insulating materials hold the flow of warm air. Also, this method is good if you need to hide the wiring, communications or disadvantages of the wall.
For walls with irregularities that are not planned to install bars for panels, preliminary works are needed. The wall is well cleaned from dust and dirty plaque, and then leave for a while. The wall must be completely cleaned, not to have residues of the previous decorative coating, it concerns any type of material - paint, wallpapers, plaster, etc., it is necessary to better grasp adhesive with the surface. The wall is equalized by putty, if irregularities are very pronounced, plaster works are needed. After performing all the preparatory work, the wall is treated with essay.

Calculation of the material required for installation
- One of the most responsible stages is the calculation of the required amount of material, which will minimize the cost of repairs. For the correct calculation, you need to know the exact dimensions of the panels themselves. Next, the width of the kitchen wall is measured, the total area is divided into the width of the panel. The resulting digit and will mean the exact number of panels. But often the amount is not as possible, some panels will have to trim and fit into size.
- When calculating, the area of \u200b\u200bdoor and window openings takes into account, this value is deducted from the total area. The surface around them is treated with trimming. The mounting of the wall panels in the kitchen is made with the help of corners and profiles, the number of which also needs to be calculated. During installation, it is necessary to leave small gaps between sheets, since the panels have an expanding property with time. Also come with a fit of the panels in height - between the panel, the floor and the ceiling leave the clearance of not more than 10 mm.
- In the second stage, the panels are cut in the required quantity and dimensions. If a hacksaw is used for cutting, then the sections are made only on the front side of the product. When using a circulating saw, an incision is made from the base side. A smooth cut is obtained if you first cover a slope, and then, putting more power, cut the panel itself. The knife is kept strictly perpendicular to the surface.
- So that the lines are smooth, it is necessary to use a flat bar or ruler. You should also not forget about holes for outlets and switches. Before mounting the panel, it is maintained in a room with a standard room temperature about semissions, it is necessary to align the humidity level of material and the environment. Material is left unpacked.
Installation of kitchen panels glue
Kitchen decoration with wall panels silicon, acrylic or universal glue for construction work is performed. Performing work, you need to adhere to the manufacturer's recommendations that are specified on the package. Works start from the inner corner of the room, then continue to move around the perimeter. The glue is applied to the entire area of \u200b\u200bthe panel, smooth stripes along the long edge, a strip of 3 cm wide, a little glue is applied to the center with 20 cm gaps. The panels are not joined tightly, leave the gaps of several millimeters. Next, these gaps will be filled with sealant. The gaps leave both the joints of the panels with window and doorways.
On the edges of the wall panels for the kitchen of leafy mounted profiles from plastic, they are selected in color. All profiles are filled with sealant. The panel is applied to the surface, pressed and closed with a hammer so that the glue is welcome to the base. So that the material fastens well, supports support to the panels. The remnants of sealant are wiping with rags, the sheets are strengthened with nails or screws, this measure is used only if necessary.
Installation of kitchen panels on a wooden frame
- Work on the installation of panels on the wooden frame starts with the installation of the base. Prepare brus from wood, their size in thickness is selected depending on whether there will be between the panels and the wall layer of the insulation. By deciding on the use of noise insulation materials, it should be remembered that the panels also delay the sound.
- Tags are applied to the working surface. At this stage, it is necessary to determine the placement of the material - if the plastic wall panels for the kitchen will be scented vertically, then the rails are located in a horizontal plane. It should be noted that the installation of panels is possible not only in the horizontal position, but also in vertical, or diagonally. But bars of the frame are always perpendicular to.
- According to the markup, the frame is fixed with dowels or self-drawing. The step between the bars is 50 cm, to ensure the reliability of the attachment. The finished framework is treated with impregnation to protect against humidity. Next, the brackets are fixed angular profiles. The material starts to be attached to the frame, starting from the top left corner and moving towards the window or door it. Installing the mounting edge is made on a tree rail. Here also for attachment are relevant brackets.
- Each subsequent panel falls on the groove of the previous one. All edges are attached to the crate. Each time you need to check the level of panel mounting using the tool. The very last panel is placed in the angle groove, it will close the connection. After installing all panels, plinth are installed and other decorative elements ending the picture.
Mounting glass panels for kitchen
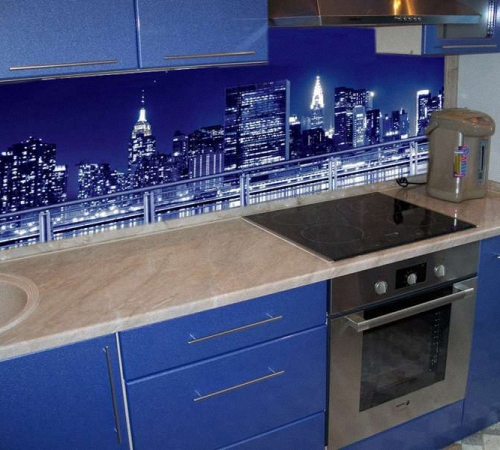
Another option wall panel for kitchen - glass. The most important advantage of such a material is design. Glass panels are combined with most modern materials and furniture design. This type of material has a lower cost than the tile, while any image is applied to the surface, which will cost at all expensive.
Also among the benefits of glass panels, their compliance with the parameters of such a room like a kitchen. They are not afraid of humidity, temperature and oily spots. The surface of the glass panel is easily cleaned from any contamination. Shows all the beauty of glass wall panels for the kitchen photo below.

The third advantage of the material is a simple installation. Glass wall panels for kitchen are mounted simply enough - using mounting films that are attached to decorative installation elements. The main part of the mounting base is screwed into the wall or is strengthened with glue. Preferably option with screwing, as it will allow you to easily dismantle the panels if necessary. Glass panels, along with sheet plastic material, help remove all flaws and irregularities of the wall. To do this, they are installed at some distance from the surface.
Rules for installation of kitchen panels and recommendations
To prevent various unpleasant situations during installation, as well as for the most optimal use of panels, it is necessary to adhere to some rules:
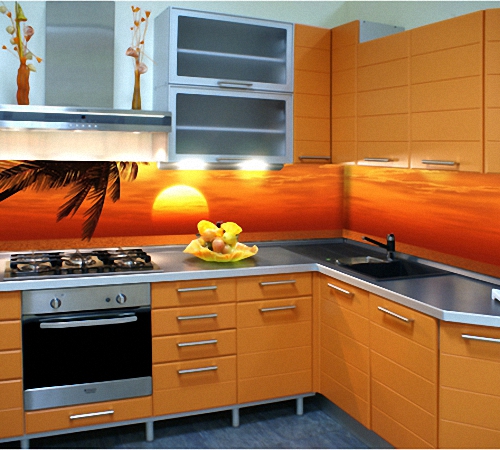
- Kitchen panels provide for applying any pattern, colors and textures. Decorative processing passes with special ways of applying an image. The range of patterns is not limited - wood, stone, oriental motifs and so on. If the drawing is applied independently, it must be protected by a special coating - glossy or matte. It is necessary to protect against dust, moisture and ultraviolet, due to which the drawing will quickly lose its saturation.
- Panels made of wood chips or fibers are covered with veneer or varnish, it is acceptable only for the bases with low humidity and without expressed irregularities. In the case of flashes on the wall, they are hidden by the crate to which the panels are mounted with brackets, screws are used from the rear.
- The panels are installed according to the "groove-groove" or "groove-ridge" method. The last option provides for docking the panels among themselves, so that all the drawing lines come together. This is a good option for rooms with high sanitary requirements. The "PAZ-PAZ" technique is also carried out in the case of a decorative insertion in the panels.
- If heavy equipment will be installed on the walls, the fasteners for it are installed on the crate or for the basis of long screws. This layout eliminates the installation of glass panels.
- For rooms with pronounced irregularities of walls, mount panels on the frame. Or align the walls to the required level.
- Panels are with a matte or glossy coating. Glossy surfaces create the visibility of the mirror reflection and increase the space. But these panels are demanding in care, the dirt from them must be removed quite often, and it is impossible to use cleaning agents with abrasive elements.
- In any case, wall panels are a budget option for kitchen walls. It is only necessary to carefully calculate the project to determine the required amount of material and finish the walls quickly and simply.


