
Niche for the bed in the bedroom serve not only by the original addition of the interior, but also perform a very important function - create a feeling of comfort and protection in sleeping. Even a completely shallow niche is capable of instantly transforming the room and give him comfort. If you think what that The pleasure is available only to the dumplings of fate, we are in a hurry to delight you - a bed in niche with your own hands can make anyone who knows how to keep screwdriver and hammer.
What to build a niche?
The modern building market offers a lot of materials from which one could make a niche in the headboard, but The most convenient option is plasterboard. It is inexpensive, environmentally friendly, little weighs, and the most important thing - Work with it is easy and simple. With the installation of the niche, any home-grown master will cope.

But in the building of building materials, so much varieties of drywall, which is not wounded. Inexpected The master will be difficult to navigate in such a variety, so we have prepared several tips. First of all, you should familiarize yourself with the classification of plasterboard sheets and their technical characteristics. In the last, most plasterboard products are similar: they have an absolutely smooth surface, they fear moisture and rather fragile.
To enhance the design from GLC use special metal profiles different stiffness Depending on the intended load. In the case of a conventional niche for the bed, low-cost rack profiles are suitable without amplifying elements and reinforcements. If you plan to install a niche with built-in shelves for decorative decorations or useful trifles that may need in the bedroom, come on Profiles are early.

For working with plasterboard does not require special tools. This is yet One advantage of the material. Cut the sheets are very easy with the help of an ordinary stationery knife - it is only necessary to carry out a flat line to cut a layer of cardboard, break the sheet in this place and gently cut the second layer of the trim. To attach GLC to the framework of profiles, screws are used.
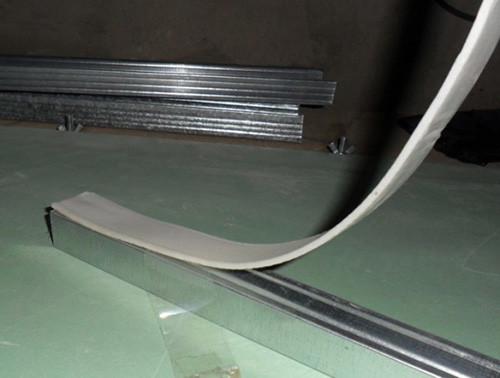
Useful advice: Gypsum Carton is afraid of moisture, but this does not mean that it is absolutely impossible to wet. If you want to bend the sheet to make the arch or other curly element, slightly moisten it and slowly bent in the desired direction. Lock it in this position until complete drying, and he Save your form.
With plasterboard it is easy to work not only in terms of installation, but also with respect to the finish decorative finish. Since the surface of the sheets is perfectly smooth, then any coating falls on hERE flawless. After coating pluckle On the surface you can apply painting, making decoupage, glue wallpaper and paint.

There are several types of plasterboard:
- Wall - manufactured in sheets 2, 3x1,2 M. or 2, 5x1,2 M. 12.5 mm thick. As it is clear from the title, this material is used to cover the walls.
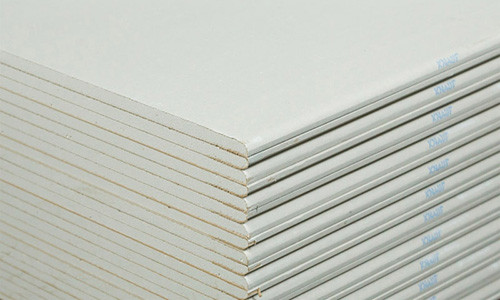
- Ceiling - sheets format 2x1,2 M. or 2, 5x1,2 M. 9.5 mm thick. Used to cover the ceilings and it is necessary to choose to create a niche above the bed in the bedroom. The technical characteristics are practically the same as the wall - it is afraid of water, not very durable, but The cost of it is much lower (the most cheap View of plasterboard).
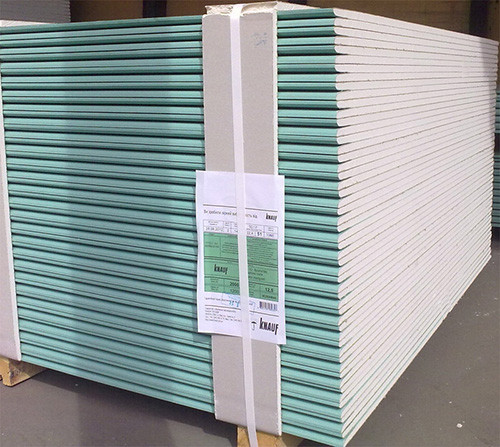
- Moisture resistant - material in format 2, 3x1,2 M. or 2, 5x1,2 M. 12.5 mm thick. Unlike previous two species that have gray, moisture-resistant plasterboard green cardboard. It is used in rooms with elevated moisture levels. Moisture resistance is explained by the special composition of the protective cardboard layer - it is impregnated with anti-grapple waterproofing agent.
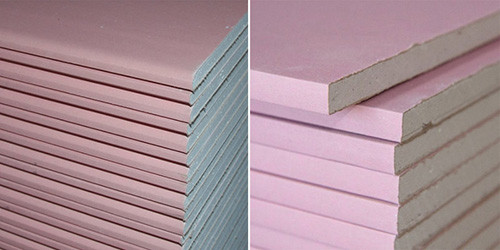
- Fire resistant - sheets of light gray color with red marking format 2, 3x1,2 M. or 2, 5x1,2 M. 12.5 mm thick. Use indoors with increased fire safety requirements (cover for fireplaces or chimneys). Refractory qualities GLC received thanks to a large number antipyrian Reinforcing additives as part of the core and an enhanced outer shell. It is worth noting that any GLC is not able to burn or maintain a burning, maximum - it can be charred. However, fire-resistant plasterboard resists the burning, and after a long exposure to a direct flame, the core is not scattered, and retains the form.
- Arched - special flexible material for the manufacture of arches. Produce it in format 3x1,2 M. 6.5 mm thick. Such thin sheets are usually mounted in two layers. If design ground Kr.ovati in niche provides arched arch, it is better to choose this type of drywall. However, it is worth considering that the cost of the material is quite high, and since it is necessary to put it in 2 layers for strength, the costs are doubled.


In the markets and in construction stores usually sell plasterboard 6, 9 or 12 mm thick. To make a solid niche, it is better to choose the sheets thoroughly .
Installation niche for bed
Before starting the installation of a rice mall from drywall or even go to the store for materials, a detailed design plan should be developed. The drawing must be indicated on the scale of all sizes up to a centimeter to avoid errors. It is also recommended to mark the mounting places to calculate how much fasteners and elements are required for the frame.
Niches for the bed in the wall can be deep and shallow. In the first case, you build as if Little cozy cave for sleep. Usually such recesses are made according to the size of the bed. Such designs look very original and gently. In addition, they allow you to create additional places to store things - on the sides you can take a lot of recesses and small built-in shelves. Bottom will greatly fit the drawers for more heavy Things - bed linen or clothing. Deep niche for a bed in a nursery is a great way to save a lot of space and teach child To order - before bedtime, the niches necessarily need to decompose toys or books.

Also deep niche is a good solution for small studio apartments. If the bedroom + living room, on the exit of the cavities can hang beautiful curtains to visually isolate a place to rest and andunity. A bunk bed in an alcove will look very compact and stylish, especially if applied to the design of a little creativity.
Yet often choose shallow niches that serve more decorative than functional element. Although they can ponadelat many shelves for useful veshchichek. It looks very original version with photo wallpapers for a headboard. Also, there can be placed a mirror, LED backlighting, framed pictures or paintings.

So, what is needed for the manufacture of niche above the bed:
- drywall;
- metal profiles UD (guides) and CD (Rack);
- U-shaped brackets;
- fasteners (dowels, screws, hardware);
- perforated corner profile for a nice flat design angles (metal or plastic);
- putty Drywall;
- drill with a set drill;
- screwdriver or screwdriver;
- roulette;
- simple pencil;
- building level;
- reinforcing tape;
- putty knife;
- adhesive for drywall;
- paint, wallpaper, decorative plaster or any other finishing decorative coating.
If you try and get it right, a niche will serve two functions (or one of the functions of your choice) to conceal defects premises, making it more spacious or releasing beneficial some zone, and be a place of storage of the necessary things. In other words, you can make a beautiful and useful niche - the perfect variation nt fori any apartment, where there is never enough space.
How to make a niche for bed:
- In accordance with the drawings make the marks on the drywall sheets and cut them into individual parts. How to cut the drywall, we have already told, but you yet and useful video showing the whole process clearly:
- Make the layout profiles for the frame on the floor to avoid the possibility of skew.
- Make marks on the wall in the place of installation of rack profiles.
- Attach the rails profiles according to the markup. Upper rails installed without mounting hardware. When you youdub position building level, then they can be fixed to the end.
- Screw profiles to the wall, floor and ceiling with a dowel. To do this, first attach a profile to its installation site, mark the attachment points with a simple pencil, drill the holes in the concrete and score a dowel. Extreme dowels install no more than 50 cm from the end of the profile. The setting step of the intermediate fasteners should be not more than 70 cm, but not less than 3 pcs. For profiles of any length.
- The back side of the guiding profile is recommended for a special soft sound insulation ribbon on velcro. It will reduce possible vibrations, and in the bedroom will become quieter.
- Collect the frame in accordance with the drawing. If you make the shelves, it is better to strengthen the area intersection of profiles with special metal corners.
- Now you can attach prepared drywall parts to the frame. Cut the rack, make the shelves, screwing the sheets with self-assembly for metal. The edges of the cut sheets will be rather sharp and unsightly, so they can be slightly treated with emery paper with small grain.
- Clamp sheets of sheets with a sickle ribbon to enhance the connection and make it more accurate.
- To the corners of the design on special glitter adhesive glue gluing corner perforated profiles. Metal serve longer plastic, but cost more. For the bedroom, plastic is quite suitable, since in such a place the corners are unlikely to be subject to regular mechanical effects.
- Slip fastening sites with self-draws and sulfyan tape.
- After drying spikel Cover all yet One layer to get a smooth surface.
- After drying, the layer putties remove stains and unevenness sandpaper and whisk dust dry cloth.
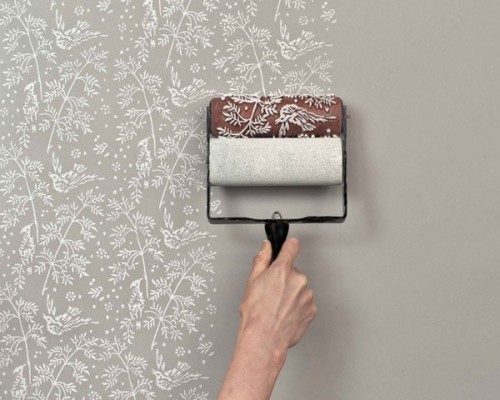
- Now you can start finishing niche of drywall over the bed. Very nice looks decorative plaster with imprints made figure roller, embossed plaster or interior paint. At this stage you can let myself go and use any artistic receptions. Even if you just niche papered with wallpaper under the bed, as well as on the other walls, it will look stylish and neat.
- You can set the lighting. It is better to give preference to spotlights or LED ribbon . Such devices are not much heat, therefore, is not able to create a fire hazard. Place the frame in the wiring or transformer LED strip.


In this video montage Niche is shown in very detailed, so after viewing such work will not cause you difficulties:
Finally, some useful tips on how to make a built-in bed in a niche correctly:
- Always paint the most detailed drawing With all sizes, quantity of fasteners and other important details. Ideally, it is better to have two outline: one with dimensions, the second is the color design of the future design. So You can compare the result with the outlined.
- Always take a little more materials and fasteners than provided by the drawing. The recommended supply is 10% of the total.
- At all stages (markup and attachment of parts), use the construction level.
- Before sowing the frame of plasterboard, check its stability.
- Try to close the plane with one whole piece of drywall than a few small.
- The smaller the junctions will be, the better.
- Do not spare spikel And proceed not only the joints, but also the entire design of the whole, leveling the surface.
- If you want to make powerful sound insulation, for example, if noisy neighbors live behind the wall, fill in the inner space of the mineral wool niches. It is inexpensive and perfectly absorbs noise.
- Think out the view of the backlight and method her Installations in advance. Slide the wiring until attaching plasterboard sheets. Holes for lamps should be cut immediately.
Bed in Niche: Photo
Among the whole diversity designer solutions It is difficult to choose something specific, but we still recommend to watch a small photofooting With original ways to design niches in bedrooms.


