Dusting tanks, urns, ashtrays. Immediately and you can not say that these are essentials. But it is impossible to imagine a cozy country house without such familiar and inconspicuous parts of the interior.
Content
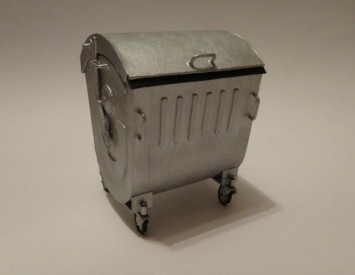
The easiest way to get a garbage tank or urn is to buy in the nearest store. This is a lazy way. It is not better to make a trash can do it yourself. And it's not even economy. A little patience and fantasy, and the country plot will decorate not a standard non-sparkling bucket, but a real masterpiece.
Do you need to make garbage tanks and urns do it yourself?
Tanks whose photos are placed below, will decorate any country house:

Urns and garbage tanks made by their own hands have a number of advantages:
- Cash savings. Let even the purchase of a garbage or ordinary urn will not hit the budget. Some savings will not hurt.
- Similar products are more beautiful, brighter shop. They are individual, unique, perfectly fit into the interior.
- Their creation develops fantasy, gives pleasure and joy in the process of creation.
- The ability to make urns and garbage tanks, sizes, color, shape and style of which are ideal for a particular place of placement.

Decoration of garbage tanks
The easiest way to get the original trash can is purchased inexpensive factory-made tank and decorate it. All that will need - acrylic paints, brushes and a little fantasy.
Even special artistic talents for the decoration of the tank is not required. There are many simple patterns, which can be performed. For example, geometric patterns. Pick up the sketch according to your abilities and desires and forward - to the goal.
- Barrel trash can. If there is an old unnecessary barrel in the farm - you don't need to buy a garbage container. Memo it. Decorate to your taste. Install in a convenient place. The problem with the garbage container is solved.

- Garbage tanks from plastic bottles. For the manufacture of the garbage tank, any materials available at hand are suitable. For example, old plastic bottles. This is a wonderful material that constantly accumulates in any house.
Advice: To get beautiful and accurate garbage tanks, plastic bottles pick one form. At the same time, they can be both one color and multi-colored.
Prepare a sufficient number of main "building material", proceed directly to the manufacture of a garbage tank:
- Make the base, interlaced the top of the future garbage tank. Take 3 items of any convenient form. It may be a rectangle, a circle or oval. It is possible to make them from the wire of large cross section or aluminum plates. In extreme cases, even a metal profile for drywall is suitable. Try to all three elements of one size and shape.
- Make a tank frame. To do this, take from 2 to 4 pieces of reinforcement or metal profile of the same length. The length of one piece of fittings is the height of the future tank. Use fittings or profile as side racks. Attach the bottoms, the middle and top of the tank. Wire, clamps or rivets can be used for attachment.
Advice: The height of the tank must be multiple of the altitude of one plastic bottle.

Build the walls of the tank using the previously prepared plastic bottles:
- Cut the steel wire into pieces, whose length is 30 cm exceeds the height of the tank.
- In the center of the bottom and covers of all plastic bottles do holes. Use the nail or shill.
- With the help of pliers to secure the end of the wire on the bottom of the frame. To be safe, make 2-3 turns.
- Put the wire one or more plastic bottles. Number of bottles depends on the expected height of the tank. When the correct calculations, the upper neck of the bottle regard middle frame.
- Secure the wire in the middle of the frame, making 2-3 turns.
- Wear on the wire required amount of plastic bottles.
- Securely tighten the wire on top of the frame. To fix, use a pair of pliers.
- Repeat the above procedure until until you equip bottles full frame.
- Try to carefully pull the wire. Nearby bottles should adjoin one another very closely.
- When using colored bottles, try during their placement to achieve a harmonious pattern. This can be alternating bottles - white stripe, brown stripe. You can do the bottom of the tank in one color and the top - the other. Do not be shy, show imagination.
- Trash ready. Of course, it is not intended for burning waste and heavy debris.
Typically, such tanks are deprived of the bottom. For cleaning it is not necessary to turn over enough little tilt.
You think that it is inconvenient - Construct the bottom of any convenient way:
- Tightly braided lower horizontal part of the frame wire. The bottom will not solid. The smaller the step of weaving, the more it will keep debris.
- Cut the bottom of any material. This can be aluminum, steel sheet. Suitable even water-resistant plywood. Not ruled out the option of using cardboard. In this case, the tank must be installed in a dry place. Along the perimeter of the bottom of the drill hole. Attach to the lower bottom portion of the frame wire.
Excellent urn out of the barrel or bucket
Do not rush to throw away the old bucket or overage barrel. From them will come a great urn. If the starting material is an old bucket:
- Modernization, though old, but the whole bucket under the urn is very simple. Enough to buy the bright colors and decorate it as you wish.
- If the bucket rusted, thoroughly clean off the rust. Cover the hole patch of aluminum or tin. Okleyte bucket outside and inside and if necessary, self-adhesive tape of one neutral tint. To decorate the boxes, use pieces of colorful adhesive tape or paint.

How to make a box of the end-of-age of the barrels:
- Cut the barrel to the desired size.
- Remove rust, to patch holes.
- Object the barrel of any building material. It can be a tree, plywood, plastic, dense cardboard.
- Paint the resulting urn. Feel free to fantasize.
Urn of old car tires
Beautiful urn is obtained from old car tires. Even if there is no car, any maintenance station with joy will provide them with each of everyone, and completely free. Make urn from tires is very easy. A long time it does not take:
- Take 2-3 old car tires.
- Clean them carefully from dirt and soot.

- Rinse tires with water and dry.
- Credit the tires with each other from the inside with the help of metal brackets.
- Outside disguise the joints. A piece of car chamber is suitable.
- Color urn by any bright colors.
- Since this urn is deprived of the bottom, use garbage bags.
Advice: Garbage packages are desirable to use with any born design. This will make it easier to clean and get rid of the need to wash urn.
Urn with a lid.
Often, the urn is installed in the open area. In this case, it is advisable to protect its contents from the rain. Make urn with a lid:
- Take the drive from the old wheel. From it will be released an excellent sustainable base for urn.
- With aluminum strips or metal profile, connect the disk with a conventional bucket. To connect, use bolts or screws. The bucket is attached in such a way that the strips or profile perform over its upper edge at least 10 cm.
- At the top of the design, attach the lid. It can be a lid from the bucket or any pot of the corresponding diameter.

Ashtray with their own hands
One of the varieties of urns is an ashtray. Ashtracks, both desktop and outdoor, are an indispensable attribute of any private house. Even if the owner does not smoke - the ashtray will not hurt. She successfully performs the functions of miniature urn. In addition, not all guests lead a healthy lifestyle. Install floor ashtrays near the mangala, when entering the gazebo.
Of which only desk ashtrays do not make. Wood and plastic, plaster, clay, metal. The most fast and easy way to make an ashtray - use a conventional beer jar:
- Take an empty jar from under carbonated water or beer.
- Wash it thoroughly.
- With a sharp knife, cut the top of the banks. Enpell the edges.
- Make with scissors vertical cuts to the bottom of the banks. The cut should not reach the bottom of 2-3 cm. The width of each strip is about 1-1.5 cm.
- Roll each strip down in the form of a roll or bend them, intertwined with each other.
- The simplest desk ashtray is ready.

Outdoor ashtray do it yourself:
- For the manufacture of an outdoor ashtray, an old bidon is perfectly suitable for milk or trimming of a ventilation pipe.
- Bidon Cover the shallow grid, decorate. Install in the right place and proceed to use.
- With the trimming of the pipe will have to tinker a little longer. Put an old bucket inside the pipe or use it bottom. Cover the pipe with a small removable grid, decorate. The ashtray is ready to operate.
Advice: When working with metals that need to be cut, be very attentive. There is a very high probability of injury.


