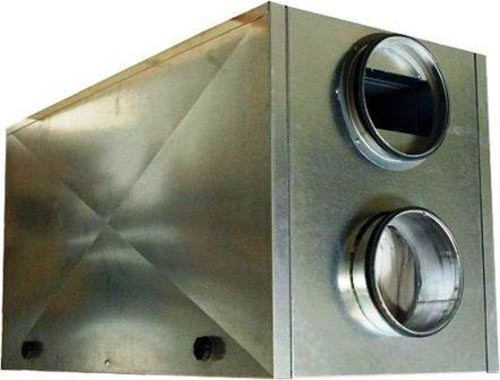
If you notice that the windows in the house began to fog a lot, dark mold spots appear in the corners, and the air is musty and “heavy”, then it is urgent to install an exhaust ventilation system. In this article, we will consider how the poor ventilation of the house threatens and how to install a forced type ventilation system with your own hands.
Content
Why do I need ventilation?
Ventilation of the premises is necessary not only so that the residents of the house can feel comfortable, inhaling fresh air, but this is a very important factor. If the “worked out” air will have nowhere to go, a person is doomed to feel constant malaise, drowsiness and can even acquire chronic diseases of the respiratory system. In particular, small children are at risk, whose lungs are still undeveloped.
But, as we have already said, troubles do not end there. In the process of life and life, moisture constantly evaporates in the house - from cooking, drying things, soul, through plant leaves, etc. In the hermetic space with the “standing” air, the pairs settled on the walls, ceiling, furniture, significantly reducing their operation. Due to insufficient or missing ventilation, the walls under wallpaper or plaster begin to dive, mold and fungus appear. As a result, not only cladding is destroyed, but also bearing structures. A house made of concrete or brick without ventilation will spin a little longer than wooden, but the result will be one. And so that such an insignificant thing as the evaporation of water does not cause the destruction of housing, you should take care of the installation of supply and exhaust ventilation in advance.
Types of ventilation
There are several types of ventilation systems according to the principle of operation. Before you decide on the installation of one of them, it is necessary to get acquainted with all the pros and cons, as well as the specifics of installation.
Types of ventilation systems used in private houses and apartments:
- Natural - air movement occurs due to pressure drops. Such a system can be seen in any apartment of a multi -storey building - ventilation holes in the kitchen and in the bathroom are “sucked” by the spent air with evaporates and removed through a special pipe out.

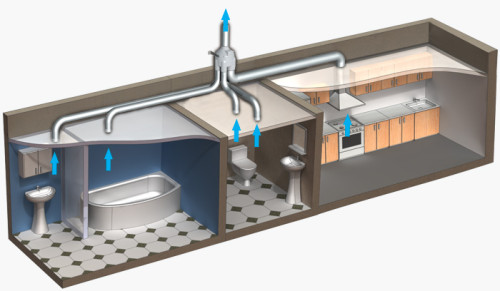
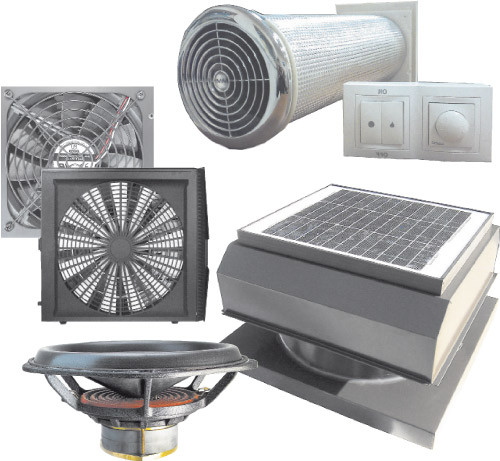
- Forced ventilation - air movement occurs due to the operation of exhaust fans, which withdraw it through ventilation ducts from the house.
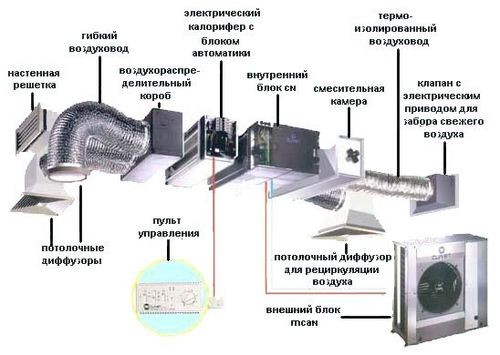
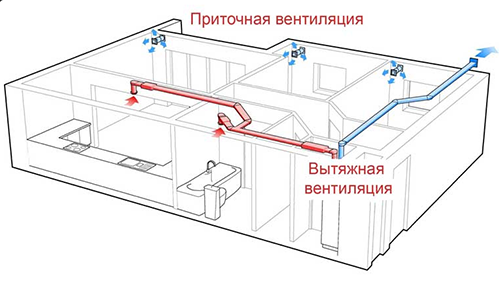
- The supply and exhaust-through one ventilation ducts using the fans, the exhaust air is removed, while other channels “pump” fresh air from the street into the rooms. This type of system is the most effective and popular for private houses, but the most expensive.
The choice of the ventilation system primarily depends on the materials from which the house is built, its quadrature, as well as the degree of air purity outside (pumping dirty slagged air into the premises is unlikely to be a good idea). If you live in a house of wood, expanded clay concrete or brick in the area outside the city where the air is clean and harmless, you can make natural ventilation. In all other cases, the last two types are preferred. The financial factor is also one of the dominant ones, however, saving at the arrangement of exhaust ventilation of the house should be very careful so that you will not subsequently spend an even larger amount of overhaul.
Exhaust ventilation
In this article, we will consider exhaust and mixed ventilation systems, since they are more effective than natural ones, and are more suitable for private houses. Forced type ventilation is absolutely necessary in houses made of reinforced concrete, polystyrene concrete foam, as well as modern SIP panels (houses built using Canadian technology). The latter need good ventilation most, since the specificity of the installation of panels determines the complete tightness of the internal space (connection without seams and gaps).
Calculation of ventilation
There are certain sanitary norms, dictating conditions for using any ventilation system. According to them, ventilation works normally if the exhaust air in the room is completely replaced by fresh twice per hour or more. Based on this, you must first calculate exhaust ventilation, and only then purchase equipment and make drawings.
First, it is necessary to determine the frequency of air exchange. This parameter indicates how many times in 1 hour the air has changed in the room. The frequency depends on the quadrature, the functional purpose of the room, as well as the constant number of people who are in it. For example, for a house with an area of \u200b\u200b50 m² and ceilings 3 m high, the volume will be 150 cubic meters, and with double air exchange, the ventilation power should be 300 cubic meters/hour. The multiplicity depends on the number of people, which is described in detail in the corresponding SNiP. For an ordinary house, where a family of 3-4 people of two-time air exchange lives more than enough, but for the office with the same square and 30 air exchange workers are required several times more.
To determine the desired performance of the ventilation system, two calculations should be made: by the number of people and by multiplicity.
By the number of people in the room: l \u003d n*l normal (l is the desired ventilation performance, measured in cubic meters/hour; n - the number of people in the room; l norms - air consumption by one person).
It should be clarified here that the norms of air flow by a person have long been calculated, but, nevertheless, are approximate. So, at rest (sleep, rest), a person spends 20 cubic meters of air per hour, during operation (work at the computer, with papers, etc.) - 40 cubic meters, and with physical exertion - 60 cubic meters per hour.
In terms of multiplicity: l \u003d n*s*h (l - the desired ventilation performance; n is the frequency of air exchange by SNiP (1 - for a residential building, 2.5 for a small office); S is the area of \u200b\u200bthe room or the total area of \u200b\u200ball rooms; h; h; - Height from floor to ceiling.
When you find both results, choose more important - this will be the required power of the ventilation system. Based on this indicator, you can already choose the appropriate fan (several fans). But at the same time, it must be remembered that the resistance of an air -conducting network can provoke a decrease in coolers performance. This can be avoided if you find the dependence of the system performance on pressure on the parameters of the purchased equipment specified in the technical documentation.
The principle of work
Let us consider in more detail how the supply and exhaust ventilation system works in order to understand how it can be designed with your own hands and save on work. The principle of operation is quite simple: throughout the house, two types of air pipes have been carried out - some stretch the spent air outward, others suck fresh air from the street through a special convector inside the room. In this convector, the air is cooled (heats up) and disinfected.
Disinfection of street air is carried out by an ultraviolet lamp. Also in the convector, an additional filter made of foam rubber or santonin (as in cars) can be installed. When entering the room, fresh air creates a pressure that cooles spent air with pairs to go through special ducts.
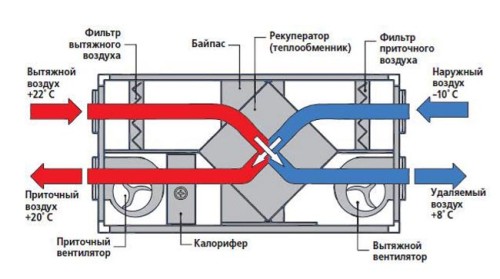
There is such a thing as the recovery of heat. But first a little backstory. When they invented supply and exhaust ventilation, and everyone began to install it in their homes, with the coming of the first winter, the problem suddenly arose-the system pumped cold frosty air inside and “expelled” all the heat outward. Naturally, heating and electricity costs increased several times, and this situation required an urgent solution. They were the emergence of a recovery system, which allowed the use of heated air from the room to heat fresh air from the street.
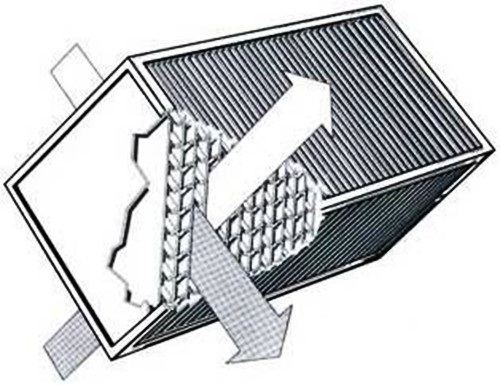
It sounds a little confused and difficult, but in fact the recuperator is a special box in which several radiators, filters and tapes are installed. It is installed on the “output” of the spent air, as a result of which heat is used again and reduces heating costs by 50%. In the summer, the recuperator is closed so that the houses are cool. The price of a purchased recuperator is quite low, but if desired, it can be done with your own hands (more on that later).
Types of motivation
Another important point that you should know about to build good ventilation is the types of motivation for air masses. Simply put, so that air begins to move to exhaust pipes.
There are two types of motives:
- Natural - ventilation works due to the difference in pressure in the house and on the street. The best solution would be to put an air duct from the north side, because it is usually the most windy. To enhance the air flow, you can also use a deflector, which will increase the indicator by 2-3 times. It is better to equip the air at the farthest end of the house, from where the flow of fresh air will begin and its spread throughout the other rooms. The significant drawback of this system is that cold air from the street does not warm up, and it is necessary to additionally install a recuperator.
- Mechanical - the principle of operation is almost the same as with natural motivation, except that the cooler or fan stands at the input of the air ducts. Its task is to forcibly take fresh air and let it into the room. In this case, the flow rate increases, which allows you to install a disinfectant ultraviolet lamp and a recuperator with filters inside the duct. The rate of excretion of the exhaust air also increases, so it completely changes several times more often than with natural motivation.
Do -it -yourself ventilation
You can carry out installation of supply and exhaust ventilation even without professional skills. The main thing is to be able to handle the tool and correctly calculate the power of the equipment. Depending on the calculations, you should choose the diameter of the air ducts and the performance of the fans.
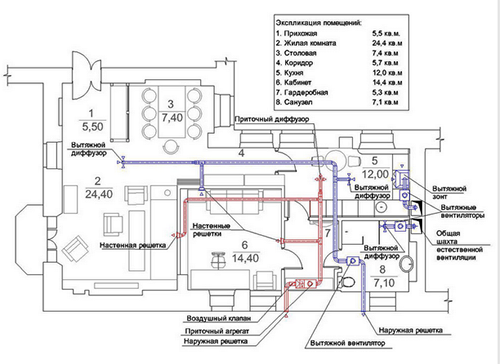
After the work of all calculations, it is necessary to draw up a scheme of exhaust ventilation - the air intake (or several) with the cooler is located on the north side of the house, and there are bumps to all rooms from the central channel. This channel can be equipped with a recuperator and a filtration system. Filters should be mounted behind the fans. The output of the air duct, which supplies fresh air outside, should be placed closer to the floor, and the fence at the ceiling (warm air always strives upwards).
Installation of ventilation
When the calculations and the scheme are over, and the equipment is purchased, you can start installing exhaust ventilation.
The course of work:
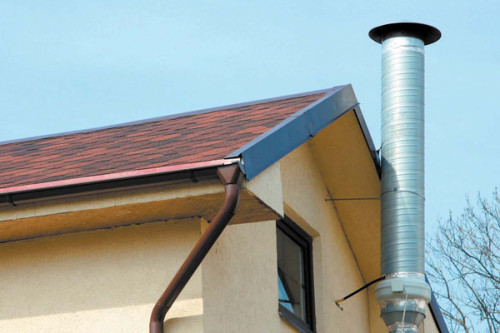
- In the outer wall of the house, make the input and output for ducts.
- Prepare nozzles for installing wall grilles. The nozzles should be equipped with check valves to prevent small litter, moisture and insects from entering the duct.
- Install the pipes in the holes in the wall.
- Fasten the ventilation unit in the selected place.
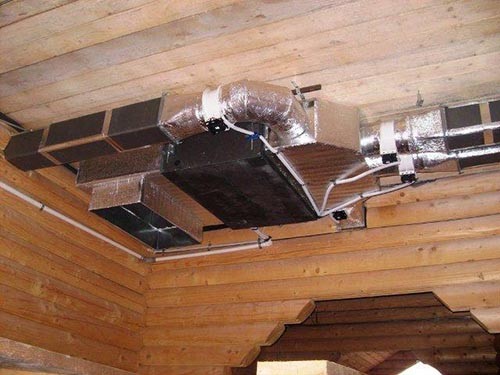
- Install ventilation channels for the fence and supply of air and connect them to the vendusting with metal clamps. The ducts can be used by different: flexible aluminum or plastic pipes, air ducts with a square or rectangular cross -section.
- Make wiring through the rooms of the supply and fence channels, screwing them to the walls or ceiling. If necessary, use connectors, tees, etc. It is most convenient to draw channels behind a suspended ceiling.
- Install ventilation grilles in the walls or ceiling, placing the exhaust and supply gratings in different corners of the room.
Recuperator
On the installation of exhaust ventilation, you can save even more if you make a recuperator with your own hands. This is an extremely useful detail of forced ventilation, so it is better to immediately consider the need to install it. Its effectiveness and financial benefit depends on the total amount for annual maintenance of the system, energy prices and approximate operational terms of the system.
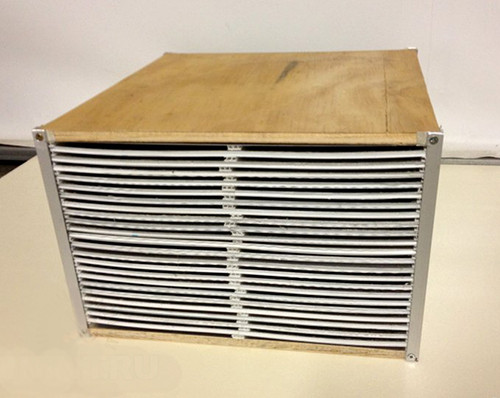
The most common type of recuperators is plate. It can be made of square plates from thick foil, aluminum or copper sheets, a thin steel corrugated, textolite or vapor -permeable membrane.
The thermal conductivity of the material from which the plates are made does not affect the heat exchange processes in the river. The number of plates is determined by the number of cassettes collected - for one 4 m² is enough. To increase the efficiency of sheets, it will take 2 times more with the same cassette size. You can also make one large cassette, but since it is difficult to remove condensate from it, and it requires a lot of free space, this method is almost not used.
You will also need a corner to fix the racks and flanges. To transfer the plates, use a spaced rail or technical plug.
To make the corps of the recuperator, you will need:
- sheet metal or plywood;
- mDF plate 2 cm thick;
- mineral wool, foam rubber or other filter material (mineral wool is cheaper than all);
- silicone sealant;
- bar to make a frame;
- metiza.
The course of work:
- Gently cut the leaf material for plates into squares with a side of 30 cm. To make them as even and the same as possible, it is better to fold several sheets into a stack and cut with an electric tool. For one cassette you will need 70 blanks.
- On the opposite sides of the squares, glue the slope of the silt or traffic jams, after cutting them with segments of 30 cm. Leave the last square to be unnecessary. If you use a steel thin corrugated roster, there are no gaskets.
- After drying the glue, glue the squares into the cassette, smearing the gaskets with glue. Apply the sheets, turning each next 90 °.
- The latter glue the plate without rails. Thus, you will get a cassette with multidirectional channels.
- Fill the intervals with sealant.
- On the sides of the cassette, make fasteners for flanges. Keep in mind that it should stand on one of the corners of the square as stable and vertically so that the perfect rhombus is obtained.
- In the lower part of the cassette will drain condensate, so there you need to make a drainage hole with a drainage tube.
- If you want to make more than one cassette in the box, then they should be of identical sizes, and their corners should fit tightly to each other without cracks.
- Insert the cassette into the box, the length and height of the inner walls of which correspond to the diagonals of the squares of the cassette, the thickness of the box should be equal to the thickness of the cassette. If there are several, increase the dimensions of the body accordingly.
- In the walls of the box opposite those points on the cassette where the fasteners are made for flange joints, make holes.
- Install the recuperator in the guides from the corner, fixing them on the walls of the box. Thus, you can remove the cassette for cleaning and repair.
It is recommended to install elementary removable cassette filters for cleaning air coming from the street. To do this, attach a layer of mineral wool 3-4 cm thick to the inner surface of the wall of the box. Also, for forced ventilation, it is better to install coolers with an adjustable rotation speed.
As you can see, it is not so difficult to make exhaust ventilation with your own hands if you understand theory and purchase all the necessary materials. At the same time, you can save a significant amount on the installation and you will know exactly how the system works in your house, so you can repair and clean it completely independently.

