Oddly enough, with the latitude of offers in furniture stores, many people cannot pick up perfect kitchen furniture. Whether does not suit the design of the kitchen headset, whether its value.
Content
- Required tools and materials for the manufacture of kitchen headset do it yourself
- Secrets of the creation of cabinet furniture
- The main steps of creating a kitchen headset
In addition, very often, choosing a kitchen headset for Khrushchev, a potential buyer faces certain inconsistencies of its needs and requests and what they offer. Kitchen headsets for small kitchens, often become objects of individual orders, the price of which is significantly higher than the cost of ready-made models. In such cases, in the presence of certain skills, knowledge and desire, it is advisable to make a kitchen headset with your own hands.

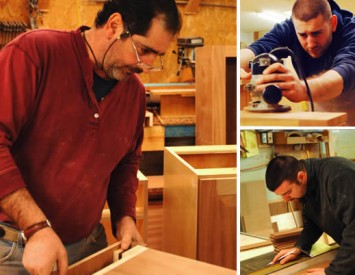
Required tools and materials for the manufacture of kitchen headset do it yourself
- Sheets of chipboard.
- Accessories (canopies, holders for shelves, door handles, hooks, dryers for dishes, legs).
- Roulette.
- Simple pencil for marking.
- Disk saw or hacksaw with small teeth for sawing parts.
- Electrolake (or simply planer) for the processing of edges and fitting parts.
- Electrode or screwdriver.
- Drills (2 pcs.).
- Screws and screws.
- Manual milling machine.
- Milling cutter for drilling nests for door canopies.
- Screwdriver.
- Sandpaper.
Secrets of the creation of cabinet furniture
Accuracy of measurements to create a drawing. It is not necessary to perfectly know how to make a drawing of a kitchen headset, it is enough to draw a simple scheme that is understandable to you. Carefully and clearly measure in millimeters (it is fundamentally) all possible sizes and mark on the sketch. The manifested patience and accuracy in the creation of parts will play an important role in the subsequent stages of assembly and fitting ready-made modules and the entire kitchen headset.
- When laying the parts on the chippers, it is important to leave the allowance of 1-2mm from the outer edges, for the edge processing. Do not forget about the 5-millimeter point between the individual parts required to obtain the width of the propulsion in 3 mm.
- Details are placed only by a simple pencil from the inside. For the convenience of assembly and finishing, they can be numbered or sign. In this case, when installing, you are not confused, gadaying what details where to mount. Do not take all sorts of handles and markers to perform markup, as you risk spoiling the item. Such a mark may occur even through the finishing coating.
- Use, if presence, power tools, which will greatly facilitate your work and requires much less time.
- All small horizontal and vertical parts of the kitchen headset are connected by self-drawing with large caps or with standard sizes. The first, of course, hard and pretty look. To attach the shelves of any width, you will need at least 2 screws or screws to work with wooden surfaces. If the shelf is wider than 0.5 m, then it is better to equip it with 3 fasteners and, desirable, enhance the strength of metal corners. Connecting separate parts of the cabinets by self-drawing with large hats, keep in mind that such hats can be on the same level in the walls of two adjacent modules. Then the distance between adjacent parts of the headset must be increased to the double height of the Hats. But the easiest way, in such a situation, use classic self-tapping screws, screwing them into the body of the wall.
- The gap between the worktop and the suspended boxes should be at least 65 cm.
The main steps of creating a kitchen headset
Creating a drawing
Actually, it may be a simple schematic plan for a kitchen headset, the main thing is that it is understandable to you. This is the basis of your successful work, therefore, to fulfill this stage, approach with full responsibility. Drawings of standard kitchen heads are presented below:


On the same sheet, list the names of all components of the design, mark their number and secure the size of the parts of the kitchen headset. Duplicate all these records on another piece. Put in a safe place in case the first sheet, in the process, is lost. Immediately you can describe the basic materials and action plan, a kind of algorithm, telling simple words, how to make a kitchen set.
Purchase of technical and finishing materials
Here you, just, will come in handy records and calculations. Feel free to consult with managers and sellers of building stores. They, having experience in such affairs, often will give a valuable council and orient in the variety of presented samples. Plywood, veneer, solid array, chipboard - basic materials in the manufacture of kitchen furniture. The last today is most in demand, taking into account its relatively small cost and convenience in work.
Production of details
At this stage, it is important to show maximum accuracy and care.
- On the sheet chipboard, make marking parts with allowances.
- Using cardboard templates, mark the location of all planned fasteners, canopies and handles.
- Drill through holes to accommodate the handles.
- On the inner sides of the door blanks with a cutter, make holes under the loop.
- Taking this disk saw, cut out parts of the future furniture set.
- R.spilovka produce from the inside of the sheet, then from the visible side the edge will remain almost intact.
- Drop the facade doors, decoring their bulk figures. Here you will be helped by a manual milling machine and an electrolybiz. Although, if you do not have the skills to handle these tools, it is easier to buy ready-made facial panels with curly stamping.
Build kitchen headset and installing main modules
- To begin with, make a trial assembly. In its process, you will be visible all measurement errors, errors and inaccuracies of sawing. For temporary assembly, take thin black screws that should be 10mm in short, those that are selected for the main installation. Start the assembly with the bottom tumb headset, attaching the side walls to the horizontal. At the side panels of lockers, attach holders or screw screws. At the altitude of the layout of the drawers to the inner walls of the modules strictly horizontally, adhere guides, given the height of the boxes.
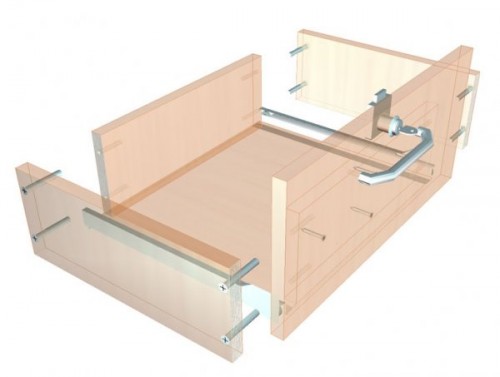

At the same stage, try inserting drawers into the guide profiles and adjust the corners of the connections. Next, screw the legs, if any projects are provided. Then, similarly assemble the top boxes.
- Remove and disassemble the design. Eliminate detected defects. Prepare details for finishing. Attach the accessories and decorate the details, according to your plan.
- Implement the final assembly, given all the corrections produced during the experimental stage. To do this, take white screws with a length of 55-60 mm. Insert the drawers.

Fastening external facades
We produce this operation using conventional furniture loops or canopies using self-tapping screws and screws.

Accommodation table tops
This detail is attached to the side racks inside the cabinet on two angular profiles. To facilitate the task, you can use ready-made products as countertops. But such a solution must be taken in advance in order to take into account the size of the finished slab in the drawing for the manufacture of a kitchen headset.

PVC Stovetop
Standard thickness of such a product of 20 mm. Plastic plate, however, very unstable to the effects of elevated temperatures and melted under their influence. Those. This is not an option for furniture near the cooking surfaces and ovens. Do not put hot pans and kettles on it. True, the end part of such a countertop does not need additional processing, it is enough to cover with special plugs, which, sometimes, bribes.
Tabletop of chipboard with laminated surface
It can be performed in two variations - 28 mm and 38 mm. The edges of such a countertop care carefully with the help of sandpaper and twice handle the diluted lacquer for furniture or parquet.
Creating countertops with your own hands
How to make a countertop for a kitchen headset yourself, in case the purchase of the finished product, do you consider non-disabilities?
- Dip chipboard from the sheet of chipboard.
- Cut out the same chip part equal to the length of the lid, 20-30 mm wide. This rail will hide the junctions between the rack and the lid and visually make the tabletop more powerful. This important item must be made of the same materials as the main part of the table top, in order to avoid different deformations under the influence of temperature and humidity drops.
- NSrecreate this bar to the lid below with the help of self-samples, processing the place of contact with carbon black glue.
- Screw the upper front edge of the table top for giving the product greater strength and aesthetics.
Fastening the back wall
Pre-painted rear panel of fiberboard are nailing with small cloves. The presence of this wall will increase the rigidity of the structure and finally adjust the angles between the design items. It is necessary to take into account the location of pipes and other communications, drinking holes in the rear panel.
We really hope that our instructions will help you in implementing your plans.


