The arrangement of the kitchen will say a lot about its owners. And it's not about washed dishes and sparkling surfaces to the arrival of guests. An ideal kitchen is one where it is nice to cook and spend time with loved ones, and all objects have their own place. In such a room, cleaning passes in a minute - everything is at hand. For a good owner, household equipment is stuffed to the maximum, furniture is at least, and there is enough space for everything. The secret is simple - kitchen cabinets are made taking into account the layout of space. Built -in furniture for an individual order is expensive, the purchased will rarely get up perfectly. But mastering the process of assembling the kitchen cabinet for dishes is not at all difficult.
Content
Preparatory stage of work
Before making a kitchen cabinet with your own hands, you should weigh everything for the future.
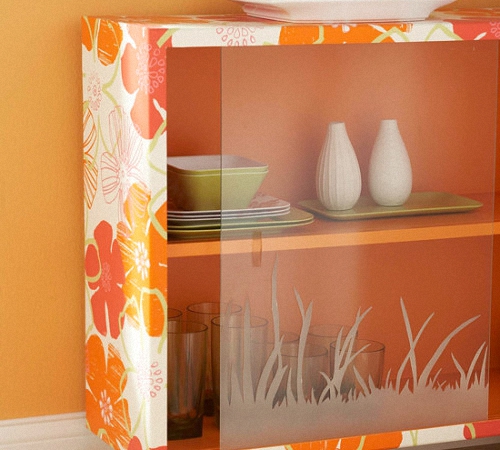
1. If the kitchen is fully equipped, and one corner kitchen cabinet between the other two was urgently needed, then the selection of the door is important. The dimensions are compared with adjacent cabinets. To select the material for the overall facade, make the door from matte glass in the color of other materials of the room. It can be made in a frame and fixed on top of a royal loop - the simplest option.
2. Sometimes it makes sense to carry out a partial restoration of built -in furniture in the kitchen - add a couple of missing cabinets while replacing the facade. This is very profitable when the case is reliable, it remains only to update the surfaces. Not only doors are replaced - the acrylic countertop will combine all the lower cabinets into a single cutting surface. The filling of the shelves inside will remain the same, very convenient and familiar. Such a kitchen renewal will cost his best cheaper.
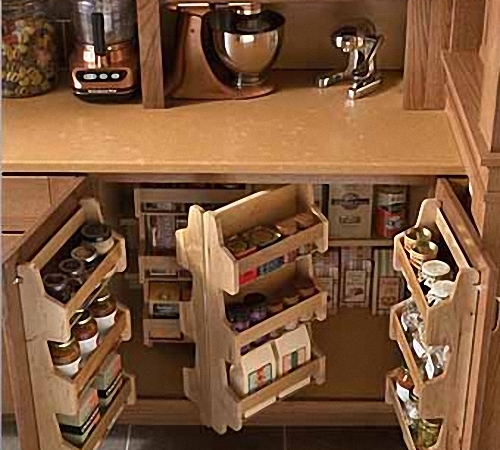
3. A kitchen cabinet may be urgently needed as a disguise for non-aesthetic equipment-a gas counter, a mini-beler or corrugation for hoods. The upper cabinets are ideal for this. The free space of such a decorative case is used rationally, supplying a shelf or drawers for the tool. The upper cover for this design is not needed - pipes should go there. An additional crossbar at the door is needed to fix the stiffness of the cabinet.
4. An important point that scares newcomers at the initial stage of work is the sawing of the material. It is impossible to do this perfectly at home, you need a special tool, better the machine. The closest carpentry workshop to you in the drawings for a small fee will make the perfect cut, prepare holes, process the edges and even arrange an incorruption. Sometimes the sawing is offered right in the building materials store. You will save a lot of time and effort, but get a lot of pleasure from perfect details to update your kitchen.
What materials are used for a homemade kitchen cabinet
To make a kitchen cabinet with your own hands, you can use different materials.
1. The frame of furniture is usually made from chipboard (wood-piece plate). For the kitchen, it is advisable to take moisture-resistant material of increased density of 16-18 mm. For countertops, only a 3.2 mm chipboard with a washing surface and torning is suitable.
2. Under the facade or cabinet doors use a veneer, natural or synthetic. Laminate and Melamin are suitable. Laminate - protective coating for chipboard and fiberboard.
3. MDF is better than chipboard, material is compressed wood -based wood dust. It is more expensive and stronger than wood and synthetic analogues, but in the production of furniture it is most plastic, it can be bend. MDF is with a matte, lacquer and laminated front surface.
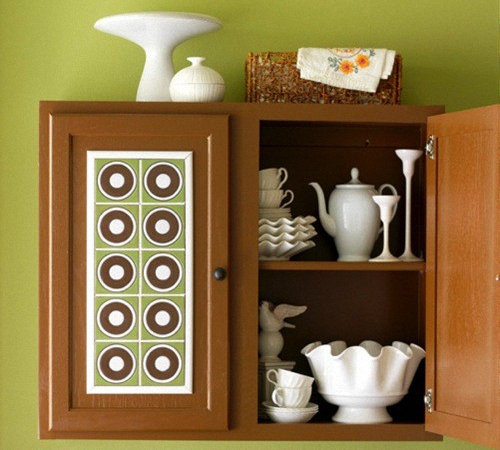
4. The most expensive material is naturally wood or array. It is used for the cabinet door. To reduce the cost and relief from it, they make a door frame, and in the center - a veneer, decorative plywood. The most precious thing is the mosaic canvas of marquetry made of natural wood, which is sometimes inserted into the door frame as a separate panel. The tree is sensitive to temperature extremes and high humidity, but has excellent decorative properties. It is protected by processing impregnations or covered with a special water -repellent varnish.
5. Multiplex - modern material based on plywood, where wood is glued in different directions in layers. He does not deform and is not so afraid of moisture.
6. Plywood can be of different qualities and thickness. It is great for the inner shelves, on the back wall and at the bottom of the drawers. This is the cheapest material, but it can also be additionally processed for moisture resistance of greater attractiveness. If the plywood is not seen, this makes no sense. On the back wall is enough and the press cardon.
7. High -strength thick glass is also suitable for shelves and doors of the kitchen cabinet. Looks beautiful in the kitchen and stained glass in the doorway. The edges after cutting should be emphasized, and it is convenient to mount the glass in a wooden or plastic frame.
8. Modern synthetic materials based on acrylic or plastic are suitable as an additional finish, but not as the main material. DVP on a laminate of 5 mm and more better use for the walls of the cabinet.
9. If there is a desire to give the kitchen a particularly respectable look - order all the doors from the same array or with inserts from veneer in a carpentry workshop. Oak, walnut, ash - for every taste, they can be painted with a stain in the desired color, for example, under a red tree. There is another method - a whitening varnish, which is applied with several layers.
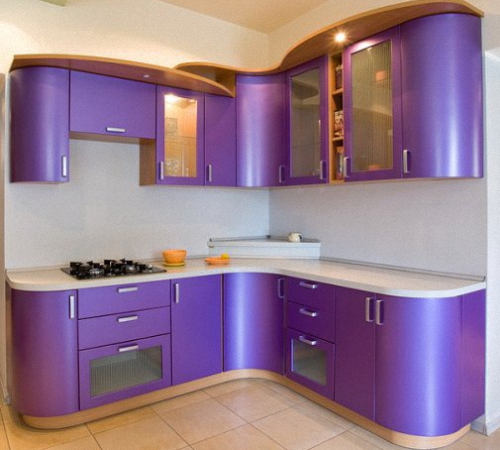
Photos of kitchen cabinets will tell you which option is the most suitable in design. When selecting facade material on the cabinet, a kitchen or kitchen floor cabinet is important to take into account the overall style of the room. The chosen color should be in harmony with the color scheme of the interior and the rest of the furniture. Only after the choice is made in favor of materials for the independent manufacture of a cabinet or general restoration, they can be purchased.
Tip: If you limit yourself to assembling one kitchen cabinet, it is easier to purchase scraps available there in a carpentry workshop - they are doubled. Having provided drawings on the kitchen cabinet with your own hands, it is easier to order the whole set for assembly in the finished form.
Preparation of the drawing for the kitchen cabinet
If you have never made accurate drawings for cabinet furniture, it is enough to view the ready -made ones - in catalogs, books, benefits or on the Internet.
1. Having dealt with the basics, it is easiest to repeat the appropriate option with adjusting your size. A drawing is not a drawing, but a simple scheme, here you do not need to be an artist. It is enough to take a sheet of paper, a triangle, a pencil and make your own option on the sample, and then fix the draft after the leaks.
2. In the drawings, the accuracy of measurements and the correspondence of each surface are very important. All measurements are indicated in millimeters. If the manufactured cabinet is inserted between others, then make sure that there will be enough space for the door opening. It is better to make an error to the minus than to redo everything after thawing and assembling due to an extra 2-3 mm.
3. The perfect drawing is an accurate indication of the size of each part, their number and total sketch. Parallel surfaces should be exactly the same, they do not need to be drawn separately. But if they are made of different material, for example, a lid and bottom, then consider the difference in thickness, make new measurements. Remember that you need to take into account the thickness of the panel during the combustion, otherwise the general dimensions may turn out to be different.
4. With home sawing, accuracy is especially important, since the tuning of the tool is swollen and stubborn will give a small difference. But it is precisely that it can be enough that the assembled cabinet does not fit into its niche, or the door rests on the side of the next cabinet and does not open. The door is made 4-5 mm less, which will provide free opening.
5. Consider the assembly method - the upper and lower surfaces will be between the sidewalls or vice versa, the sidewalls will be blessed from above and below. See how the finished cabinets are mounted. Usually the sidewalls are outside, and horizontally inside, but there may be options. The thickness of the back wall will affect how much the closet will be issued.
6. If you have to assemble the floor, and not the kitchen cabinet, then the sidewalls will perform the function of the legs. In this case, the lower surface is mounted slightly higher than the level of the sidewalls, taking into account the irregularities of the floor. It is better to raise the lower shelf 5-6 cm higher so that with a possible flooding of the kitchen, water does not get to the shelves. It is better to close the void with a basement mounted between the sidewalls. The ideal option is when all the furniture for the kitchen and the bathroom is hung, regardless of the lower or upper plane.
7. For the floor kitchen cabinet, you will need a working surface or countertop if the top of the product is at the level of the table. A higher cabinet without a countertop involves a larger number of shelves. The inner shelves should be a little shorter than the bottom so that the door is tightly closed without knocking.
8. The last thing to take into account is the depth of kitchen cabinets. If the product is assembled in one copy, complementing another furniture, then measures the wardrobes. The remaining dimensions of the kitchen cabinets depend on the space for placement.
9. The ancient way of manufacturing kitchen cabinet furniture assumed a wooden frame. Today, all case furniture is collected according to the general scheme, taking into account the design options of the upper or lower placement position. These are the legs, loops for fastening, the number of shelves inside, the top or lower handle is the whole difference.
10. In single products, the height of the kitchen cabinets is measured with the markings of other objects - a gas stove, a table or a refrigerator. In a narrow niche between the sink and the stove, you can place a sliding cabinet on rollers used as a bar or storage for households.
11. The last moment is accessories. The method of attaching the door without distortions and the density of its fit to a greater extent affect the general aesthetics than the material used. Think about what the mechanism of fastening the door and its handle will be - with one hole or two. Do not forget about hinged loops for mounting on the wall. If you make 2 cabinets - floor and hinged over the other, the pens will be mounted in different corners: upper or lower. All metal parts will help to choose a consultant in the accessories department.
Tip: If impregnation, glue, varnish other chemical fluids are used in the manufacture of the cabinet, it is important to choose them correctly. Cheap varnish can be sticky and disappeared for years, and products such as bread or honey quickly absorb extraneous smells and become unsuitable.
These recommendations to an experienced master will seem to be azami, but for a beginner in such a case, any advice is invaluable. To avoid unwanted alteration and defects in the finished product, it is important to think over all these moments. Constructive deviations even by 2 mm should be reflected in the sketch. Only after everything is thought out, measured and taken into account, begin to saw materials or order ready -made details. All notes in the cut are made only with a pencil from the inside, since a marker, pen or felt -tip pen leave a caustic mark on the front surface.
Tools
When buying materials and preparing all components, it is important to think over all expenses. If there is a complete set of tools, you can make cutting yourself. In the absence of 1-2 devices, it is enough to rent them for rent, so you need to decide on the date of work. If there is no equipment, trust the specialists of the sawing workshop or carpentry workshop, and make the assembly yourself.
The necessary tools and accessories:
1. A milling cutter with a straight groove cutter and a nozzle for sample a hike for mounted loops, a screwdriver, a drill with a round nozzle or a drill for knots, a conventional drill and a screwdriver, a stapler with brackets for attaching the back wall, a universal level.
2. Hidden loops for doors, metal corners for hanging a cabinet, pin, cins, confirmation and plugs, screws, commanders or strips and glue.
Assembly process
1. Put all the chopped and numbered parts in the order in which they will be collected. The roof, bottom, side walls and fasteners for retractable shelves will be needed first. The shelves and the door can be postponed so far. Additionally, with a pencil, we mark the arrows on the inner surface, what surface to be mounted, so as not to confuse. Drill holes for the commanders.
2. On the door and one inner surface before installation, drill holes for hinged loops. It is important to mark everything and do exactly so that the door does not hang and close tightly. For internal holes, a round cutter or a special nozzle on a drill is used. The beginner can use the most primitive and archaic version of attaching a hinged door - on a piano loop.
3. The cabinet is easier to assemble on dance joints. You will need a flat mill for cutting the grooves, where we glue flat skirts. They swell from the glue, providing a strong connection, but they themselves will not be visible. The milling cutter will give a high -quality groove, and the glued dugs are additionally better to score. Next, the penet should enter the same hole made in a perpendicular plane. We glue the gaps between the dowels well. This is how the basic frame is assembled. Additionally, you can fix it with confirmation and closed with a plug. In extreme cases, it is additionally fastened with nails.
4. The base of the cabinet is ready, then we fasten the back wall, which will give the stiffness of the structure, the easiest way is a stapler. If, according to the idea, there should be a backlight in the hinged cabinet - prepare holes for LEDs. Next, fix the rear wall of plywood or press cardboard. It will not let the design skewed during movements. It is best to put it in the grooves that are withdrawn for her, and fix the stapler with brackets after checking the perpendicularity of the corners.
5. On the upper edges of the cabinet, fix the metal corners with a screwdriver, which are reliable for attaching the product to the wall. For this, there are enough screws 4x15.
6. The mounting of the door cabinet is the most crucial moment. Hidden loops must be adjusted. Round holes are drilled on the door with a round cutter or nozzle for knots for a drill. They should be located 8-10 cm from the upper edges. It is necessary to do work carefully so as not to drill the door through. The openings opposite to them in the sidewalls of the cabinet are made in advance, before the assembly.
It is important not to count at the measurement so that everything matches. When one loop is installed, we verify the horizontal level, fix and adjust the second. First screw the loops to the door, then hang, fixing on the side wall. After that, we mount the closet on the wall and put the shelves. In the floor cabinet, do not forget to insert the base before installation, it should be deeper than the door. It is fixed with pins during the assembly of the case.


