The presence of a chair in the house helps to make a rest more comfortable and enjoyable, and also gives the feeling of lightness and calm. There are many options for chairs, they differ in shape, appointment, but combines their fact that they all make life comfortable. About how to make a chair from a tree, consider further.
Content
Advantages and disadvantages of a tree chair
Getting Started with the process of making a chair, you should decide on the material that will appear as its basis. In this article, let's talk about how to build a wooden chair. Therefore, we suggest familiarizing yourself with its main advantages:
1. Environmental safety.
Wooden furniture has always been distinguished by naturalness, harmlessness and hypoallergenia. Therefore, it is the wooden chair that will not deliver any discomfort in its use, since it is an environmentally clean material as the base material.
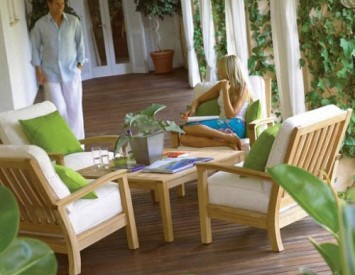
Wood chairs photo:

2. Strength and durability.
Furniture made of wood is distinguished by strength, resistant to mechanical effects and durability.
3. Aesthetics and variety of forms.
Choosing a shape for a wooden chair from a tree, it is difficult not to be confused in their diversity. In addition, the use of threads, special paints and varnishes are capable of making a chair more aesthetic and attractive.
Furniture made of natural wood is quite expensive, but if you try to build a tree chair with your own hands, it will be possible to save three times more money than when purchasing it.
Wood chair do it yourself
We offer to familiarize yourself with the option of making a wooden lattice chair, which has an inclined seat and is featured convenience and elegance.

This method of facing the chair is universal, so it will be possible to build such furniture as a table, a shelf or a stool.
For work, you will need:
- bruus, cross section 2.8x2.8 cm;
- plywood consisting of several layers, the thickness of which is 1.8 cm;
- morlogs, paints and varnishes;
- threaded sleeves;
- shkantov, screws;
- several studs;
- material for grinding;
- soil and varnishing solutions used when working with wood;
- oil paints of black and red colors that will help the back and legs of the chair brightly contrasted with each other.
Among the tools will require:
- desktop type disk saw;
- drills with drills;
- stusl;
- rubanka;
- pliers;
- screwdrivers;
- sponges and painting brushes.
Choose a bar, while the main requirement for it is the size of the section, it must correspond to 2.8 cm. Pre-prepared blanks must be perfectly smooth and smooth. Before working, check them on the absence of cracks and roughness.
Drawings of wood chairs:

In accordance with the drawings, the timber is cut into several slats, the length of each of them is 55 cm. To assemble the back and side walls, thirty-six planks are required. In addition, you need to have bearing bars installed in the seats area.
Secure the bar using the stops and cut it using wood saw.
The end sections of each bar should be placed, and then holes are drilled on them, the diameter of which is 0.8 mm. The interval between the central and end point of the bar is 2.5 cm. Using the drilling rack, carefully measure and draw the items before they are drilled.
In order for the chair to have a presentable appearance and responded to all standards and safety rules, the end areas are processed using sandpaper, and the chamfer is removed from the edges.
For rounding the longitudinal edges, the plans are used, and then sandpaper, which will help remove all irregularities and pollute the surface. For the separation of one plank of the chair from another, details are applied, called "checkers". For their manufacture, it will take to cut wooden elements of a square shape, the size of 2.8x2.8 cm. On the ribs of the checkers, it is necessary to remove the chamfer and drill the holes in the passage. These holes must coincide with the slots on the planks for their harmonious connection. Two "checkers" on both sides are glued to each bar. In each hole is inserted over one stud, built of cutting materials. At the edges of the workpiece glued and aligned with the rail. Using clamps, pull all the details together and leave until complete drying.

The veil helps to keep the tree in primeval form over the years. For the processing of parts, it should be suspended on the pre-prepared bar with nails or studs. Install all the blanks on the nails and apply a veil with a sponge. Surplus the simulators need to be removed using a brush.
After complete drying of the simulation, proceed to the next process, including the null and the coating of the parts with paint and varnishes. To dry the details prepare a special unit consisting of a board, which are glued to the seasons.
The next stage includes the manufacture of the backrest and seats of a wooden chair. To do this, you will need a small sheet of plywood from which the workpiece of the desired size is cut. With the help of screws, they are connected to each other, in addition, it is necessary to provide holes for the wanks that will provide additional strength of the chair. This design is painted with red oil paint and is waiting for a complete drying.
In the details that were made of a bar should drill the holes with a diameter of 0.8 cm. In such a way as to ensure the unobstructed passage of the studs. Connect all parts with all the parts with spills and threaded sleeves. In order to fasten the seat, drill several holes in the carrier part of the structure. From the bottom of the chair, screw the seat to the housing of the chair.
This chair will delight with its brightness, beauty and convenience of all residents and guests at home.

Production of a wooden garden chair: Instructions and recommendations
The most harmonious among the flowering plant plants will look a wooden chair. But, before proceeding with its manufacture, we suggest familiarizing yourself with the general recommendations that will help you do:
1. The first requirement for the garden chair is its transportability. This piece of furniture should not be bulky and easily tolerated from place in place in case of bad weather.
2. When choosing a type of wood, it is better to stop on oak, bucken or walnut breed. In addition to these options, it is possible to use pine, aspen, cedar, larch. Such a tree is the most durable and stable before mechanical impacts and moisture.
3. Since the chair is on the street, it is exposed to sunlight, moisture and precipitation, so it is recommended to take measures to protect wood from external stimuli.
4. Before using the boards, they should be folded and put in a room with a canopy, under the influence of wind they can be dried and become stronger. After that, the process of their grinding, impregnation with antiseptics and solid solid. Next, the drying of the boards and their coating with paint and varnishes.
5. The number of bitch on the tree affects its texture relief. In addition, that the appearance of the chair reminds natural wood, it is better to cover it with colorless varnish.
6. When assembling a garden chairs, try to fasten the fasteners well drowning in the tree. Otherwise, the occurrence of hooks on clothes is possible.

Preparatory work includes work with wood, its drying and coating with a variety of materials. Use boards whose thickness is 2 cm.
In the process of manufacturing a garden chair, you will need:
- two rear legs, the size of which is 21x255x788 mm;
- two front legs, measuring 21x76x534 mm;
- reference armrest, size 21x128x407 mm;
- the back of the chair in the form of a back, the size of 21x280x915 mm;
- jumpers - 21x52x590 mm;
- rear supporting part of the armrest - 21x78x611 mm;
- two layers for insert - 13x21x255 mm.

As consumables require:
- hardwood keys - 2.4x6 cm - 20 cover;
- 20 pieces of screws from brass, measuring 0.45х0.5 cm;
- 20 pieces of brass screws 0.45х0.32 cm;
- sandpaper for grinding;
- glue on a polyurethane basis;
- oliffs and varnish for furniture;
- cardboard material;
- paint Scotch.
For the construction of a garden table, as tools, will require:
- disk saw;
- manual milling machine;
- electrolake;
- hacksaw;
- electric drills;
- screwdriver;
- grinders;
- roulettes;
- level;
- pencil.
Garden chair of wood, drawing:

Use panels with a wide thickness for the manufacture of the rear legs, backs, armrest and seating space. To obtain them, it is necessary to choose similar to the color and texture of the board and to glue them.
In order to build the rear legs, use a pre-prepared stencil for which they will be peeling. Attach it to the board, make a drawing on a tree, with a pencil and connect two blanks with a scotch, so you can make two parts at once. Consider, it is better to make a pattern of several millimeters more than the drawing, so that later by the branches or the mill to fit the part for the desired size.

The backrest facilities procedure involves sawing the pre-prepared billet from glued boards. Then it is necessary to mock the lower part of the back for twelve and a half degrees, so that it is harmoniously connected with the rear legs. And the upper part of the back is twisted by a 0.9 cm radius. Next, collect the product, while customize the parts with an accuracy of a millimeter.
Attach the rear legs of the chair to the back with the help of screws and glue for the tree, pre-taking care of the drill holes. With the help of an angular connection, bring the side parts and legs with each other.
Plug-in planks will help close the resulting gaps. To fix inserts, use screws. Note that the reliability of the chair directly depends on the quality of the connection of all parts. Boards should be directed in opposite sides of the legs. In accordance with the outside of the drawing, describe the board of the connected details. Related sections are not cleaned.

Behind the billet should choose a groove, while the seat is located to the back at an angle to ensure the density of the joint.
Start cutting the front legs, while the upper sections are mounted at the angle of six degrees. Attach the front legs to the design of the chair using screws and glue.
The garden chair should differ much reliability, therefore it is recommended to use an additional jumper in the form of a pride, with which the strength of the chair is enhanced. To cut the jumper, pre-measure its location and cut the part of the desired size.
Now proceed to drinking the wedge-shaped supports of the armrest, which are fixed on the front legs and make the chair more convenient to use. When all the details are collected, you should proceed to the final grinding of the chair. After the process is completed, the surface should remain smooth. If you wish, color the chair in the desired color or cover with a colorless varnish, which will help save the texture of a tree.

Rocking chair for two do it yourself
To make such a chair, you will need a minimum set of tools that consists of:
- electrolovka;
- disk grinding machine;
- screwdriver;
- several drills for working with wood;
- bit to work on the screwdriver;
- painting brushes;
- roulettes;
- pencil;
- construction level.
This model of the chair is rather simple. The shape of the chair resembles an arc that consists of two side parts, bonded with a large number of boards.
Pay attention to the material of the manufacture of this chair, since its size is quite large, it will be located directly in the yard or in the garden, which means the materials must be high quality. Euro plywood is used in the process of manufacturing the side parts of the rocking chair. Its thickness should be 3 cm. From this material it is necessary to cut two side parts consisting of three CARGs. Marking is made using pattern, pencil and roulettes.
Rocking chair chairs:

When the template is transferred to the workpiece, the smallest errors are allowed. The main condition for the proper functioning of the chair is the identity of drinking two lateral parts.
Next, the bar is required, dimensions of 5x2.5 cm. With the help of the jigsaw, spill thirty-five equal boards from it, 1.2 m long. In principle, the length depends on the desired length of the chair, so it is subject to adjustment. As the fasteners are recommended to use:
- confirmates 0.5x12 cm - about 15 pieces;
- self-tapping screws0.4x4.5 cm - 150 pieces.
The first process of working after cutting parts is their grinding. To carry out this procedure, if there is a good tool and skills to work with it, is not difficult. But note that special attention should be paid to the end sites.
Next, the material is treated with the help of simulat and varnish. It is better to apply solutions in two layers, waiting for complete drying of each of them. To avoid moisture absorption, treat wooden parts with hot oil.

The final process is the assembly of the rocking chair. Three Tsargi are located in the upper, central and lower parts of the chair. They are attached using confirmates. Follow the strength of the compounds, since they depends on the durability of the seating.
To drill holes under the fasteners on the sections of the chair, which form its direct surface is recommended to use the conductor. This device will help facilitate this work and will make all the holes identical. Otherwise, make this work manually.
Use a special putty that will help hide the holes from the screws. If there are cracks or defects, putty will help you get rid of them. Now the process of staining the chair or the coating of his varnish remains. Several pillows will decorate this piece of furniture and help make it brighter and comfortable.


