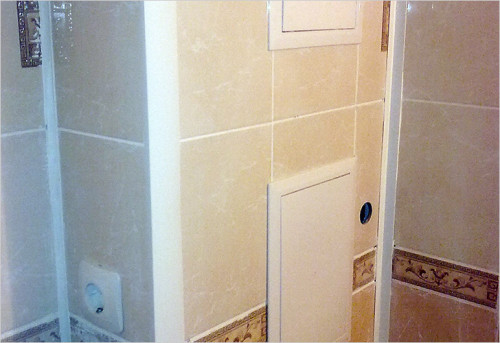
Open sewer and water pipes in the bathroom do not give the room aesthetic appearance. Non -visible pipeline structures are shed on the floor or walls, but this method requires cardinal alterations. It is more practical and easier to build a decorative box for the bathroom. Various materials are used to arrange a protective casing: plywood, chipboard, plastic panels, etc. The most suitable and convenient material for the box in the bathroom is drywall.
Content
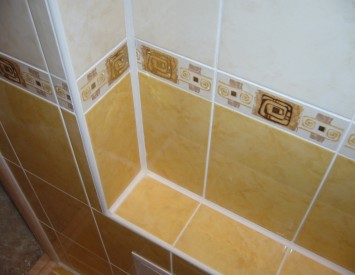
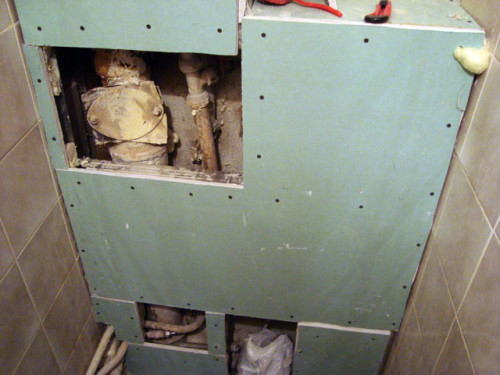
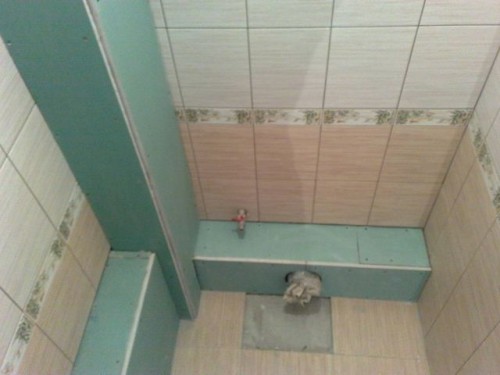
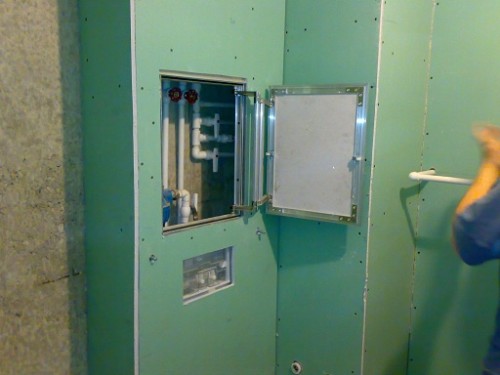
For access to the threaded joints of the pipeline, revision hatches are provided on the box. They are necessary for preventive maintenance or repair of pipes without dismantling the box. The key points of the installation of the box in the bathroom are in the photo in the article. The mounted box in the bathroom made of drywall is finished with ceramic tiles, glued with wallpaper or painted.
Preparatory work
Most often, problems (leaks) on internal wiring pipes occur in places of joints and on valves. Before starting the installation of a decorative box, preventive plumbing work is carried out. Places of the connections are examined, and if necessary, prevention, replacement of nodes or gaskets is carried out, and metal pipes are painted.
Tools and materials for the box in the bathroom
A simple set of tools will be needed for work on arranging a gypsum cardboard box. Namely:
- roulette and the building level (horizontal and vertical direction) or Waterpas;
- plotnitsky corner of at least 35 cm;
- 18 mm mounting knife with interchangeable blades;
- drill with a shock mechanism or punch;
- reverse screwdriver or screwdriver;
- knife -haired carbon on metal;
- a hammer, a marker, a pencil, a straight marking rail or a meter ruler.
From the materials you need to purchase:
- One sheet of drywall of standard sizes is 2500x1200 mm and a thickness of 9 - 12 mm enough for a box in the bathroom. Given the high humidity in the bathroom, a moisture -resistant wall drywall is acquired.
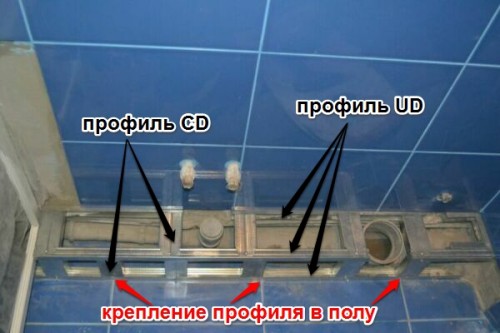
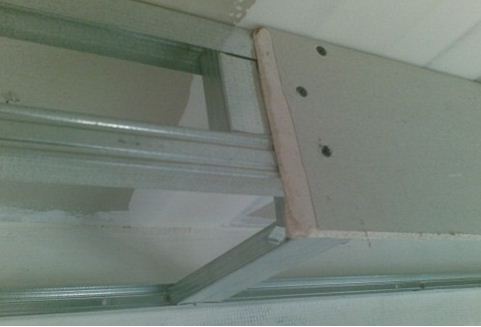
- For the frame of the box, UD guide and CD forming frame Profile made of galvanized steel or wooden beam 40x40 - 50x50 mm. The beam is necessarily treated with antiseptics and soils for wood, preventing rot and formation of fungi.
- Installation of the frame is carried out on plastic dowels of 8 - 10 mm with screws. Small screws - "fleas" are designed to connect the frame profile. For a wooden frame, self -tapping screws are used ½ longer than the thickness of the beam. For fastening drywall, screws of 35 - 45 mm are used.
The corner external and internal ribs are strengthened by a plastic or perforated aluminum corner. To attach the corner and aligning the surface of the box, an acrylic putty is required.
The procedure for the installation of a box in the bathroom
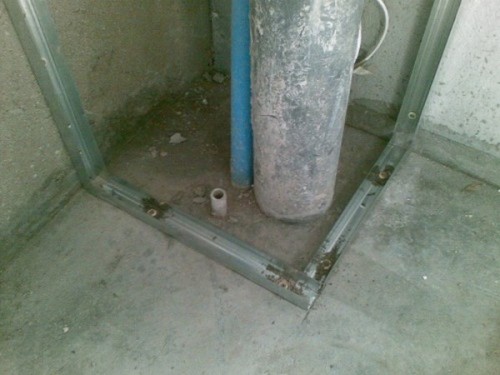
- The marker on the floor and walls marks the circuit circuit circuit. From the pipes of internal wiring to the inner walls of the box, a space of at least 3 cm on all sides is left. If it is supposed to continue the box with ceramic tiles, it is reasonable to adjust the external parameters to its size.
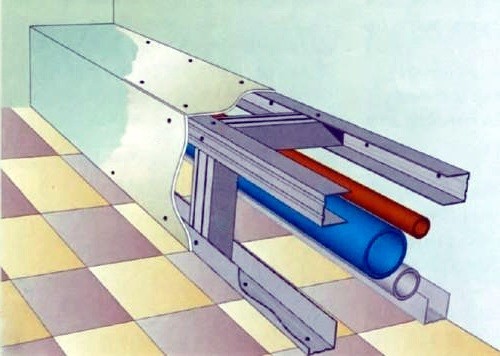
- According to the markings on the walls and floor, the guide to the UD profile is attached to the dowel. The step of fasteners is 30 - 35 cm. Using the waterpasis, vertical and horizontal corner racks are exhibited and fixed with transverse inserts of the CD profile. The transverse jumpers are installed with a step of 50 - 70 cm and fixed with small screws. The perpendicularity of the jumpers is checked by the carpentry corner.
- If a wooden beam is used for the frame, with screws are mounted with screws with a thin drill, and the jumpers are enhanced by metal corners.
- According to the installed frame of the box for pipes in the bathroom, the dimensions are removed and transferred to the plasterboard sheet. Strips for lining are cut with an mounting knife using a flat rail. It is desirable to cut stripes from whole pieces of drywall. First of all, elements for sidewalls are cut. The ends of the sidewalls are cut in the exact size of the wall to the corner rack of the frame. After the installation of sidewalls with self -tapping screws 35 - 45 mm in a step of 2 - 3 cm, measurements for the facade pattern of the box are made. The hats of the screws are “recalled” into the blade of drywall by 1 - 1.5 mm, covered with a primer and put down. After fixing the facade strip of the box, proceed to the formation of external and internal corner ribs.
- To strengthen the corner joints, a perforated plastic or aluminum corner is used. The regiments of the corner are selected in such a way that the line of hats of the screws is decorated. The corner joint is smeared with a thin and even layer of finish putty. The perforated corner is tightly pressed to the surface. The putty that performed through the perforation is aligned and smoothed with a spatula.
Features of design and installation of a bathroom box
The gypsum plasterboard box itself is a simple design, which is a frame from the profile with drywall patterns fixed on it. When installing the box in the bathroom, some practical moments are taken into account.
Sewer riser in the bathroom
There is an audit on the sewer risers. The audit is a hole or a divert with a hatch mounted on rubber gaskets. In the case of a blockage, the audit opens access to the sewer pipe for cleaning. It is impossible to sew it with drywall tightly. The design of the box provides for a window for a free approach to revision. The finished plastic window can be purchased at a construction store and fixed on the loops.
Water pipes
In places of threaded joints, valves, valves and installation of the meter, access is provided for review and repair. It is recommended to make a doors spacious enough for repair work or a completely collapsible box. For the formation of the openings, holes are cut into the intended areas. The perimeter of the holes is strengthened by the CD with a profile and closed with decorative plastic doors.
Decorative decoration of the box in the bathroom
The box in the bathroom made of drywall is decorated with any finishing material. Ceramic tiles are laid on the glue, after setting the seams are treated with grout. To decorate the box for painting or wallpaper, the surface is aligned with a thin layer of finish putty and impregnated with a primer for painting or wallpaper glue. MDF plastic finishes or lining are attached to their components or waterproof construction glue.
