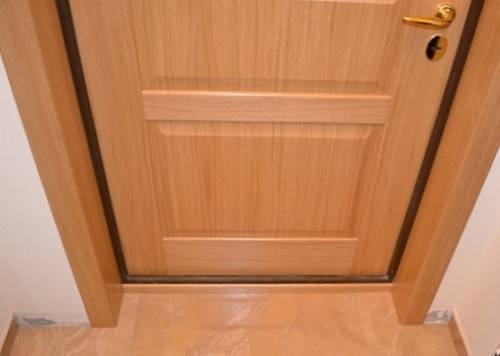
Whatever the building is built, a lot of time and money take to install the doors. To save on this, you can put a door frame with your own hands. In this case, the installation process will be controlled by you personally. In addition, the implementation of such work helps to develop accuracy, as well as to learn a lot in construction standards. It should be said that the durability, strength and aesthetic appearance of the door largely depend on the quality of the installation of the door frame. Therefore, this stage of work should be treated with special responsibility. Next, we will tell you how the door frame is installed.
Content
Door box: Dimensions
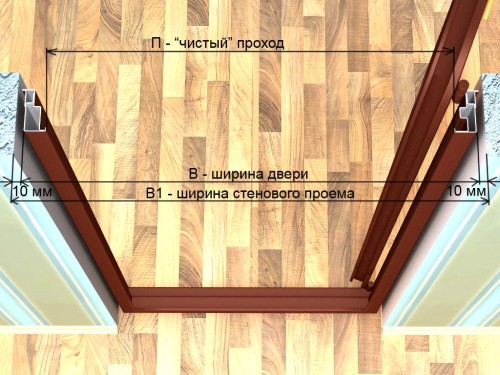
Dimensions of the wooden door box are determined by several parameters:
- The first is the size of the door leaf selected for the box.
- The second is the purpose and characteristics of the room.
Before starting work, you should familiarize yourself with the instructions on how to assemble a door frame. It is worth saying that different premises have different requirements for ventilation and noise insulation, and they, of course, should provide the installed door. So, for example, the door to the bathroom should not pass cold air inside and at the same time should not allow heat air leakage to the outside. Other rooms, for example, warehouse rooms, on the contrary, need ventilation so that the materials inside are not spoiled. If the door is installed in the boiler room, then it will be useful to make additional ventilation, especially if there is gas equipment.
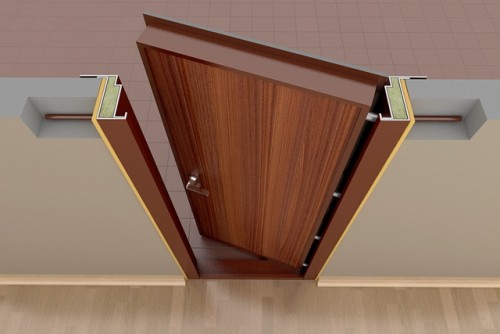
In order to prevent heat loss, the design of the door frame is built of four bars. As a result, it will be a closed rectangle in the form. At the same time, the design of the door itself will be present such details as a premature and loop vertical beam, as well as tributaries. Between the beam of the box and the door around the entire perimeter, it is necessary to withstand a gap of 3 mm so that the door moves freely.
If it is necessary to provide ventilation, the box is collected only from three parts. In this case, instead of the threshold, a technological gap of 16-18 mm is left. The door base will then have the shape of the letter P. In this case, the necessary indentation of 3 mm should be observed only along the upper beam and vertical racks. In addition, a gap of 2.5-3.5 mm should be observed between the threshold and the new flooring in order to compensate for the expansion of the material at a temperature difference.
The closed box is usually greater in height than the unmarked. This is due to the fact that the height increases due to the thickness of the threshold, and, therefore, the thickness of the door box will be greater. This must be taken into account when conducting calculations and measurements. Otherwise, the door will be too long and it will have to be shortened to fit under the opening. This is extremely undesirable to do, especially if the canvas has a veneer coating. If you have to cut such a coating, it is best to start from the side where there is a decorative finish, and then move aside, where this finish is not. In this case, the design of the box will not be broken.
How to install a door frame
Tools
To put the door frame with your own hands in place, some tools will be needed:
- So, several bars will be needed, which are usually already included with the door frame itself.
- In order to prevent distortion of distortions during the installation of distortion, you need to have a plumb line or level at hand.
- In addition, you will need nails, a hammer, a screwdriver with screws, an electrophorer and a hacksaw.
- Even for work, wooden rails, milling cutter, chisel, mounting foam will be needed, and you can take trims as wedges.
Of course, a set of professional tools will cost quite expensive, but this will ensure a qualitative result of the work. The fact is that when using simple tools to install a box, you can allow large errors, especially if there is little experience in this matter. Therefore, before starting work, you should contact specialists who can give quality tools. It will be much more profitable, because It makes no sense to buy new devices for one job.
Preparatory work
Before putting a new box, you need to dismantle the old one. This item is a key part of the preparatory stage. This is done quite simply:
- First of all, you need to remove the platbands, then take a hacksaw and a mounting tool with which to remove the entire old wooden box. It is very important not to damage the wall, which can threaten an extra waste of time during additional decoration work.
- The old anchor bolts and the remaining fasteners are twisted or, as an option, cut down using a grinder. Be sure to check the strength of the wall. If there is a need, then the door box freed from pressure should be strengthened.
- When removing the old box, platbands are primarily dismantled. Then, by means of a hacksaw, the box itself is disassembled.
- In order to strengthen the wall, sometimes you need to install a reinforcing structure. This is a very important point, because How much the installed door will last.
Stages of installation
Installation work consist of several stages:
- First you should measure the doorway. After dismantling the old box, its dimensions may differ from the original. The measurement results are needed so that spacer wedges can be put in place, the dimensions of which should exceed the distance between the beam and the wall by no more than 3.5 mm. One way or another, with them the fasteners of the box will turn out stronger. It should also be noted that the presence of a swivel was allowed where it is necessary to file a bars at an angle of 45 degrees. Therefore, before carrying out installation work, be sure to purchase a similar tool.
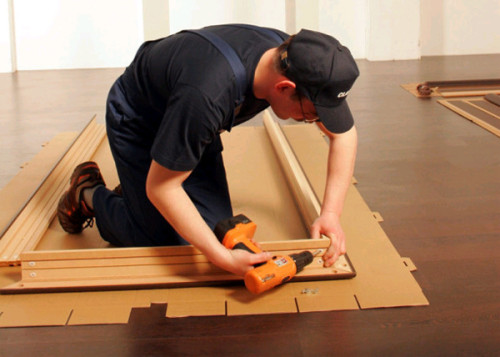
- So, proceed to the assembly. The work is usually conditionally divided into several stages, the first of which is that the constructions bars are simply laid out on a flat surface, where it will be convenient to inspect. In this case, you need to pay attention to the presence or absence of grooves in the boards, with which the details will be connected into one.
- It is very important to correctly fasten the installed box. For this, holes are drilled in the joints of the beams. Boards located horizontally and vertically need to be pulled out with self -tapping screws. The most important thing is to be neat and accurate. To perform this work competently is to ensure sufficient strength of the door attachment. Keep in mind that in some modern door systems that do today, the lower bars are absent, because, in fact, they have no need.
- If there are grooves, then in the upper part of the beam are connected to the side sides of another bar, and are carefully beaten with a wooden kiyanka. It is better not to use another tool so that the material is not damaged.
- Then all parts are interconnected. As fasteners, screws are suitable. When this is done, you need to check how reliable the final design turned out. The short grooves may not have grooves. Then they choose one of two options: parts are fastened with nails or screws. On this, the first assembly stage ends.
- The protruding ends of the wooden beams will interfere with further work. Therefore, with their sawing off, the second stage of installation begins conditionally. Next, before continuing to work, pay attention to the surface of the bars. If it is smooth and smooth, then this means that everything was done correctly. You also need to remove the measurement from the upper part of the door frame.
- In addition to the surface, be sure to check how straight the corners of the structure turned out. Next, the rail is cut off, and then fixed by means of nails to the side beams. The extra parts of the rail should be cut off. The second stage is completed.
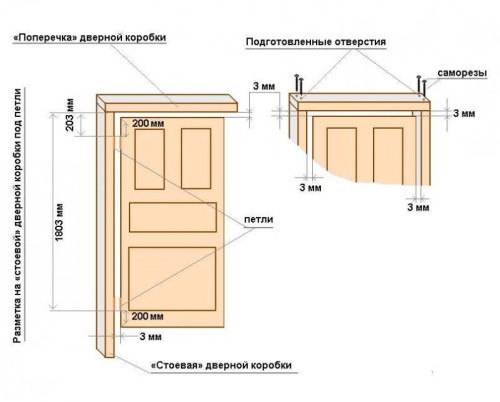
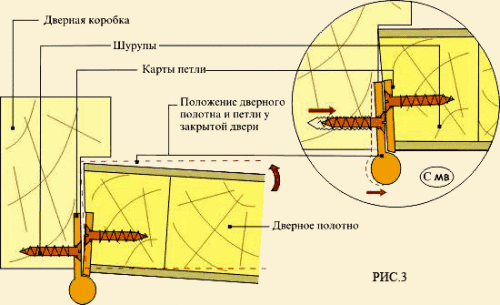
- At the third stage, door loops are installed in the place. To do this, a door box and a door are installed on the floor. In this position, you need to decide on the location of the loops. Please note that between the upper and lower edge of the door should be at least 19 cm. The length can be another. The most important thing is that at all doors of the house it is approximately the same.
- In the right place, the contours of the loops are indicated, not only on the door, but also on the door box. When the door is installed in place, there should be a small clearance between the floor and the upper part. Next, check some important points. So, for example, the horizontal and vertical axes of the door frame and the elements of the door leaf must coincide.
- We move on to the trim of places for future loops. This requires a chisel. So, on the inside of the structure, you need to measure 19 cm from the upper edge. Next, a door loop is applied and circled along the contour using a simple pencil. It should be borne in mind that a folded loop from the door to the box leaves a gap of about 40 mm. Given the thickness of the loop, it is necessary to calculate the depth of its installation.
- Then take the milling cutter and prepare the seat under the upper and lower loops. If there is no mill, then you can do, as mentioned above, a set of chisels. From the lower edge of the door structure should be approximately 22 cm, and 10 mm of which are diverted under the gap from below.
- After which the box, along with the hinges, is applied to the door leaf. This is necessary in order to make the marking of places on the door for fastening the loops. On the door leaf, cutouts are made similarly as on the door frame.
- Next, measurements of the dimensions of the opening are made. The resulting calculation results are transferred to the side bars. When this is done, the box can be carefully lifted and proceeded to its installation in the doorway. Using a plumb line or building level, be sure to check the vertical of the design. In addition, you need to make sure that the corners are straight and the upper beam is strictly horizontal.
- There is always a chance that the frame will not fit into the opening the first time. This can happen, even if all the measurements were made without errors. If there are such shortcomings, do not be upset. Between the box and the opening, the gaps are easily sealed with mounting foam.
- When the frame is installed in place, it is necessary to fix it. The box is attached to the slopes through dowels. As a result of work, the design in the opening should be reliable. You need to make sure this before temporary rails and spacers are removed. After such a check, temporary parts are removed, and the protruding parts of wooden wedges are sawn down.
- In case of gaps, the accepted standards must be observed, the calculation of which can also be easily fulfilled independently. When using mounting foam during work, one should not forget that it expands when solidified. Therefore, it should be possible to cut off excess without obstacles. It is important that the mounting elements and hinges used are suitable for the weight and purpose of the door. When performing installation work of the door frame, you must not forget about the microclimate in the room.
On this installation of the structure can be considered completed. Therefore, you can hang on the loops of the doors and install platbands. The platbands can be fixed in various ways. For example, on nails, on screws or on glue. If nails were used, then their hats must be closed after work. In the case of using self -tapping screws, decorative plastic plugs should be put on them. According to a similar scheme, door -to -door gearboxes are collected.
Features of the assembly of the door box for houses and baths from the beam
Undoubtedly, wood is one of the best building materials. But it has one feature, which should be remembered-after the construction after some time it settles. Therefore, for wooden houses, it is not recommended to equip door openings after the construction of a crown for about a couple of years. Moreover, it is necessary to know how to properly put a door frame in such buildings.
The following method is mainly used. So, if the dimensions of the opening and the width of the door box coincide with the dimensions indicated in the project, then the groove is cut in the middle in the middle and then the beam is clogged into it, to which you can nail the box. The walls even after shrinkage continue to settle. Therefore, it is impossible to fix the box directly to them. If the opening has not yet been formed, then first of all the hole is made for the door structure. Moreover, the width of this passage should be two thicknesses of the ridge less than indicated in the plan. In this case, the box beam is made with the groove. Next, the box is installed according to the same scheme that was described above.

