Morning fees to work, in kindergarten or school - there are a couple of free minutes, and here you find that you can't find the keys to the apartment. In such a situation, almost every person turned out. The keys over time are, and in the most unexpected places. So that this does not happen, and the keys were not lost at home, you can make a special keys storage device - a key.
The key to the hallway can be made from different materials. It is to decide which exactly to acquire a key to in addition to its main function - storing keys, she complemented and decorated your interior.
Keywords:
Few people know that there are several types of key and hundreds of variants of different key storage facilities.
Traditionally, the keeper is given a place in the hallway. It can be a wall or place on the bedside table. If you have a shelf or a cabinet for shoes, hats and umbrellas in your hallway, then you can install a key to it. It will be a great place to store keys. The device can be made of different materials and look different. If you do not want to purchase storecases, you can make the key to yourself from the girlfriend. In the meantime, you will pick up the materials, develop a drawing and make the key, you can adjust a small cardboard box, a tin can for the keys or a vase.
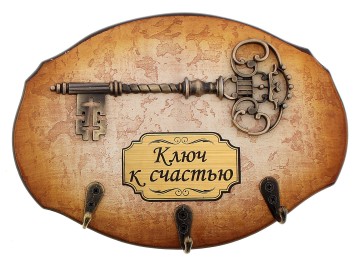
Look at the photo, such a key can be done in just half an hour:

The second type of key is wall. Simple models can be made of soft base - cardboard, dense fabric or hook connected. If you wonder how to make a key, you can easily install a wall key from the girlfriend.
These key ideas in the photo will help you understand what the key to do you:


The third option key is pocket. A small leather case or soft tissue will always find in the bag (especially in the ladies) bundle with keys. For convenience, you can buy several pocket keys at once to keep the keys from the apartment, garage, car and office. Such keys storage covers can be purchased in the store or make the key to yourself.
What are handheld keystones, see photo:


What is she needed
The main task of the key is to ensure the safety of the keys. It looks like a small drawer or a locker made of wood or metal. You can also meet options for keys from durable plastic. In such a key, you can only store keys from the front door, but to entrust the storage of more massive keys - to open the garages it is better to trust more durable models made of metal.
The key sizes can be different and depend not only on the number of keys, but also from the preferences of the owners. In most cases, the keys are selected under the style of the room. Standard metal key is made in the form of a small box with a door and a lock to limit access to the keys of random visitors and guests. Inside the key, there are hooks or other fixtures for keys. If you look at the rear key, then there is a place for fastening the key to the surface.
There are special keys for apartments, offices, hotels, warehouses and other industrial premises. For a large object (for example, an oil refining or metallurgical plant), special metal keys are produced in the form of large boxes. Set such large-sized models in an affordable place to establish in the event of an emergency (fire, flooding, earthquake, electrical supply problems) was able to emerge all the doors of the premises. Such key keys do not have such an attractive species as model for home.

What advantage of the keystitch:
- Metal design does not burn, it will not melt and is not deformed.
- The metal key is not afraid of temperature and humidity drops, since the surface is processed by special anti-corrosion products.
- If you set the key in the corridor, it will become a reliable storage or mini-safe for keys.
- Save personal time, especially in the morning hours. With the appearance in the wall of a wall organizer, a long-time key is no longer necessary.
- Regardless of which the material is made of the key, it can always be removed and installed elsewhere, for example, in a room that will be not available for outsiders. Also a good option for the location of the key is in the same hallway, but not on the open wall, but inside the cabinet.
If we consider the keystics from less durable materials - wood and plastics, then it is worth considering that compared to metal keys they will not be so reliable. This disadvantage can be compensated for more attractive species. Of course, if there is a need to maximize key protection, then it is better to establish a real safe.
Keywords: do it yourself
If you decide to make the key yourself yourself, you can go easy and purchase a simple wall key from a tree or plywood in the store. You can make the decor of the useful item on your own. Visit the art shop or shop "Everything for creativity", there you can find a lot of interesting things, for example, a suitable stencil and a can with paint. In just half an hour, you can make a real masterpiece from a monophonic boring key. You can decorate the facial part of the key to the individual inscription or pattern, and then paint paint.

The keys from plastic can also be reapped with the help of stencil and stained-glass paints, and then open the surface with colorless varnish.
In addition to keystones from solid materials (metal, plastic, wood, plywood), you can independently make a key from cardboard, skin and even straw. There are even master classes of the manufacture of keys from natural materials. You can find interesting key keys closed on the individual key - it is very convenient, the main thing is that later you do not have to look for the main key.

How to make a key with your own hands:
If you do not have free time, and right now you want to make a key and arrange each key in your place, then you can make a useful item from old things. A wooden photo frame is suitable for the key. You will have an original wooden key.
Materials for work:
- small sizes wooden frame;
- hooks (metal or plastic) - the amount will depend on the size of the frame and from how many keys do you plan to send to storage;
- glue (can be "PVA" or "moment");
- tassel - 2 pcs. (for glue and paint);
- paint for painting wooden surfaces.
We make yourself a wooden key:
- First you need to decide on the color. Choose the paint of such a shade so that it harmonize with the interior of the room in which the keystitch will be located.
- If the frame is very old, then it is necessary to clean it from the old paint or varnish. Use grinding paper. First, Okatrite the surface with a coarse grinder, and then in shallow.
- In order for the paint well onto a wooden surface, cover the tree with a thin layer of primer.
- Now armed with tassel and paint, cover the surface with several layers of paint. Wait for the paint completely dry to attach hooks.
- Initially, we chose such hooks that need to be simply screwed into the wood.
- It remains to think about how exactly we will roll the key to the wall and lay the keys on hooks.

If you are at least a little familiar with the joinery, you can make a real key from the tree. Simplest option - Take a part of the old window wooden frame and cut the desired size. It is possible to give a good appearance to the future key using paint or varnish. And if you apply such an interesting decoupage technique, like "craklers", then you can achieve an artificial effect of "forming" surface. Using a special set of paints and varnishes, in the end you will have a wooden surface with the "old", in places of the breakaway paint. But in order to make a creative key from a wooden rectangle, you can use old keys or cutlery instead of ordinary hooks. Try to bend them and fasten to the surface. You can hang on such hooks not only keys, as well as umbrellas and a hat.

And this is an example of the original key:

You can make such an unusual key from old squiggle. The main thing is that the natural material is harmonized with a common interior. You can screw more than ten hooks into such a wooden roasting and hang not only the keys, but also all the other things needed in the hallway. Surely such a snag will have to do not only like you, but also your pet pets. You just stays watching a mischievous cat scorched your keys.
Keystone from plywood
To make a keystone in the form of a house or cute little animals, you will need materials and tools:
- plywood or list of fiberboard;
- aerosol can acrylic paint
- transparent lacquer (aerosol);
- fabric napkins;
- paper napkin with a drawing for decoupage;
- tassels;
- decamental glue or diluted PVA water;
- loops and hooks;
- sandpaper.
How to make a key to yourself:
- First you need to prepare a paper sample. If you decide to make a key in the form of a house, draw a shape on a sheet of paper and cut it out. When it is decided to make a key in the form of a cat, print a sample on the printer and increase it to a real size.
- Finished sample attach to a sheet of plywood. To make it easier to work, you first need to cut the square, and already cut the desired detail out of it.
- The edges of the workpiece polish the coarse sandpaper.
- Surface process the colors of the selected color. Acrylic aerosol paint dries very quickly. To prevent contamination of surfaces, you can work in the bathroom, checking the pre-floor glue.
- If you have never worked in the technique of decoupage, then it is better to start with small surfaces, so the edges of the key proceed with the paint (you can use a sponge), and attach the selected pattern from the napkin to the middle.
- How to prepare Pattern: Take the napkin and hands gently "cut out" the desired pattern. Separate two layers from the napkin, and attach the top layer with the pattern to the surface.
- Prepare glue for decoupage. You can purchase ready-made glue in the store, but it is better to save and make it yourself: take one part of the PVA glue and one part of the water. Mix both components and a soft tassel gently glue a paper drawing on Phaneur.
- Start working from the center of the drawing, moving gradually to the edges. Do not take a lot of glue on a brush so that "wrinkles" are not formed on the surface.
- After complete drying, the surface surface can be covered with colorless varnish in two or three layers. After applying each layer, you need to wait for the varnish completely dry.
- When the workpiece is ready, you can fasten the hooks and loops.


