Most repairs in private houses and apartments are often associated with the replacement of interior doors. They can be changed due to aging and destruction of the canvas or to change the design of the premises. As a rule, the replacement of the door leaf is necessarily carried out with the door box. Usually, specialists are hired for this. However, the operation to assemble and install the door box itself is not too complicated and does not require special carpentry skills. If there is a set of simple carpentry tools, such work can be done independently. About how to properly assemble and install a door frame with your own hands - further.
Content
Doorbell assembly schemes
There are only two ways to assemble the door frame:
- Shards are made at an angle of 45 °. To do this, a knock is used. It will help cut the box strut strictly at a given angle.
- Wrinks are performed at an angle of 90 °. To do this, you will have to carefully saw off the part of the mock profile, which is installed on the boxes of the box. Otherwise, the elements will be impossible to do. During this operation, accuracy must be observed, because it will not be possible to hide errors when cutting a mock profile.
For assembling the box, a galvanized fastener (wood screws) is used. Self -cuts made of ordinary steel during operation can begin to rust by transmitting corrosion of wood.
In most cases, wooden boxes are connected using spike joints. The most popular, due to its simplicity, is open through a single spike. In one of the parts connected, the “internal seizure” is made, a spike is cut into the other, which should coincide with the recess in size. When they are connected, the parts of the door frame are connected. There are many different studs, however, most of them are quite complicated and require the use of professional equipment.
The dimensions of the door frame
The main criterion according to which the size of the door frame is selected is the width of the door leaf. The canvas should be placed in it with minimal gaps that will provide the doors free move.
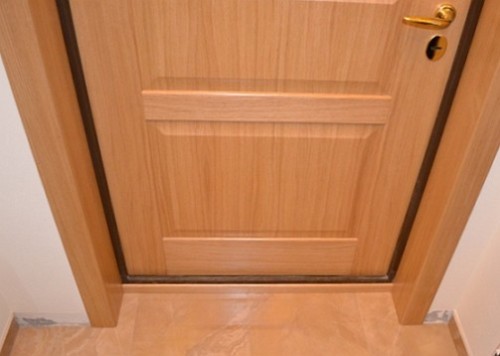
The second criterion, which affects both the size and the configuration of the door frame, is the installation site. If it is supposed to mount the door in the room in which you need to save the inner microclimate, the box is mounted with the threshold. It will prevent the penetration of outdoor air. If the box is installed on the threshold, between it and the flooring, it is necessary to leave a small gap with a 3-5 mm wide in case of thermal expansion. And vice versa, if the room must be constantly ventilated, then the box is collected without a threshold. Instead, a technological clearance is left up to 20 mm high. This allows air to freely penetrate the room, ventilating it. The door with a gap is installed in the bathrooms in order to reduce humidity in them due to this.
The most optimal option will be if the width of the box and the thickness of the wall will match.
Preparation of the opening of the door frame
The installation of the door frame must be carried out on a hard base. Before installing the door frame, the opening must be prepared. After dismantling the old box from the opening, the remains of the plaster, sealing material are removed. If the walls are made of brickwork, when dismantling the old box, it can be damaged. In order for the masonry not to collapse and do not cause injury, it must be strengthened. The doorway is enhanced by the welded structure. It consists of their two frames, boiled from corners with a size of 50x50 mm, which are interconnected by small segments of the steel strip. The finished design is installed in place and welded to the embedded. The latter are pieces of sheet metal. In the middle, a through hole is drilled in the middle, through which a piece of reinforcement is driven into the wall. The reinforcement and sheet are welded, receiving a bookmark.
After completion of work, the doorway is cleaned of dust and primed. If you need to lay communications through it, you need to do this in advance, before installing the box.
Assembly of the door frame. The easiest way
Before installing the interior door frame, it must be correctly assembled.
The connection at a right angle is the easiest way to fasten all the structural elements of the door box. To cut the spikes, make cuts at an angle of 45 °, while without practical skills, the lesson is not too simple. That is why beginner craftsmen connect the box in the simplest and fastest way.
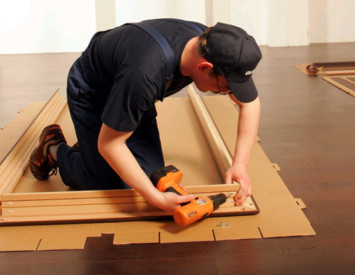
The initial stage must prepare an even horizontal surface on which the assembly will be made. The best option will be a large table, since it is much more convenient to work on it. However, if there is no one, then the floor is quite suitable.
For the assembly you will need:
- Drill and drill.
- Scurgery.
- Wood hacksaw.
- Electrician.
- Strax, hammer.
- Anti -corrosion screws.
- Roulette, pencil, square.
Work order:
- The first step must be laid out the boxes around the canvas. To provide a gap between the box and the door leaf, it is necessary to use gaskets. As the latter, pieces of fiberboard or packaging cardboard are perfect.
- After the racks are laid, the crossbar is trying on. This is done in order to cut it off in the size of the canvas. Having tried on the required length, you need to mark on the crossbar to produce cuts. For markings, it is better to use a well -sharpened simple pencil. After the marking is made, part of the crossbar is cut out in the place where it will joke with the racks. If the details of the box are covered with veneer, then for the production of backwater, a knife -haired woman is used. A similar wood tool can leave a “torn” along the edges of the cut, which will not look quite aesthetically pleasing.
- After produced by washed to the required depth, the remains of wood are removed using a chisel.
- When the work with the crossbar is over, it again applies to the racks. If there are no large gaps or irregularities, then you can continue to work further, otherwise the fastening places are a little modified.
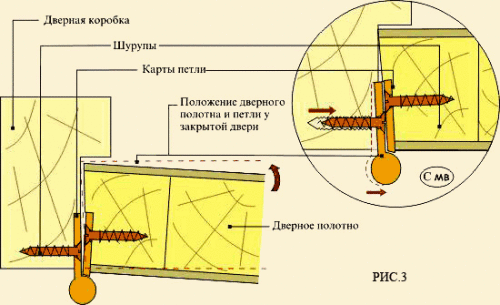
- The next stage is the clipping of seats under the loop. According to the standard, the loops should be located at a distance of 20 cm from the end of the door leaf. If you don’t get into this framework a little, nothing terrible, of course, will happen. When measuring the installation site of the loops, it is necessary to take into account the gap between the canvas and the box. After the installation sites are determined, the loops are screwed with one screw and outlined around the perimeter using an awl.
- The recess of the outlined boundaries is made using a chisel. To begin with, with a neatly thin sharp knife, a layer of veneer is removed, and then a recess is made using a narrow well -sharpened chisel. Its depth should be sufficient to hide the loop flush. After cutting the upper loop, the lower one is made similarly.
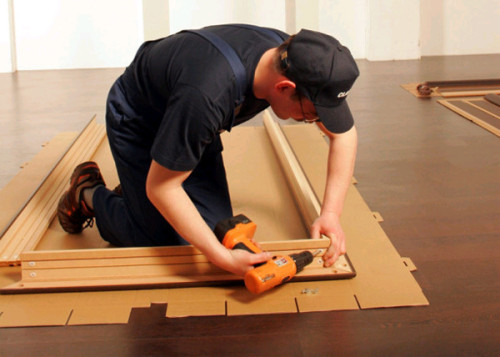
- When the clipping of the loops is completed, the box can be collected. To do it is quite simple. In the crossbar at the place of its adjacency to the racks, two holes are drilled with a diameter equal to the diameter of the screws. Then, using the latter, the stand and the crossbar are connected. The second is screwed in the same way. When working on the assembly of the box, it is necessary to control the perpendicularity of all compounds.
- If the box is assembled with the threshold, then it is installed from below. The threshold is attached in the same way as the crossbar. Otherwise, it is necessary to ensure the rigidity of the structure so that it is easier to install it. To do this, you can temporarily connect the racks by the bar, which can be removed after the installation is completed.
How to install a door frame correctly
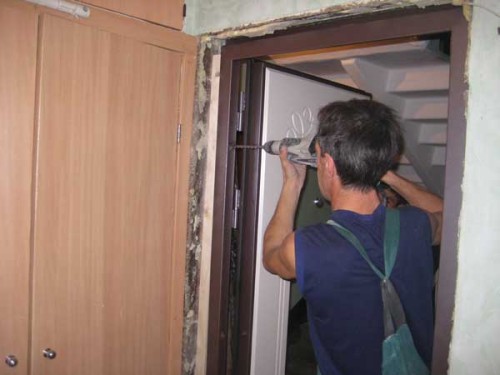
The installation of the door frame is best carried out together. The finished design is installed in the middle of the opening. In order not to move, it is fixed with wooden wedges. Then, the level of installation of the box is checked with the subsequent adjustment. When the design is set in terms of it, it can be fixed. Anchor bolts are used to attach the box to the brick or concrete wall.
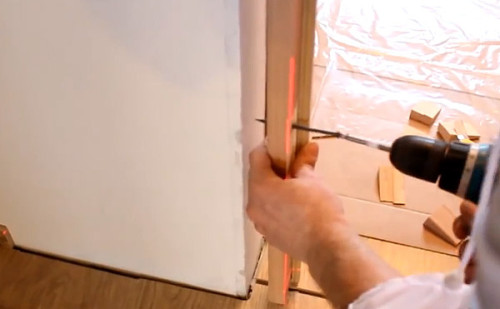
In each rack, 3 holes are drilled: from above, at the base and in the middle. Then, with the help of a punch, holes under the anchor are drilled through them.
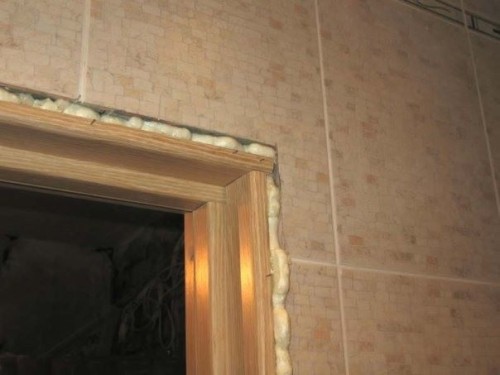
After that, the box is screwed to the doorway. The last stroke remained. The gap between the box and the doorway is filled using mounting foam. This will make the connection stronger and improve heat and sound insulation of the room.
After the foam hardens (usually it takes no more than a day), its excess is removed with a knife. Now you can hang the door.
Further, the gap between the box and the opening is closed with the help of platbands. The platbands are cut at an angle of 45 °, using a knock. They are attached to the box with small nails in which the hat is cut.
In the mock rand, you need to cut a hole to install the lining on the lock. To determine the place of its installation, it is necessary to install the canvas, and determine the place where the castle tongue rests on the rack. There is an overlay, in the middle of which a notch is made so that the tongue is completely entered. The notch is made by a large drill and is finalized by a chisel. After all the work is finished, the lock of the lock is installed. It is attached to the rack with small screws.
