Today, many people want to see the decoration of their home with an unusual, different from the usual atmosphere of average apartments. Everyone wants to see dear curtains, handmade carpets, luxurious antique furniture. But of course, such an environment is far from a pocket - furniture items with signs of aging are very expensive and are often sold only at foreign auctions. But if you still really want to make my apartment special, artificially aged furniture fashionable in recent years can be a way out, and with your own hands.
Content
Tools and materials applicable in work
Depending on the chosen method of aging furniture, the following materials and tools may be needed:
-
brush with metal bristles;
-
bulgarian with a nozzle;
-
sandpaper of different abrasiveness;
-
brush for sweeping dust and sawdust;
-
brush, roller;
-
soldering lamp or kerosene burner;
-
antiseptic paint;
-
the azure is dark and white;
-
ammonia;
-
craquelure varnish;
-
morilka;
-
shellane soil;
-
white spirt;
-
vetosh, sponge.
How to age furniture yourself
Artificially aged furniture also looks very beautiful and noble, but getting it is much easier, faster and cheaper than genuine old.
From the existing methods of artificial aging of wooden surfaces available for independent development, one can distinguish three main ones:
-
Chemical. This method implies the use of various substances, such as ammonia, stain, craquelure varnishes, etc.
-
Thermal. The effect of antiquity is achieved due to the effects of a hot soldering iron or open fire.
-
Mechanical. The most common method of damage is scratches, cracks, etc., and their subsequent treating with varnish, paint to enhance the effect.
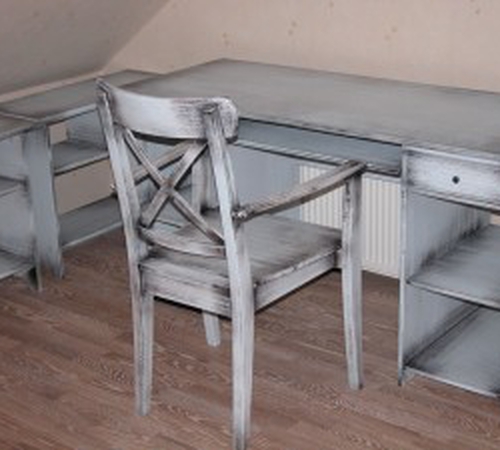
When using these methods, it turns out completely different in appearance to aged furniture. Photos of each option are not comparable to each other, although everyone is considered manifestations of the same direction in the art of decoration.
Next, you can consider each of them in more detail, but before that it is necessary to prepare the treated surfaces, i.e. Remove from the loops of the door, accessories and decor items, as well as a layer of old paint or varnish.
Chemical method of aging furniture
This method has several options, the difference between which is the use of different chemicals.
-
Sleeping with ammonia. Before starting work, you should walk on the surface with sandpaper so that a clearer structure of the tree manifests itself. This is not necessary, but if there is a desire, then the effect of antiquity can be enhanced in this way. Further, ammonia is applied to the wooden surface. Acting on it, it causes darkening and the appearance of a grayish shade characteristic of old wooden objects. It is worth noting that this method can be used only for deciduous wood due to the presence of tannins in them.
-
Sleeping with paint and crackeletal varnish. The purpose of this method is to create the visibility of a ragged, worn surface. First of all, it is necessary to determine the main color of the processed object, and then choose a lighter one, to achieve the effect of faded paint. For this, bright white paint and an ivory color, ghee, etc. are equally suitable. The main color can be obtained by white tinting.
-
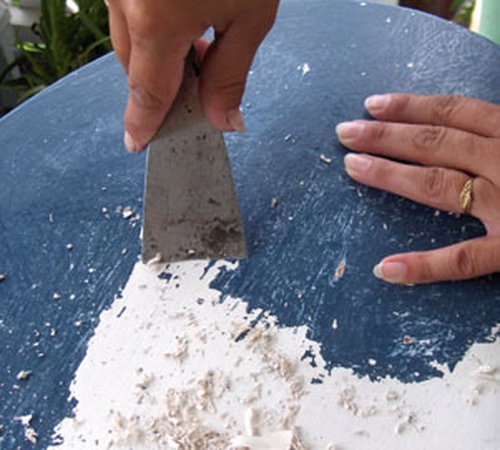
The first tone is first applied to the surface. After the paint is completely dry, it is stained again, but with white color. After that, it is also necessary to wait for complete drying. Next, the dried paint is treated with a small skin, achieving these actions of the formation of fragments and the emerging lower, darker layer.
-
To depict cracks, a special craquelure varnish is used. It is applied to the base and after that, when they begin to cover the surface with a second layer of paint, it is covered with cracks characteristic of ancient furniture. These cracks will have the color of the base layer. If there is a desire to get a more interesting effect, then for the base you can take not one, but several dyes.
-
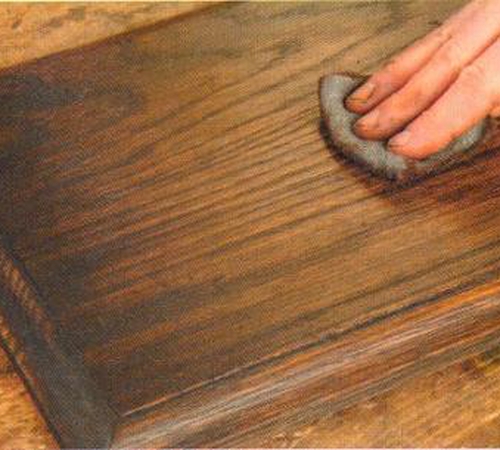
Awing with a stain. The surface of the tree is smeared with a water -based stain, setting the basic color. After that, they begin to selectively wash it off with a wet sponge. The emphasis is on the middle part of the boards, while the edges, cracks, bends are left dark.
If the desired effect is not achieved during the implementation of the above actions, the surface should be sanded after completely drying out. On the hollows and bends, you can additionally walk with a brush with a dipped stain. The next step is another layer of the stain, but on another basis (if the first was on the water, then the second can be taken on alcohol, gasoline or ligroine basis).
Next, the processed part is completely dried for twelve hours. After that, the woody pores are filled with shellac soil with a brush or a piece of paralon. At the final stage, a special wax is rubbed into the processed surface and polished by a soft rag.
Thermal method of aging furniture
-
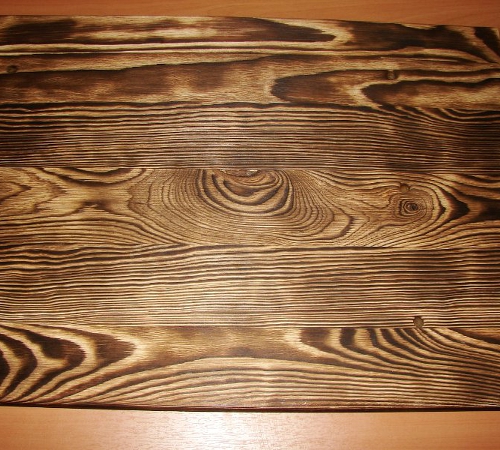
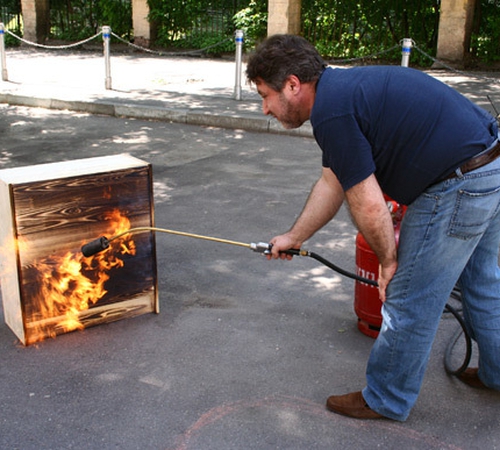
By acting with this method, the wooden surface of the furniture is burned with a soldering lamp until a textual pattern and knots appear. After this stage is completed, it is necessary to remove the cargo from the surface, as well as achieve a more relief structure using a metal brush. In order for the drawing of the tree to be as expressive as possible and manifest itself in all its glory, you can freeze the product in one layer. Next, it is advisable to apply the final varnish coating.
This method requires extreme accuracy and attentiveness because, acting with a soldering lamp, a wooden item is very easy to ruin.
-
In the thermal method, as an option, you can use a kerosene burner instead of a soldering lamp. In this case, you can damage the surface with a metal brush both after and before heat treatment.
In the process of work, it is not in any case that it is impossible to delay the fire in some places longer, in the others less. This is best done in the open air - in the yard or, in extreme cases, on the balcony. Before you start scorching the processed furniture, it is better to fill the hand on an unnecessary piece of wood.
Mechanical method of aging furniture
This method is popularly most common and most suitable for safe use at home. It has three methods of implementation:
-
The first way. It is very simple. The processed surface is cleaned with a metal brush, and covered with white azure, waiting for it to dry. The azure is a translucent coating through which the natural structure of the tree is visible.
When the coating dries completely, we clean it again with a brush. The result of such processing is a bleached wooden surface with small scuffs and relief.
-
The second option. It is a little more complicated than the first: the soft fibers of the tree are removed with a brush, creating a heterogeneous structure, and then painted to enhance the effect. First, on the surface, they pass with sandpaper, then a metal brush, which, if desired, can be replaced with a grinder with an appropriate nozzle, wood fibers are removed. After that, you need to clean the working plane of sawdust so that they do not interfere and do not close the work. At the end of this procedure, the surface becomes contrasting and embossed. To strengthen and emphasize its beauty, you need to stain azure in two layers. Apply the coating with a brush or roller. After waiting after applying a couple of minutes, remove the excess with a sponge of excess, watching the emerging relief. As soon as the product acquires the desired look, you need to interrupt and leave it until it dries completely. After that, apply a varnish coating.
-
If you like aged furniture in the style of Provence, an additional thin coating of white azure should be applied to the lacquer coating. After drying it, you can apply as the final layer of transparent azure. This option of aged furniture with your own hands looks very good if light colors prevail in the decoration of the room.
-
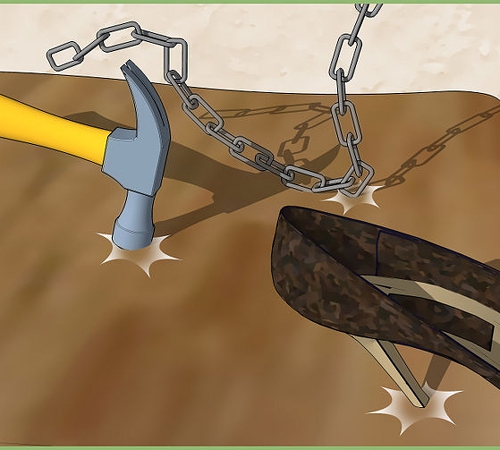
The third option is multi -layer staining. Before its beginning, the surface of the furniture must be damaged by all kinds of tools that leave various traces: to knock on it with a hammer, drive a saw, scratch with an awl, etc. Next, the tree should be primed with a layer of transparent antiseptic, let dry well and apply a continuous layer of antiseptic paint. After complete drying, you can once again process the product with first and then fine sandpaper. On the first layer of the “trace of centuries” should not appear much. Masters engaged in decorating furniture argue that an excellent result gives an uneven coating with a wood -protecting, antiseptic agent “down -text”.
-
After emphasizing, you need to brush the resulting dust and open the tree with white azure. A dark base coating will shine through its layer. Moreover, uniform coloring in this case is inappropriate, because The visibility of the old, worn surface is emphasized by influxes and gestures in the coating. After drying this layer, it is necessary to once again apply a metal brush, imitating the structure of the old wood on the surface of the furniture. At this stage, the coloring begins to contrast sharply. But the tones of the old wood are always more muffled. You can smooth out a sharp difference, using a white azure, diluted in half with a White spot.
How to grow furniture-a master class using wax and a stencil
This method of decorating furniture helps everyone to solve the familiar problem when any of the objects of the situation served for some time and lost its original appearance, but at the same time remained strong and reliable in terms of quality. In this case, you can give him a second life with the help of this artificial aging technique, which is somewhat similar to the methods described above, but something differs from them.
Of the additional tools and materials not described in the corresponding section, we will need:
-
black and white acrylic paints, and it is desirable that the white is an aerosol;
-
white paraffin candle;
-
rubber lace napkin;
-
parquet or furniture varnish.
To achieve the best result, you need to carefully and consistently execute all the points of the following instructions:
-
as a preparatory stage, the decorated piece of furniture must be cleaned with sandpaper, first large, then small, in order to remove the remains of the old paint or varnish;
-
we take a brush with artificial bristles and completely stain the working surface with two layers of black acrylic paint. The second layer is needed to equalize the first;
-
next, we rub the edges, corners and other protruding places of furniture, which would most likely get rubbed over time over time. This action is necessary so that with the subsequent application of the paint it is possible to remove it in the places where it fell on paraffin;
-
now we take a lace napkin that will play the role of a stencil, and fix it in that area of \u200b\u200bfurniture, where the drawing will be appropriate: if it is a chair, then on the back or seat, if the cabinet or bedside table is on the door or roof, etc. After that, a spray with white paint is completely stained with the entire surface of the product. It is advisable to do this on the street, but if this is not possible, then you need to at least cover the floors with newspapers, film or cardboard, otherwise everything around will be covered with spray of paint;
-
when the paint is completely dry, with the help of a sponge, clean the places that you wiped with paraffin before painting. You will see how dark paint appears through the upper white layer. After that, you can remove the napkin;
-
at the end of the work, it is better to cover the surface with parquet varnish to extend the new coating life.
In conclusion, I would like to say that in your own -handed wood furniture, a photo of which in various versions you see on this page, this is what will bring a fresh stream into your life, will allow you to rise above the routine and will make it possible to be proud of the unique atmosphere in the house and your fruits skillful hands.

