The corner cabinet allows the most rational use of the room space. If the furniture headset in the room is located in such a way that it remains an empty angle, it easily fills the angular construction. Also, the angular cabinets act as a binder element between the cabinets, which are located on the walls adjacent to each other. Corner furniture is easily gathered with their own hands, as well as any other cabinet furniture.
Content
Varieties of angular cabinets

Corner cabinets are the designs of various configurations. They are separated in shape, according to internal filling, by manufacturing material and color. The shape of the cabinet is selected based on personal preferences and the overall interior of the room. The three main forms of corner cabinets are distinguished:
- Cabinet in the form of a triangle. This is the most profitable configuration for small rooms. The triangular cabinet has no side walls, it fills only the angular space, without stealing free space in the room.
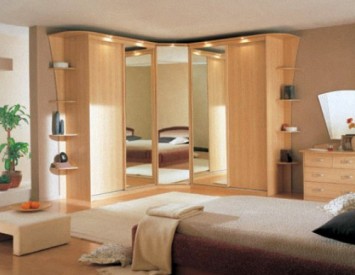
- Cabinets corner diagonal. They differ from ordinary corner cabinets by the presence of one wall with the door. In such furniture, a more spacious inner space is formed at the expense of the side shelves.
- Cabinet in the form of a trapezium. Such structures are most often mounted in niches, the shelves inside the cabinet have the shape of a trapezium, the doors are moving along the diagonal. Demonstrates such angular cabinets photo below.
The following classification shares the corner cabinets by the installation method. In this category, they are divided into built-in and cabinets. Cabinets have rear walls, are not attached to the wall and are mobile - they are easy to move to another angle. Built-in wardrobes do not have the rear wall, are attached directly to the wall. Separately highlighted wardrobe, which resemble a small room for storing clothes and shoes.

In addition to the external design, cabinets are distinguished and on an internal device that is done completely diverse. The cabinet is equipped with shelves of various sizes and in an amount limited only by the volume of the cabinet itself. If it is supposed to keep clothes in it, then hooks and hangers are mounted. All these nuances are thought out at the drawing stage.
Development of a project of an angular cabinet, necessary materials
To assemble the corner cabinet with your own hands, it is necessary to start to create his project. The help in this issue will be various programs for designing furniture, one of the most popular is the product called Pro100. The program creates a drawing, calculates the materials and the necessary accessories. The drawing is created and without the participation of the program, manually on a sheet of paper. Initially, the size of the furniture is determined, the side walls are drawn. They are carriers, so it is important to calculate the project so that the sides of the cabinet are made from a solid board. Based on the own needs and layout of the room, the cabinet is designed by a solid monolith from the floor to the ceiling, or leave free space from above.
The side walls are enhanced by horizontal jumpers, which are located at right angles. The width of this design is selected based on the size of the cabinet, on average it is 100-150 mm. The rear walls of the cabinet are inexpedient from the thick material, they are sewn by MDF. If a cabinet is planned, not resting in the ceiling, the roof is made from a solid piece of material, and the floor is also manufactured. In terms of the size of the upper and lower linings, all horizontal partitions are calculated from the data of the wall thickness obtained.

The internal space is optimally divided into three zones. The upper zone is the mezzanine, represents one single shelf. The middle part contains shelves and hangers for clothes or only hangers - it depends on the destination of the cabinet. The lower part also represents one separate shelf or retractable box. Often at the bottom of the cabinet make the shelf for storing shoes. For the reliability of the design, the lower partitions are strengthened with vertical jumpers.
The last stage in the design of the project is to create a cabinet door. This design is made swing or sliding. For mounting of the sliding door, the guides are fixed along the top and bottom line of the opening. The swing door is fixed by the classic way, on the canopy. At the end of the project development, all the necessary fittings and materials are calculated. A list is drawn up, the total length of the open ends, which must be seized with a decorative edge.
All wooden parts for the cabinet are bought in the store and then cut under the desired size. Colley is produced either independently or order the cutting of the material in the store. All accessories are bought separately, it is recommended to choose the products of Turkish and German producers as the most durable and reliable. In the list of fittings, door handles and loops must be present, if the swollen door is mounted. Also necessary closers, configmatics, wrenches, legs, hooks for clothes, a metal horizontal plank for trempels. Equipment of accessories is selected based on what is the internal circuit of the corner cabinet. Also for the decor of the location of the confirmates acquire plugs under the color of the base material.
Algorithm for assembly and installation of the corner cabinet
The assembly process depends on what exactly to assemble the corner cabinet. A drawing of a five-ranger or classic corner cabinet provides some nuances of mounting. It mainly depends on whether the cabinet is mounted as a separate design, or it is created as an insert to the main headset. In general, the process of assembling an angular cabinet looks like this:
- The material is collected according to the drawing, the presence of all necessary components is checked.
- Legs are installed on the bottom of the product.
- The side walls are mounted using confirmates.
- In the upper part of the side walls drill the grooves for the waders. The location of the holes of the holes depends on the location of the holes on the roof.
- Treats with glue PVA specks, drive them into the lid.
- Roof is installed on the side partitions
- If the cabinet is going to under the ceiling, then it is necessary to change the position of the legs so that the roof is tightly nevertheless.
- After installing the cabinet, the hinges are fixed for swing doors or guides for sliding. Installing fasteners for shelves.
- The shelves are installed, the rest of the fittings is mounted, confirmates are decorated. Corner cabinet with your own hands assembled.

An example of assembling a triangular corner cabinet
Now in more detail about how to create an angular cabinet with your own hands on a specific project and sizes. The design described optimally fills the space in the corner, while the amount of material residues will be minimal. On this angular cabinet, the sizes are easily selected individually, pushing out from a height of 183 cm. For the manufacture of the following dimensions will be needed:
- 2 pcs 2.5 x 30 cm, length 180 cm.
- 1 pcs 2.5 x 20 cm, length 180 cm.
- 1 pc 2.5 x 10 cm, length 180 cm.
- 3 pcs 2.5 x 7.5 cm, length 240 cm.
- 1 pcs 2.5 x 5 cm, length 90 cm.
- Figured bar 90 cm - 1 pc.
- Decorative embossed panel for finishing 6-9 cm thick - 1 pc.
Make such details:
- Rear wall of the cabinet - 1 board 2.5 x 20 x 183 cm.
- Side sides - 6 cuts with cuts at an angle of 45o, dimensions - 2.5 x 30 x 76 cm.
- Front finish - 2 boards 2.5 x 7.5 x 183 cm.
- Corrugated panel - 2 pcs with dimensions of 2.5 x 42 x 183 cm.
- Roof and floor - 2 boards with dimensions 2.5 x 10 x 67 cm.
- Countertop - 1 Plank with dimensions of 2.5 x 5 x 67 cm.
Next, the cabinet is assembled according to the following algorithm:
- Manufacturing shelves.
For shelves, pine boards are taken with dimensions of 2.5 x 10 cm, the width of which is additionally measured. Standard board size - 17-18 cm. On the sides on the boards, sections are made at an angle of 45o. To make a smooth slice, the desired angle is measured on the material, they draw the distance to the opposite side, measure the distance that is equal to the rear wall width. From this point to the opposite side, an angle in 45o is postponed.
The next board will be located in the opposite side. It is applied to the finished slice, die angle. In this way, all the necessary details are prepared. In this design, they are exactly 6.
- The back side of the cabinet.
When all the shelves are ready, they are mounted to the rear wall. To do this, measure the necessary distance between the shelves, put the labels and drill holes on them. Shelves are mounted with glue and bolts with a diameter of 2 inches.

- Processing front corner edges.

The front finishing bar is also at the beginning. Tags are set in accordance with the location of the shelves on the rear panel. To do this, the panel is applied to the already attached shelves or the distance is measured by a roulette.
Shelves are applied to the places allotted for them. Holes are made for fasteners. When mounting the screws are mounted in this way - from the inside of 50 mm of the product, with an outer 35 mm. Each shelf accounts for 2 screws. For additional fixation use glue. Screws do not twist excessively tight.
- Installing corrugated panels.
The width of the openings on the sides of the cabinet is determined. According to received data, parts from the corrugated panel are cut. Their size and fasteners are calculated so that they fit tightly to the base. Glue is applied to the sides of the shelves, the panel is fixed with screws with a diameter of 35 mm. Particularly followed the density of the rear joint fastening, as it will be clearly visible on the finiteness of the product. In the forefront, small marriages are allowed, in the subsequently they will all hide behind the decorative elements.

- Shelf processing.
At this stage there are two ways, how to make an angular cabinet with your own hands. The first is to collect a finishing facial frame, then fix it into place. The second - first fix on the edges of the shelves decorative strips with glue and 50 mm screws. In the second embodiment, the guide holes are drilled at the ends of the boards, the holes are made of 3, by the number of screws. The bottom plank is manufactured on its taste. To fix decorative slats, the length of the upper front edge of the product taking into account the side corners is measured.
- Door installation.
These works are the most complex and responsible. For the manufacture and installation of the door, specialized tools are needed, in the absence of which it is necessary to show a mixture. This process requires much attention, the ability to focus and responsibly perform all the work. If there is a milling machine or electric copies, the door with inserts is easily manufactured. The thickness of the product should not exceed 18 mm, in some cases the decorative panel is installed in the frame.

Overhead doors are made of a wooden frame with sides of 7.5 cm x 2.5 or from separate strips. frame assembly is made of 75 mm diameter screws. On the reverse side are attached decorative grooved panels. You need to ensure that the finished door rests on the shelf. When there are two swing doors often supplement their vertical strip, which excludes the formation of a gap between the doors. After mounting the door cabinet is ready for operation.
A few tips on installing corner cabinets
- During installation it is necessary to lay the cabinet floor with cardboard or cloth as runtime works on it will scratch.
- If you plan to collect a ready-bought cupboards, before assembling the need to check all the details. In case of shortage immediately contact the store where the purchase was made.

- Before installing awnings for doors is necessary to determine the direction in which the door is opened.
- If the cabinet is installed as an additional structure to the other furniture, it is necessary to make sure that the doors of adjacent cabinets will not beat each other. This problem is eliminated by the limiter.
- Before mounting the door to the wall mounted plastic lining and canopy for mounting plate. Fix these parts with screws. The handles on the doors are placed only after the final installation and adjustment.
- Corner cabinet combined with a ready module in at least three fixing points.


