As a rule, the dismantling of the bath is carried out during the repair work of the entire room or when replacing plumbing equipment. In any case, you will need a step -by -step instruction of how to remove the bath, so as not to damage the elements of the cladding, furniture and other plumbing in the bathroom, to work quickly and efficiently.
Content
Preparatory stage and start of work
Despite the fact that in the process of dismantling you still form garbage, preliminary cleaning and preparation of the premises is a mandatory step before starting work. If this is a comprehensive repair, then nothing should remain in the room at all, up to the shells and hoses. Experts recommend the dismantling of baths in overalls and protective equipment. You must be prepared for the fact that the work is quite praised and dirty.
So, before you remove the old bath, you need to do the following:
- Completely turn off all communications in the bathroom: redraw all water supply taps.
- Take all the accessories and accessories of the bathroom. Even if they do not interfere with you, you still risk staining them strongly or hopelessly damage them.
- Take away all the furniture from the room: bedside tables, cabinets and so on.
- Dismantled plumbing and sanfusion.
- Clean the room from everything that can interfere with the work.
Quite often, dismantling the bathroom is directly related to major repairs, which involves the removal of tiles, tiles, peeling paint and other facing materials. Everything is done mainly quickly enough, but at least a day you will leave.
We also advise you to ask in advance whether the service of large -sized debris is provided in your house. Otherwise, you will have to engage in the export of the old bath on your own, which is quite difficult.
We proceed to dismantling
When all preparatory work is done, you can proceed directly to the dismantling:
- First of all, it is necessary to disconnect the drain pipe. If your plumbing is standing since the Soviet Union, then most likely a pipe is a cast iron connected by a solution of concrete. Naturally, this design is fixed tightly. The easiest way to simply cut off such pipes so as not to waste time. In any case, you are unlikely to use them in the future. But plastic pipes are enough just to promote and put off for the time of dismantling in another room.
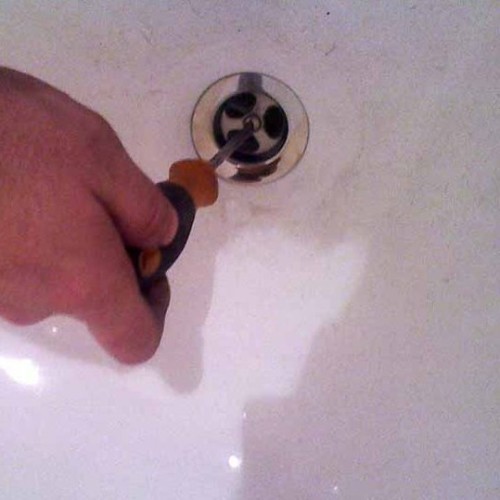
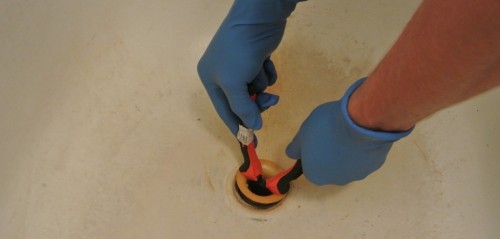
- Before you remove the bath, disconnect the floor siphon and a pipe of overflow. The siphon in most cases is fixed with a clamp bolt turned towards the drain grill. It is enough to turn it in the opposite direction and unscrew it. After that, the siphon is disconnected without problems. It happens that it is difficult to unscrew the clamping nut. If it does not succumb and there is no need for its subsequent use, you can simply cut it with a hacksaw for metal. Such nuts are made mainly from soft brass, so there are no special efforts for the cut. If it is inconvenient to work with a hacksaw, you can use a chisel and a hammer. Just carefully solve it, trying not to damage the bath itself.
- Now it is necessary to make side cuts. They are made from the inside of the drain lattice so that the distance is sufficient to cut the sector from the plum funnel. Its size should be no more than a quarter of a circle.
- Next, carefully saw the funnel circle. The most important thing is not to damage the enamel. But this is important only if you mount the bath again. If not, you can work faster and without particular care. What will ultimately remain from the plum, push the edges inside, bending with a chisel and a hammer. Now the drain without problems will pass through the drain hole in the bathroom, and you can easily pull it out.
- Disconnect the pipe of drain-overweight and pull out the outdoor tube out of the sewer bell. In order not to drip water, the bell itself can be closed with a gag or simply wrapped with a piece of unnecessary fabric. If the bath was grounded, then the strip should be disconnected so that it does not interfere with work. To do this, just knock out a metal wedge with a hammer. Part of the tile at the edges of the bath also often has to be removed.
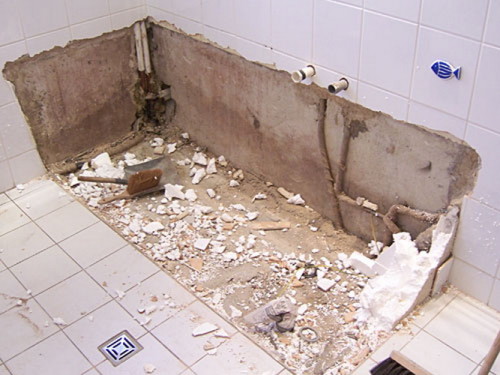
- Now it is already possible to free the bath from the cement adjacent to it. Again, if you do not plan to use the bath anymore, special caution is not required. You can just beat off pieces of cement. It is likely that he will disappear with the enamel. However, in the event that all the plumbing is installed back, you need to act carefully. The upper layers of cement can be removed with the same chisel, but to do it very carefully. Next, you will have to work more subtly. You can use a knife, spatula or any other sharpened metal, carry out all the actions extremely carefully. On top you can take place, but it is also fraught with damage to enamel, which in the future will cause corrosion. In any case, if the bath was fixed with concrete solution, then all the work is perfectly done.
Features of the dismantling of different types of baths
In general, the process in all cases is quite similar, but different weight implies certain features and causes some difficulties. Therefore, we highlight the key points of the process in each individual case.
Dismantling a cast -iron bath. The problem is that the reuse of cast -iron baths is usually not possible. Therefore, the main tool for dismantling will be a hammer that the bath will break.
Fitting pieces of cast -iron bath is a laborious and very noisy process. For general reasons, we recommend that you warn your neighbors that at a certain time you will carry out repairs in order to avoid complaints later.
Cast iron - the material is very heavy, but quite fragile, if you work with force. Fight the pieces of metal as smaller as possible to be able to immerse them in bags and take them out of the house. The advantage of breaking a cast -iron bath is an exclusion of the need to hire special equipment for export. Pieces can be immersed even in a passenger car, taken to a landfill or put it on scrap metal.
If you do not want to work with a heavy hammer for many hours, you can use a grinder with a special disk. The pieces will be smoother and more convenient for removal.
Important! In the work, use personal protective equipment: gloves, glasses, closed shoes.
About how to remove an acrylic bathtub, a special detailed instruction is not required. It is light enough and without problems passes in the doorway. It can also be cut and taken out without problems.
It should be said that many agree to take acrylic bathrooms with pickup, which will save you from additional trouble.
The dismantling of a steel bath according to the principle is almost identical to the dismantling of cast -iron. For sawing, it is enough to choose a strong circle and a grinder. But if the bathtub itself is small, it weighs a little and easily goes into the doorway, then you do not need to saw it. You can even just take it out into the street. You can be sure that she will be taken away immediately.
Tips and recommendations
Despite the general simplicity of work, there are a number of nuances that must be taken into account in the work. Therefore, we bring to your attention a set of basic tips, which will greatly simplify and speed up the process:
- If the bath is light and passes in the doorway, do not saw it. Sake your own time and strength.
- When you take out the bathroom from the room, which you will mount back after repair, it is better to paste the corners with a mounting film so as not to damage the enamel if you hit it on the angles of the opening, etc.
- Make sure not to damage the details from the mounts. Try not to lose them. Without these elements, it will be very problematic to install a bath and it will stand fragile. We'll have to go to the nearest construction store and buy new ones.
- We advise immediately during the repair to replace all the withdrawal pipes. Even if they changed relatively recently. You can easily damage them, and after installing a new plumbing, the replacement process will be very complicated. The replacement will not affect the cost of repair work, but it will prevent additional expenses of effort and time in the future.
- The joints of the pipes are recommended to be treated with high -quality sealant. This is rather a preventive measure, but it will never be superfluous and will ensure a long service life.
- Before you take out a bath, the legs are best removed if possible. You will most likely put it in another room, and the metal of the stands can greatly damage the coating. It will be more reliable to remove them and simply fill the bath to one side in a new place or support the wall.
- When you raise the bath vertically, it can go forward on the tile. To prevent this, you can lay an ordinary rubber rug under it. This will provide excellent adhesion to the surface and greater safety in work.
- If one side is firmly attached to the wall, you can simply raise the opposite side and “drop” it to the floor. But you should take care of softening the blow: apply fabrics, rugs, etc. But if you live in an old house with weak floors, this method is strictly not recommended.
As you can see, the dismantling process itself is nothing complicated, but it requires significant efforts and time costs. Therefore, soberly calculate your own time and effort. And only after the final repair, start work. You can familiarize yourself with how to shoot a bath by learning the video.


