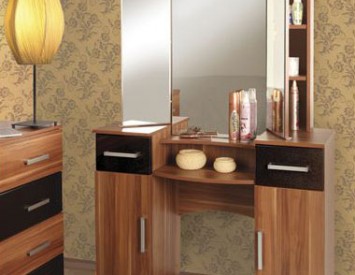
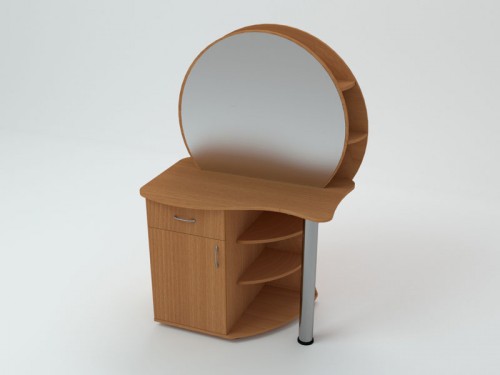
For women - a stupid indispensable piece of furniture interior. A convenient and useful table - a nightstand equipped with a mirror, stands out in the interior, but at the same time should harmoniously correspond to the overall style of furniture design.
Content
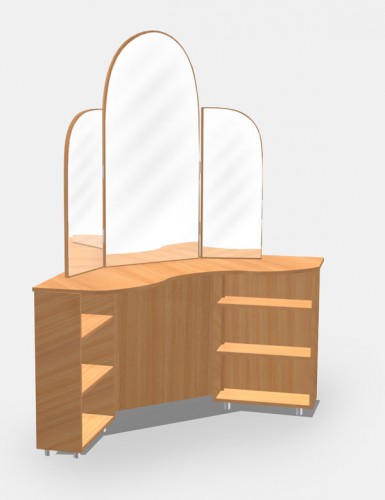
It is not very difficult to make a dressing station yourself. A classic dressing table with a mirror is a table with drawers and one or two bedside tables. A successful option is an angular dress with a triple treel mirror. To begin with, read the types of dressing rooms, the photos of which are posted on the Internet and select a suitable option for yourself.
Drawing and the necessary materials for the dressing room with a mirror
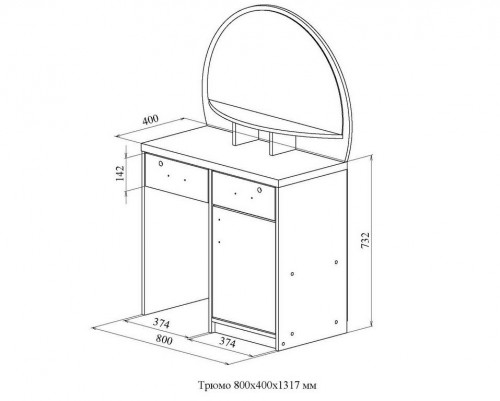
Draw a pencil the exact drawing of the dressing room indicating all sizes. The drawing will help you determine the required amount of materials and accessories for the independent manufacture of the dressing table.
- The table of the table-the nightstands is made of laminated wood-bearing plate with a thickness of at least 2 cm, the rear walls of the bedside tables and the bottom of the drawers from the fiberboard. You can buy a mirror and mounts for it at a furniture fittings store, where you need to purchase loops for facade doors, the facades themselves for drawers, the runners for them and the door of the cabinets. MDF facades do not need additional processing, just get the loops suitable for them.
- Choose the same handles and purchase a end tape. The legs can be made by yourself or purchased ready -made ones. The ending is flat and welded by the iron and “P”- figurative, which is attached to glue. Unit fittings will also be required - screws, screws, confirmation, metal mounting corners, etc. For the countertop, purchase a thicker boat from chipboard, you can even be ready for your size.
Opening and assembly of a table with tables for the dressing
Apply marking on chipboard, pencil or thin marker. It is better to cut straight lines on a stationary circular machine with a fine cutting part. Curved lines are made by an electric jigsaw. The shtima angular looks very convenient in the interior.
- When working with an electric jigsaw, pay special attention to the correct pruning. The plane of the canvas and the end edge should be a right angle. In the case of distortions and chips on the plane of chipboard, you will have to decorate the edge “P”- a figurative end tape.
- The workpieces carved in size are marked under the holes along the plane and on the end side. For marking you will need a carpentry corner and awl. Body in the laminated surface of the point, plunge with a marker. Designing several identical holes in the end part of the workpieces, fold them with a pile with a carpentry square, draw a vertical line with a pencil and, having determined the center, put the points with a marker.
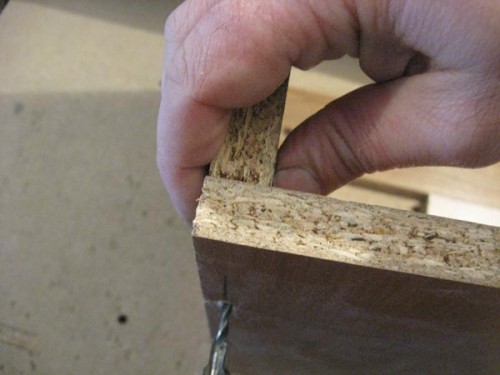
- For drilling, you will need a special drill for a confirmation or two usual wood with a diameter of 5 and 8 mm. A through hole of 5 mm is drilled in the planes and a 8 mm chamfer is removed under the confirmation hat. The chamfer is removed at least 2 mm depth. A hole of 5 mm to a depth of at least 4 cm is drilled in the end parts. It is important to drill holes without deviations and distortions.
- To assemble the frame of the dressing room to the bedroom, you will need a special “g” or “z”- a figurative hexagonal key of 4 mm or a nozzle for a reverse screwdriver. To begin with, make separate parts, leaving a minimum background for correction of blanks. Having received the overall picture, putting and correcting the details, you can clamp tightly.
- The end tape is of two types - flat or “P” - figurative. If the surface is cut carefully, without chips and distortions, you can glue a flat end. The PVC end tape is exhibited along the facial edge and welded by a well -warmed iron. Excess edges are removed from the back with a sharp mounting cutter. “P” - the figurative edge hides chips and distortions of the end edge, but it creates a bar on the plane of the chipboard, and in some places this can create some inconvenience. Such a trout cannot be used in the places of docking of the workpieces or it must be cut for a tight adjustment of the planes.
Manufacturing and assembly of a drawer for the table table table
Decide on the guides. They need two, roller or sliding, to choose you, the main thing is not to confuse the right with the left. A longer part of the guide is attached with short screws onto the side wall of the dressing table, and the second on the drawer.
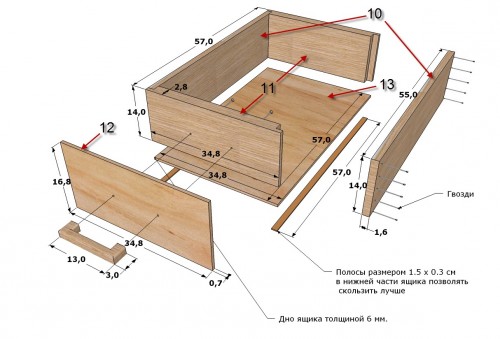
- Three planks of equal thickness and height and the facade plank MDF will be required for the drawer of the dressing table. In the lower part, having retreated from 5 mm, a longitudinal groove is made, which is thick equal to the thickness of the bottom of the fiberboard or plywood. The drawer is assembled to the confirmation or wooden doughs.
- With the thickness of the side wall of the chipboard of 20 mm, two deaf openings under the dad are no deeper than 15 mm. Standard wooden furniture doughs have dimensions from 4 to 30 mm in diameter and up to 200 mm long with a longitudinal corrugated surface. Structures are assembled under the faint for PVA glue. The bottom is fixed in grooves, but does not sit on glue.
Hanging facades and fastening the mirror on the dressing room
- To fix the mirrors, there are two methods: mechanical mounts and double -sided tape for glasses and mirrors. Along the perimeter of the curly mirror, holes are drilled under the mounting with the diameter along the fasteners and sits on PVA glue. In the second case, on the back of the mirror there are standard overlays or sticky pads from special double -sided tape for mirrors are glued.
- For facade doors, special deaf holes are provided for attaching furniture loops. For doors without landing nests, they need to be drilled. The diameter for fastening of a furniture loop is 35 mm, a limiter must be put on the drill, since the hole is deaf, 12.5 mm deep. The loop sits in the nest, is aligned and attached with short screws to the back of the facade and the inside of the side wall of the dressing room. Two adjusting screws are located on the loop, with which the facade is corrected by planes.
The last stroke is the fastening of the handles on the facades of the cabinets and drawers. For this, holes are drilled along the diameter of the fastener. Be sure to put metal or plastic washers from the inside. Beautiful stylish pens, always striking and can radically change the most plain furniture.
