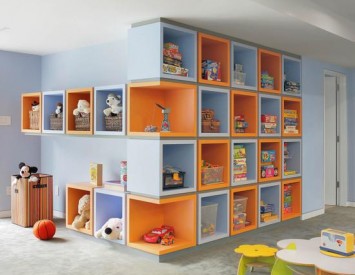
In the children's room there is always a question to order space. Scattered children's toys, things and books are practical and conveniently placed on the rack. Stylish and beautiful racks in the children's room are easy to make independently. Showing a little imagination, you can sketten a simple, but interesting drawing is a scheme. The device of the rack in the children's room is functionally in that in the process of the child's growing, it can be transformed. Increasing additional sections up or width. Some shelves can be removed by increasing the cell or on the contrary to mount new ones.
Content

Make a rack for children with their own hands, even someone who has never come across the manufacture or assembly of furniture. For the manufacture of racks, a wide variety of materials are applied. Wooden board and timber, laminated chipboard, as well as the framework of the rack can be made of metal corner.
Scheme of a simple rack in the children's room

Tools for making wood rack
For the manufacture of the shelving, you will need a carpentry and measuring instrument:
- Roulette and carpentry corner, clamps.
- Wooden hacksaw, drill, screwdriver with a set of bit, hammer and pliers.
- Chisel or chisel, planer and sandpaper.
- Furniture accessories for mounting shelves and a rack frame to the wall (corners, barrels, etc.).
The rack is made entirely of timber and boards or combined. It is permissible to manufacture shelves from MDF plates, laminated chipboard or thick plywood 18 - 20 mm. Wooden board in width is selected depending on what you plan to store on the rack. Thickness should be at least 2 cm.
Procedure for making a rack for children's boards
Carcass Carcass Corner Connections

It is important that the boards cut in size had a solid angular connection. It is best to make such a connection with spikes and faces. In the end ends of the boards, the cuttings were made with a tree with small cloves on the thickness of the mating board.
The chisel or chisel is sampled by a groove under the thorn. It is important that the dimensions would be respected with maximum accuracy. The connections are sampled, connected and tightened by clamps until complete burials.
It is desirable to put additional fastenings from a metal corner from the inside of the frame.
Intermediate compounds of shelves and vertical walls
In the finished frame, make accurate markup of the installation of horizontal shelves and vertical simpleness. For the middle attachment of the intermediate shelves, a studded combination of a row on a spool, square or round.
The simplest connection is round wooden stud. To do this, through the marked chalkboard of the frame is drilled through holes under the wooden stud. In the ends of the shelves of mating with a frame, the nests are dried to a depth, which makes up 2/3 of the length of the heel.
Connections are subject to strict requirements. Studs are labeled PVA or joinery glue.
After final graze, the rack for the children's room is processed by sandpaper, opened with a mourn and varnish or paint. The rack installed in its place is fastened for resistance to the wall with metal corners.
Production of a rack in a nursery from drywall

From drywall make a rack in a nursery very easy. Such a rack will be stationary and will serve you for a very long time. First, sketch the drawing of the future rack and calculate the required amount of plasterboard. Standard sheet 1.2 - 1.3 meters in width and from 2 to 4.5 meters long. Thickness is from 6 to 24 mm. If on the rack in the children's room you provided a place for the TV or intend to store other items that have a lot of weight, then instead of a standard profile, purchase a metal corner.
The frame is usually mounted from the standard UD profile. The profiled racks of the base are attached to self-drawing to the wall and the floor. From them, vertical frame sidewalls are erected, intermediate seals and horizontal shelves. The framework of the shelving is constantly checking the horizontal and vertical.
On the mounted frame, with the help of metal screws (25 mm), secure the upper and lower shelves. Next, checking the Waterpas, continue to sow plasterboard frame with a small step with a small step. It is not difficult to work with it, you can not even limit yourself with straight lines and angles. This material provides for the possibility of various roundings and smooth transitions.
Rack shelving for nursery from drywall

The surface is cleared of dust and dirt. Self-screwing sites are processed by a special primer.
A special reinforcing mesh is pasted on the seams and place of the jack. These places are also processed by a special primer.
A special metallic or plastic corner is installed on the slopes and the angles. For arched or curly shelves there are special bent corners.
To mount the corners, the putty is applied on both sides to a smooth layer and pressed to the limit. Purpure splashed through perforation remove the spatula and smoothed along the plane, gradually aligning the surface.
After drying the first starting layer of putty, the second finishing layer is applied. On the soldier, there should always be a clean and even edge of the working edge so as not to damage the first surface.
After drying the finish surface, all planes are grinding with a grater with an abrasive replaceable mesh, the primer is laid under painting and stain with water-emulsion paint. Your children's furniture and racks should be harmoniously combined in style and color scheme.


