Garden furniture is an indispensable attribute of each house site. Scams, tables, armchairs and sun loungers will make the presence of more convenient and pleasant on the territory of the house. Subjects of garden furniture can become not only functional-useful, but also supplement the overall picture of landscape design. Currently, buying the garden furniture you like is not difficult. In a wide variety of proposed models, you can choose the most suitable option for yourself, which organically fits into the design of the site. However, having enough time and desires in the presence of a certain set of tools, garden furniture can be made independently. About how to make a bench with your own hands - further.
Content
Types of garden benches
There are a large number of models of garden benches. In their design, they are divided into:
- Benches with a back. Such models are more convenient, however, more materials will be required for their manufacture, and their design is more complicated.
- Benches without a back. They differ in a simple design, but it will not be quite comfortable sitting on such a bench for a long time.
Based on the material of manufacture, the benches can be:
- Plastic. Some craftsmen make frames of garden benches from propylene pipes. This design makes sense after the end of the installation of heating or water supply systems, after which there are many waste of materials. For the manufacture of such benches, you need the experience of soldering plastic pipes and special soldering iron.
- Homemade garden garden benches. These are the simplest and cheapest in the manufacture of benches. For their production, it is enough to have several wooden fasteners. At the same time, the design of wooden garden benches looks beautiful, even if wood is used in an unprocessed form. Often for the manufacture of garden benches, wood waste from old sawn trees is used. The easiest version of the garden bench is to take two stumps and connect them with a couple of boards, having previously fought them for stability. The disadvantage of the tree is that it needs constant care. The wood unprotected by special coatings will not last long under the open air in conditions of humidity and constant temperature fluctuations.
- Metal. For the manufacture of metal benches, welding skills are needed. The frame of simple models can be made from a profiled pipe. This material does not weigh too much with its strength, which positively affects the mobility of the product. Apart, garden benches with art forging elements can be noted. It has a bewitching appearance that can become a highlight of any landscape design. However, it is worth noting that the cost of such models is quite high.
- Stone. The frame of such a bench can be laid out of natural stone or brick. Despite the complexity of such works, stone models serve for quite some time, even without special care. Benches made of natural material will be an excellent addition to alpine slides. It is worth noting that the stone is often supplemented with a wood with wood, since sitting on a stone surface is not too convenient.
Where is it better to put a bench
Before proceeding with the construction of a particular model, you need to consider in which place to put it. There are no certain rules in this matter, so you will have to resolve this issue at your discretion.
It is advisable to put a bench where a picturesque look will open from it. It will not quite be pleasant to look at the wall of a neighboring house or garage. If there is a beautiful flowerbed, or an alpine slide, it is better to put a bench there. Then it will be possible to rest on it after a busy day.
If part of the site is reserved for growing vegetables, then the bench can be placed next to the beds. Then, tired of work, you can sit on it and relax.
It is also necessary to try to place a bench in places where there is a natural shadow. In this case, it will be comfortable to rest on it even on hot days. If there is no such shelter, it is necessary to provide a canopy on it.
How to make a wooden garden bench with your own hands
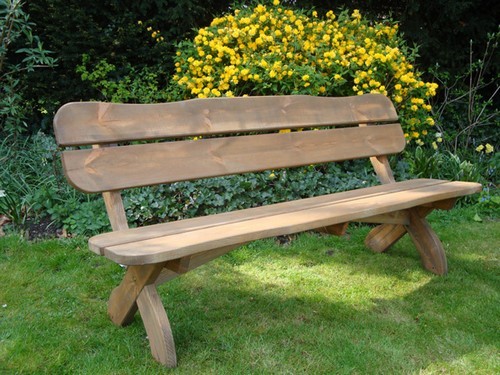
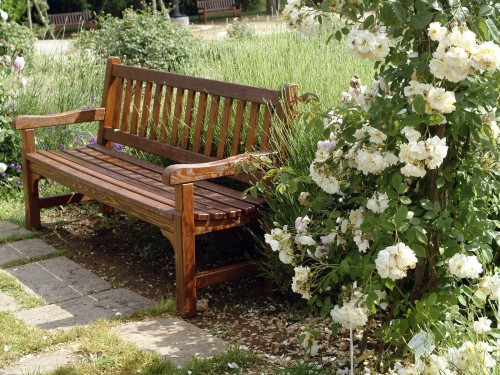
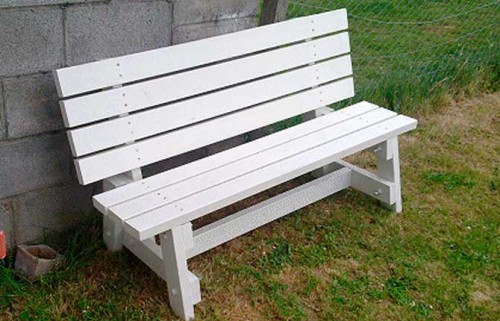
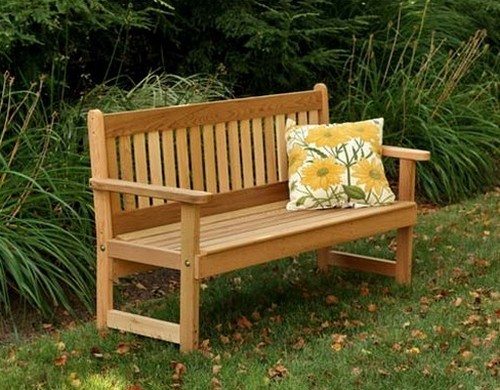
A wooden bench is the most popular type of garden furniture. Ease of manufacture, cheapness of materials make it a leader among home -made products. The circuit of a garden bench with a back of wood is quite simple. In order to implement it, you will need:
The board is overlapped with a thickness of 40 mm, standard width - 2 pcs. Since the standard board length is 6 m. It will need only 2 boards for a bench with a length of 1.5 m. You can buy them in any lumber store. For the convenience of transportation, you can ask sellers to cut boards into measuring lengths of 1.5 m, or do it yourself, taking an electrician on the trip.
For fastening parts of the product, wood screws will be used. It is necessary to purchase fasteners with an anti -corrosion coating. Otherwise, in the open air it will simply rust.
It is necessary to prepare from the tool:
- Electrician. Drinking parts manually is not pleasant pleasure.
- Drill and screwdriver.
- Slate, hammer, roulette, ruler, pencil, set of drills, square.
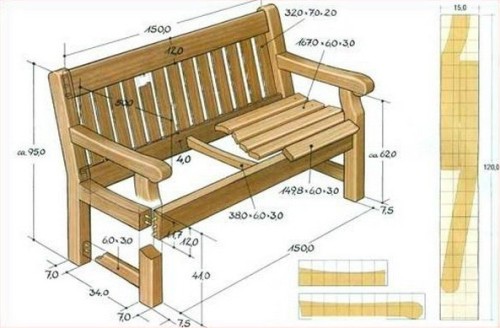
The future wooden bench with your own hands will have the following parameters:
- Seating height - 0.36 m.
- The depth of the seat is 0.55 m.
- The height of the back is 0.54 m.
- The length of the bench is 1.5 m.
With such parameters, it will be quite convenient to sit on it three adults with a height of up to 2 meters. Sitting the bench must be done at a slight angle. Its front edge should be slightly higher than part adjacent to the back. It will be comfortable to sit on such a seat. However, with the angle of lifting the seat, you should not overdo it, since it will not be quite convenient to get up from it.
Under the specific dimensions of the bench, several blanks must be cut off. For sitting and backs, 5 boards are cut off 1.5 meters long. The hind legs will make a single whole with the support of the back. In order for the back to have a minimum slope (18 ° -20 °), the pieces of the board are cut using an electrician. Their length should be 0.9 m. The angle of inclination of the back is achieved by cutting off part of the workpiece. The height of the seat is measured from one edge, then using geometric evictions there is a necessary angle, and the width of the board decreases by its size.
After cutting, the finished parts are processed using an electric grinder to remove the burrs and roughness. Two segments of 0.39 m are taken for the front legs. They are also cleaned with a plane.
The next step is connected by the front and hind legs. This is done using bars with a length of 0.55 m. The block is obtained by sawing the board of the same length along the segment of the board. The result was two full blanks of a wooden bench. Now they must be combined into a single whole. For sitting, 3 boards are used, for the back - 2. In order to exclude the accumulation of moisture on the surface of the seat, it is necessary to provide a gap between the boards.
The fastening of all elements of garden shops, wood benches are made using galvanized screws Ø4mm. When carrying out work, it is necessary to observe accuracy so as not to split the board. To do this, in the connected boards, a non -through hole Ø3.8 mm, into which the self -tapping screw is twisted, is drilled. To make the bench look neat, and there was no chance to damage the clothes on the head of the self -tapping screw, hide in the hole. To do this, its beginning is drilled by a drill with a diameter of 1 mm larger than the diameter of the self -tapping hat. The depth of sweat is not more than 5 mm. Next, it can be closed with putty.
After installing the back and seat, the manufacture of the bench can be considered finished. Now it remains to protect her from moisture and pests. To do this, the wood is opened with a layer of olifa or a special antiseptic. After it dries, they are painted. To do this, you can use the enamel of the pf brand. It is advisable to paint in 2-3 layers. In this case, it will be possible to forget about the new bench for 2-3 years.
Garden bench made of wood and metal
If there are welding skills and the main tools, you can make a metal bench with your own hands. This will need:
- Profiled pipe steel 20x20mm.
- Welding apparatus.
- Electrodes of ANO, Wani Ø4 mm.
- A grinder with a set of cutting and reference circles.
- Bolts with washers and nuts Ø6 mm.
Work order:
- First, the racks of the bench are made. They will have a T-shaped shape. 2 identical segments are cut off from the pipe, which will play the role of the seat rack. Then 4 identical segments are cut off. They will serve as a support for sitting on both sides and the basis for racks.
- Designs are welded to each other.
- Now the upper supports for sitting from the side of the back are cut in such a way that, having cooked them with the support for the back, get it tilt. Next, two racks for the back are welded. As a result, two identical halves of the bench should be obtained, which are welded for greater stiffness using two longitudinal pipes. Their length will be equal to the length of the future bench. One pipe connects the bases of the seat, the other supports of the racks.
- Now it remains to screw wooden boards to them. To do this, in the pipe at the site of installation of the back and seat, through holes are drilled under the diameter of the bolt. The same are drilled in the boards, after which the latter are screwed to the metal structure.
- If the bench has a monolithic color, it can be painted after installing the boards, otherwise the metal structure is first painted, and the boards are separately, and then collect them together.

