Sometimes, it is better and cheaper to make a folding wooden table with your own hands than buy a ready -made one. In this case, it is possible to set the necessary dimensions and use high -quality materials. A strong wooden dining table will solve the problem of ordering space and free space in the kitchen or living room.
Content
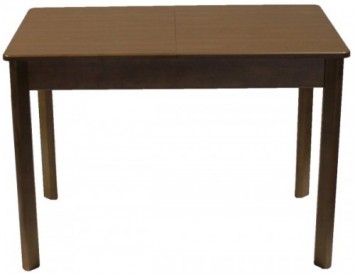
A very convenient and popular apartment will be a book. He perfectly copes with the function of a large dining table and in a collected state takes up very little space. With your own hands, it takes very little time and materials to make such a table.
Sliding dining table made of wood
Detailing and preparation for assembling a folding dining table
- The canvas for the folding table is better to buy ready -made. Three components will be needed. Two lamps of chipper size 450x750 mm and one removable part of 400x750 mm with a standard thickness of 18 mm. You can cut it in size right in the store. There you can buy a melamine end flexible tape to the color of the countertop. The edge to the end is welded by a red -hot iron and voted by a sharp knife for drywall.
- You can order a countertop from an veneled wooden board. Any is suitable for wood - pine, beech or more expensive solid varieties. In this case, the countertop needs to be additionally treated with stain and varnish. The legs are made from a 45x45 mm bar. In the carpentry workshop, they will be protected to you on the stamp. The lower size can be set 25x25 mm. The approximate height of the table is 735 mm, and the height of the legs in this case will be 715 mm.
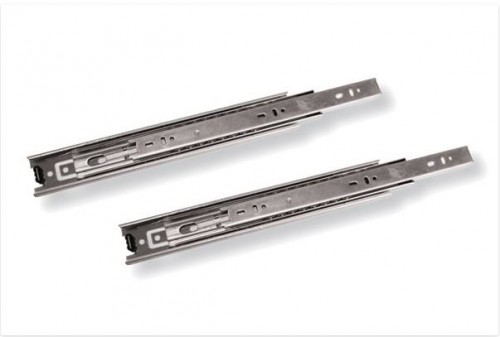
- For the frame and the base of the folding table, a 20 mm plywood thickness and boards are required - 2 pcs. on the sidewalls from the end 830x120 mm and 4 pcs. On the longitudinal sidewalls of the frame 420x120 mm. You will also need wood screws (4x50 and 4x16), doughs and 8x30 and a furniture metal corner of 30x30. For the table layout mechanism, purchase rolling guides. These are used in drawers. Two right and two left guides with a length of 300 mm will be required.
- Before starting the assembly, it is recommended to grind all the details, soak them with a stain and open them with varnish. After the varnish dries, the details are once again fucked with fine sandpaper and re -opened with varnish.
Assembly of a folding dining table
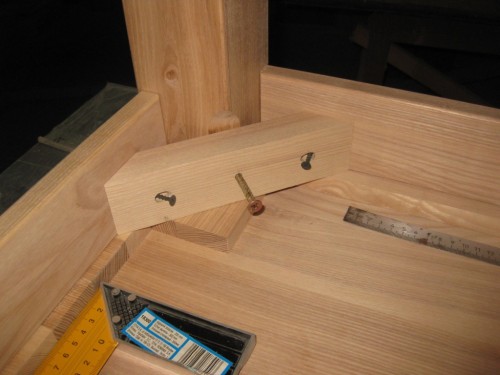
- A rectangular frame frame is assembled from the planks, the end parts and the strips are attached, focusing on the extreme level of the sidewalls. The legs are fixed with self -tapping screws at the corners of the box, strengthened with metal corners and finally clamped by screeds.
- The sliding parts of the countertops are exhibited on the plane of the frame, cuts are made on mating surfaces and holes for cams are drilled, a diameter of a standard skate of 8 mm, the hole should be no deeper than 25 mm. Install the puppies on the glue of PVA in a checkerboard pattern. Squares on the middle countertop are installed, focusing on the halves of the main countertop.
- From the boards intended for the countertop, two P- figurative frames are collected. They and the frame base are attached to the guides for the sliding mechanism. Powders are right and left -handed, pay attention to this. Divide them into two parts, the wide guide is attached to the sidewalls of the stationary frame, and narrow- retaliatory runners on the picked mobile part of the countertops. Further, the runners are snap in the grooves, and the ease of move is checked. There are adjusting screws along the axes of the guides.
Table - DIY Book
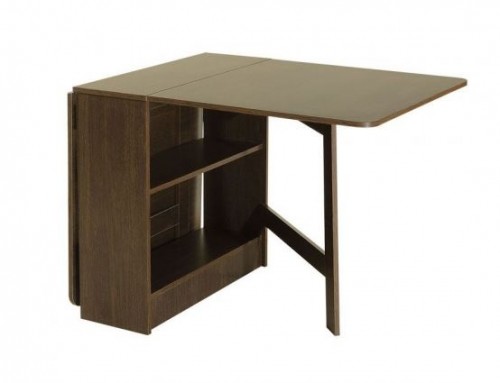
 Transformers also include a table - a book. This is a very convenient and practical option for a folding table. You can make it with your own hands for one day, it does not take up much space in a collected state and can be used as a full -fledged folding table table.
- According to the drawing (see photo), a detail is made. For the manufacture of the table, it is better to use chipboard. You can cut the workpieces in the building materials store, so the end slices will be much smoother and cleaner. For the countertop, you will need two plates in size 70.5x80 cm and one 35x80 cm. All mobile parts, including retractable legs, are attached to the piano loops.
- The optimal table height is 75 cm. Based on this size, a beam 4x4 cm is harvested, a 2x4 cm rail for legs and a transformer table frame. For sidewalls, two -sized rogues are cut from chipboard in size 35x73 cm.
- The end sides are decorated with a melamine edge of the surface of the countertop selected in color. The edge 2 cm wide is applied to the end of the countertop and is ironed with a hot iron. The protruding surpluses of the welded edge are removed with a sharp mounting knife.
- The box of the main frame is assembled for confirmation. A 5 mm drill, according to the marking, through the planes are drilled in plane boards, and in the end to the end to a depth of up to 50 mm. On the flat holes, the chamfer of 8 mm with a drill is removed so that the confirmation head is flickering with the plane of the chipboard. Then it is masked by a special plastic plug. For the stability of the box of the frame, tsarks or furniture metal corners are installed in the corners.
- The frame is placed on the floor on the floor and on the entire width on both sides is attached with small screws a continuous royal loop. The right and left wing of the countertops are brought to it, and is also fixed with screws from the back.
- Before starting to make the legs for the table, the beam and rails should be polished, frozen under the main color of the table and varnished. From a beam 4x4 cm, a pair of imaging legs is made. For strength and stability from the rail 2x4 cm, a slanting diagonal or straight cross and fixing the tsars are inserted. One of the vertical sides of the legs is attached to the box of the frame of a royal loop.
For better preservation, small plastic marks can be filled on all supporting surfaces. There is an option when the book is placed on roller legs. So it is much more convenient to transport around the apartment.


