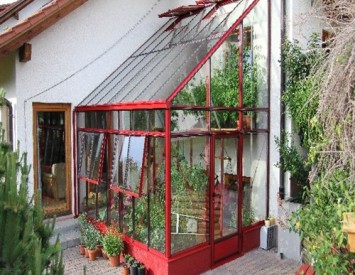
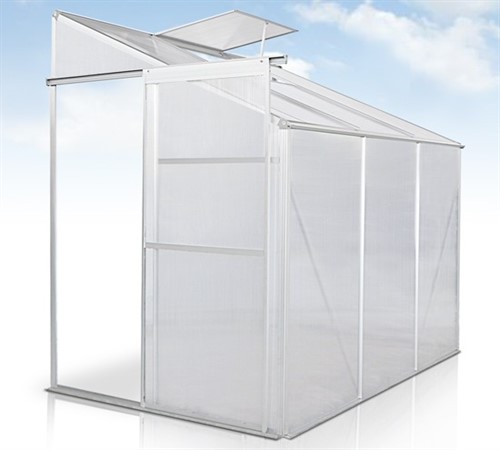
The greenhouse acts as an integral assistant in obtaining an early crop, as it protects the planted cultivated plants from the harmful effects of sharp changes in spring temperatures. Of the various types of greenhouses, the best option is a wall -mounted greenhouse that allows you to rationally plan a land plot and save on building materials.
Content
The peculiarity of the greenhouse with a single -sided roof
A characteristic feature of this kind of greenhouse is the installation to the southern or western wall in order to maximize its entire area during the day. In addition, the wall of the house warmed up under the influence of the sun, at night, will give heat to the greenhouse space, preventing a strong decrease in daytime temperature.
The choice of materials for upcoming construction
Types of the foundation
To create a greenhouse foundation near the wall, various materials are suitable that differ in cost, use and the complexity of the construction. The most in demand include wood, brick, concrete.
Advantages and disadvantages of a wooden foundation:
- Low cost.
- Natural heat insulator.
- Simplicity of installation.
- Small life.
The advantages and disadvantages of brick relative to a wooden foundation:
- Long life.
- The complexity of work.
- It is destroyed under the influence of moisture.
- High cost.
The advantages and disadvantages of the concrete foundation relative to the brick:
- High life.
- The simplicity of creating the foundation.
- Low cost.
Selection of frame elements
For the construction of the frame are used:
- wooden bars - ideal for film, glass, or polycarbonate coating;
- metal profile - only for film and polycarbonate.
The choice of greenhouse coating
1. Polyethylene film.
Advantages and disadvantages:
- low cost;
- good light outlet;
- ease of installation;
- small operational period;
- it is easily torn, especially in the places of fasteners to the frame.
2. Glass.
Advantages and disadvantages:
- durability;
- high light outlet;
- good thermal insulation, so in hot weather it is necessary to ventilate the greenhouse;
- the complexity of the glazing process;
- the presence of a strong frame;
- high cost.
3. Cellular polycarbonate.
Advantages and disadvantages:
- light weight;
- high impact resistance;
- excellent dispersion of light;
- excellent flexibility of sheets;
- durability;
- low cost.
Technology for the construction of a parietal greenhouse from polycarbonate
To build a strong and durable greenhouse to the wall, select a concrete foundation and polycarbonate coating.
Foundation
The necessary materials for creating a concrete foundation:
- concrete;
- sand;
- gravel;
- trough for kneading concrete solution;
- shovel;
- boards (for formwork).
The construction of the foundation and formwork:
- We make markings of the future foundation.
- We drive the pegs at the corners of the marking and pull the rope.
- We dig a trench with a depth and a width of about 50 cm.
- We knead the solution of gravel, sand and cement in a ratio of 5: 3: 1, mix thoroughly.
- Pour the trench with the finished concrete mixture.
- After hardening, set the formwork to a width of 30 cm, about 20 cm high.
- In the corners of the trench and near the wall we install the pillars necessary for the installation of the frame. It is better to additionally attach the pillars to the walls of the pillars. If the length/width of the wall greenhouse exceeds the length of the bar, then in the middle we install additional pillars.
- Again, knead the solution.
- Pour the formwork.
- After complete hardening of concrete, dismantle the formwork.
Frame
Materials and tools:
- battery screwdriver;
- self -tapping screws;
- knife -hated wood, metal;
- passatigi;
- wooden bars or P - figurative profile;
- metal corners;
- hinges, loops.
Installation of the frame:
1. We mark on the wall the height of the roof of the welder and beat the bar.
2. We connect the corner and middle poles using a bar and corners to the required height of the greenhouse - this is the basis of the frame.
3. We combine the basis of the frame with a wall bar, i.e. We build a crate of the roof.
4. Along the perimeter of the entire frame structure, we lay additional bars along the width of the polycarbonate sheet, as shown in the photo.
5. We determine the place for the window and door, lay the transverse bars in these places.
6. We build a door and window box from bars.
7. We attach ready -made boxes to the structure by means of hinges and loops.
Polycarbonate
Tools and materials:
- polycarbonate;
- disk saw;
- drill;
- thermal -haired;
- special strips for docking polycarbonate.
Polycarbonate fastening:
- We mark the necessary width and length of the sheet on the polycarbonate, cut out.
- We apply a cut sheet to a wooden structure.
- We mark the fastening points with a pencil, drill holes with a diameter slightly exceeding the size of thermal -haired.
- Remove the sawdust from the sheet, dust.
- We attach the sheet to the design of the greenhouse, insert the thermo -haired and fasten it to the crate with a self -tapping screw.
- With subsequent sheets, we produce similar manipulations.
- Do not forget about the bar for connecting polycarbonate sheets.
The diverse range of materials and tools of the modern market allows you to make a mini-pimple quite quickly and efficiently regarding your own preferences and ideas.


