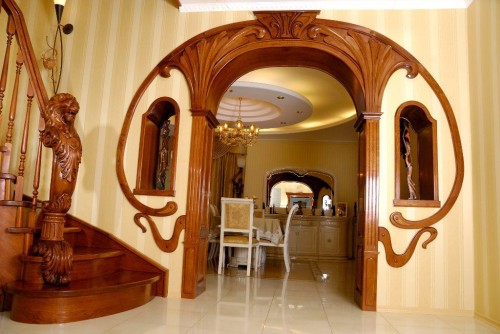
Filling the intersthen space with arches is one of the most popular techniques in the design of the room. The arches expand the space of the kitchen room and save the place due to the lack of the need to install interior doors. In addition to the design of the interior opening, this architectural element is often used to frame wall niches or fireplaces.
Content
Types of arches in room design
There are a large number of various configurations of arches in modern design. Thanks to this diversity, the arches fit perfectly into the interior of any direction, from classics to minimalism and modern. The arches differ mainly only in the shape of the vault. The main structures that are used in the interior decoration of the room are as follows:
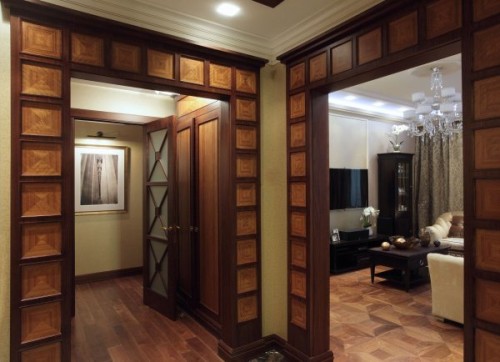
- Roman arch. The arch of the correct design. It has a high radial arch, the diameter of which is equal to the width of the arched opening. Such designs are perfectly combined with designer solutions in the classic style, and are ideal for rooms with high ceilings. Often such arches are framed by gypsum stucco or natural wood.
- Art Nouveau arch. Great for rooms with a small area and a small ceiling height. They are distinguished by smooth lines of the arch, which are a truncated radius. Thanks to this, the room seems more elongated, visually expanded.
- Slavic arches. These are fairly simple models, which are an almost rectangular arch with slightly beveled corners. They are popular among beginner builders due to ease of installation.
- Eastern arches. They have an inherent sore form of the arch inherent in eastern architecture. They will become an excellent addition to the interior in the North African style. This design is quite complicated, so novice builders to such forms resort very rarely.
- Thai arches. Gained popularity relatively recently. A distinctive feature of Thai arches is an asymmetric form. Their arch has the shape of a semi -radius, due to which one side of the opening is larger in height. Such forms can be an excellent solution for placement in the style of modern or minimalism.
- Trapezius. A simple form that resembles the Slavic style, but with more massive beveled corners. In a frame of natural wood, it is perfect for an interior in the English style.
- In the production of repair work without certain experience, it is better to give preference to simple models, such as square arches.
About how to make a square arch with your own hands for the kitchen - further in the article.
Why is it better to use drywall for the kitchen
The appearance of this material has significantly facilitated the work of builders. Now, in order to build an interior wall, you do not need to build it out of brick and cinder block. It is enough to make a frame from the profile, to which to attach sheets of drywall. This material has a lot of advantages. Consider them in more detail:
- Ease of installation and processing. Gypsum plasterboard is a sheet material that consists of two layers of dense cardboard, between which a gypsum layer is located. Thanks to this structure, drywall is very well processed. To cut off a piece from the sheet, it is enough to make an incision on one side with a knife, break off a piece, and cut off the cardboard from the other. This feature makes it possible to cut out any, even the most complex figures from the material. Installation of drywall structures is quite simple. Special steel profiles are sold for them, thanks to which you can easily build a design of any complexity.
- The minimum weight of structures. The plasterboard itself, like the profiles for its installation, have low weight. Thanks to this wall, you can put anywhere without the need to build an additional foundation.
- Low cost and high cost. Unlike brick masonry, the cost of the construction of drywall structures is quite low. Its manufacture is not very laborious. The plasterboard crossroads is built independently in less than four hours. Unlike a brick tub, to which several layers of plaster must be applied, the drywall surface is flat. It is enough to apply a thin layer of finish putty on it, which significantly reduces the reduction in the repair process.
DIY squares of drywall.
This option is the simplest, so even a novice master can easily cope with it.
So, in order to close the inter -stena opening with a thickness of 100 mm square arch, you will need:
- A sheet of wall drywall, the thickness of which is 12.5 mm.
- Profile of steel drywall UW. The width of the profile depends on the thickness of the wall opening. To open 100 mm thick when using a wall plasterboard 12 mm thick, the width of the profile will be 100 - (12.5 + 12.5) \u003d 75 mm. In this case, the finished arch will be in the same level with the wall.
- The dowel of fast installation with a diameter of 6 mm.
- Self -cutting for fastening a metal profile, the so -called "seed".
- Self -cutting for fastening drywall.
- Perforated corner.
- The putty is finish.
From the tools you will need:
- punch or shock drill,
- drill with a winning tip,
- a screwdriver with a nozzle,
- mixer for making putty.
Work order:
- Before starting work, it is necessary to measure the size of the future arch. Its width will be equal to the width of the inter -stange opening, and the height - depending on the desire of the owner of the room. Then the transverse section is cut off, which will be mounted to the ceiling. It is set in such a way that from the edge of the opening to retreat at a distance of 12.5 mm.
- In the profile, holes are drilled in diameter, which is equal to the diameter of dowels. The step of the holes should be no more than 200 mm. Then it is necessary to attach a segment of the profile to the ceiling and outline the holes drill sites.
- After that, holes for the installation of dowels are drilled with a perforator on the marks. Then, using dowels, the segment is attached to the ceiling. First, the dowel is inserted into the hole, and then a nail is driven. The dowel itself has a mushroom hat that holds the profile perfectly.
- After installing the ceiling profile, the laterals are mounted, the size of which corresponds to the height of the arch. The ends of the side profiles are launched into the ceiling and attached using the "seed". They are attached to the wall opening using fast installation dowels.
- Next, the lower crossbar is installed. Its ends are turned into the side profiles and are connected by "seeds". If the width of the arch opening is large, then so that the lower crossbar does not sag, stiffness from the same profile is installed between it and the ceiling profile. They are attached to the upper and lower crossbars with specialized screws.
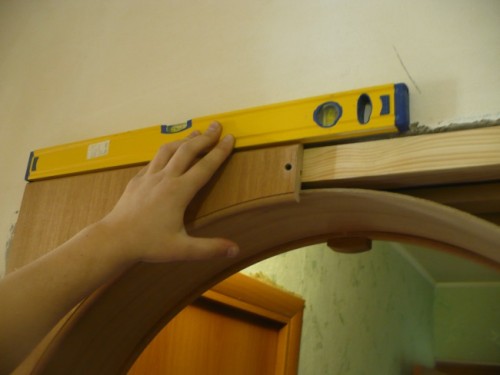
- When installing the arch of the arch, all profiles are checked by level.
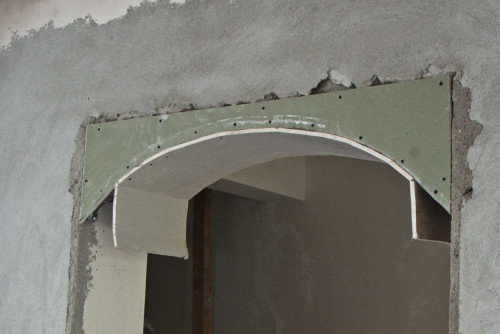
- After the installation of the arch of the arch of the arch, it is necessary to cut 3 sections of drywall. Two of them should have a length equal to the width of the wall opening and width equal to the height of the arch + 12.5 mm. They will be installed from the front and back of the arch. The third segment should have a length equal to the width of the wall opening. It is installed from the lower end of the arch.
- Drywall is attached to the structure from profiles using special screws. The fastening step should not be more than 200 mm.
- Next, drywall must be prepared for putty. To do this, it is processed by a primer of deep penetration. After drying the latter, you can proceed to putty.
- Since gypsum -plastic square arches do not have an uneven surfaces, there is no need for their plaster. You can only apply the finish putty. It is prepared from the finished dry mixture and water. A little water at room temperature is poured into a clean bucket and a mixture is gradually added, which is constantly mixed with a mixer. The finished putty should be the consistency of thick sour cream. If putty is performed for the first time, it is better not to knead a large amount of solution. The fact is that it dries very quickly, and the dried material is no longer suitable for use.
- In order to achieve even corners, a perforated corner is established. It is glued with putty.
- After the putty is completed, it is allowed to dry, then the presence of errors is checked. They are cleaned with a grout with a small cell. After that, the surface is again primed. As soon as the primer dries, the arch can be covered with wallpaper or painted.
Square wooden arches
Along with drywall structures, wood arches are often found. The process of its installation is practically no different from the use of GCL.
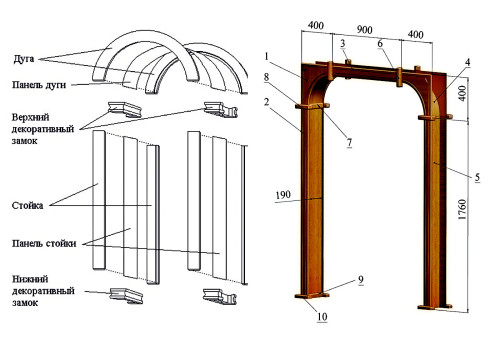
For the construction of such an arch, it is better to use a wooden beam as a material material. The lower end of the arch is sewn up with a polished board.
The side sides of the wooden square arch are decorated with wood racks. They narrow the width of the opening so that there is a small gap between the wall and the counter. It is closed with a decorative platband. According to a similar scheme, they work with the upper part of the arch.
Now it is popular to finish the square arch with decorative elements, such as artistic threads. Such an arch is simply easy to mount in the opening and close its rest with drywall or chipboard.
Wooden arches have a fairly beautiful look, but their cost is very high. This fact does not allow them to win competition with drywall structures. To decorate the room, you can hang curtains on a square arch.


