Your baby has grown up and playpen him become cramped. This means that it is time to buy a new bed. Agree, it is not interesting to sleep in an ordinary bed. Much more interesting to go to sleep in a bed that resembles a racing car. This car will be a children's bed for a child a real gift, and every night he would fall asleep with great pleasure in it.
Content
In specialized furniture stores you can find a large range of different designs, which are shaped like a rocket-bed machines and beds made in the form of fairy-tale characters. There are such beautiful masterpieces cribs are very expensive. But not always compensate for the high price of quality. Make a bed alone in the cellar.
Even if you have no experience with carpentry tools, with a great desire to learn, you can make them a favorite for baby bed car with his hands. Bed in a car more suitable for the boy.
Important! If in the process of work you will actively "cooperate" with the son (grandson or nephew), consult with him, what color will be the future machine, what additional elements make to give the product of originality - the child will be very happy to help. Now you will see, then he will be proud of his original bed and exploit it neatly.
What is necessary
First of all, you should decide whether to make the car completely or you will be easier to redo the old baby cot.
If you already have a bed with a wooden basis - excellent. You can add some decorative elements that are cut out of plywood, then paint them and attach minor vehicle elements.
Another question, if you need to make a bed on your own "from scratch". To begin with the framework, which is able to withstand any burden, as besides the fact that the child will lie in the crib, from joy it will jump on it, and also go on a journey with friends.
And one more option is to buy a finished metal or wooden frame on the legs, and then "dress" on it a pre-prepared decorative car cover on it.
Sketch
After you have decided that you make a car from the very beginning, you need to find the photo of the bed on the Internet, which will enjoy your son. Print the image and proceed to creating a sketch.

The sketch is necessary to ensure that during the work you visually watched how to make the car and determine the consumption of materials. It must display the bed from all sides: in front, rear and sides. Do not forget to transfer real sizes. Also consider that flights in the future bed should not be low, as with insufficient protection around, in a dream the child can ride the bed. Do not make very tall sides, because the child will be inconvenient to climb it.
Materials
Approx drawing of a bed in the form of a car:

According to the drawing, the bed consists of such elements:
- bursts (car body);
- box for small items (with a side part of the bed);
- small shelf (rear spoiler);
- in the hood - one or two drawers for toys.
To the selection of material for the future bed, we will take full responsibility:
- materials that are used to assemble furniture with their own hands - sheets of MDF or chipboard. Sheets have different thickness and color. Standard sheet size - 2700 per 1830 millimeters. Depending on the size and details of the future bed, one or two sheets will be needed;
- if you think that furniture sheets can harm the child's health, instead you can use furniture shields made of natural wood, as well as Phaneur;
- prepare a bar 50 to 70 millimeters - take 4 planks;
- euro Shurus and Eurovintages are special furniture devices that remotely resemble self-tapping screws. Sizes of fasteners - 7 by 70 millimeters and 6.3 per 50 millimeters;
- special nozzle and key for fasteners;
- drills of the desired diameter;
- rollers for moving a crib;
- nails (by 120 millimeters) and self-tapping screw;
- dye;
- screwdriver;
- electrolovik;
- sprayer or bruster for paint;
- orthopedic mattress;
- fabric for laying bed.
Making the foundation
We proceed to the construction of the frame of the bed in the form of a car. The frame must be as strong as possible, because children do not use the bed for direct purpose. In the afternoon, they love to jump on the bed. Therefore, a wooden timber is used to enhance strength. It is advisable to cut it on the size of the sketch immediately when buying.
The foundations of the base are combined between self-draws, screws or nails. In a bar, under the screws, you immediately need to drill an opening electrode, because otherwise it can burst. From above, the frame is placed on the frame or furniture sheet, which will serve as a support for the mattress.

Dispressing sheets
After creating the base, you can proceed to cutting sheets. Options cut two:
- If you are not strong in your computer and do not understand the graphics, then make templates for the side parts, the front and rear parts of the machine manually. If you draw well, you can immediately make templates from hand. If it does not work, print the sketch of the model and increase to the desired size. Of course, it will take quite a lot of time, because it will have to distribute the workpieces and glue them to the leaf, until it turns out the real size. Then the template is placed on the plywood sheet and will be burned with a marker. With the help of electric jigsaw, details of the future bed of the machine are cut. If you planned a complex painting, then you can make templates for staining the product.
- If you know how to work with graphics programs, it is enough to make the drawing (vector). Next, the file is printed and glued sheets. It is also possible to provide an electronic layout in a furniture company, which will perform the cut parts of special equipment.
Do not forget to treat the ends of each part sandpaper (or glue masking tape). Thereafter, the drill can drill (for konfirmat) all the holes at once.
stained parts
Before painting the parts, perform pre-assembly of the bed. The assembly will allow to identify possible distortions, defects, inconsistency details and eliminate inaccuracies.
If the assembly has shown that all the details are "sitting" in their places, the bed disassembled and begin to paint. To paint lay down evenly, it is advisable to work with a spray or purchase paint in cans. Of course, you can paint the parts and a brush, but then it is necessary experience, because the paint should be applied several times, and then another, and lacquering.
Try not to work in the living room, because the painting of parts of the future will take a few days of bed.

Assembly
When all the painted parts have dried, you can begin to assemble the crib.
We act according to the plan:
- The rollers are bolted to the frame at the bottom.
- Is fixed to the frame all the details on each side.
- To disguise head screws, you can paint them with paint or furniture purchase "hats" in the tone of the car.
- On the slats or plywood laid beforehand bought a mattress. It put on a waterproof cover (if necessary) or a mattress wrap thick cloth or blanket.
- Attach small parts to the car.
That's all a bed of the machine is ready! There are a few things that can be added: lights for floor and headlights. If you know a bit about electrical wires, then make the backlight will not be difficult. In addition, if you decide to stretch the wires, do it in advance, even at the first stage - when cutting the material.

you can make these lights if desired. To create them, you need to purchase a reflective paper (or foil), as well as tape diodes.
The picture shows the gradual assembly of lights.


If ready to put the spotlight now auto glass - that distinguish a toy spotlight on this will not be easy.

And in this photo shows an embodiment of mounting the LED backlight.

Here is the finished bed machine with backlight:

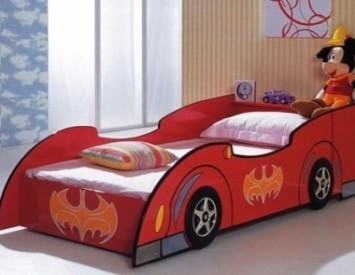
The photo presents options for the bed of the machine: 
And such a bed will accurately like twins or weather: 
And girls will be interested in playing and sleeping in such a crib:

This video will allow you to learn more about how to make a bed car:


