It happens that the model's model you like is suitable in all respects, but does not have the head of the head of the head. But, if I really like the furniture, then make the headboard with your own hands.
It is not as difficult as it may seem at first glance. Even a newcomer in the field of construction and design will cope with this task. How to make a headboard, and what is needed for this, you will learn from this article.
Why the bed is headboard?
- For convenience. You can always rely on the headboard. At the same time, you do not feel any cold nor the hardness of the wall.
- To protect the wall cover. The headboard will help prevent wipping wallpapers on the wall.
- For decorating. Thought-out and well-executed, the idea of \u200b\u200bthe head of to make your bedroom cozy and nice, give the room a certain charm and sophistication.
Design options for bedside
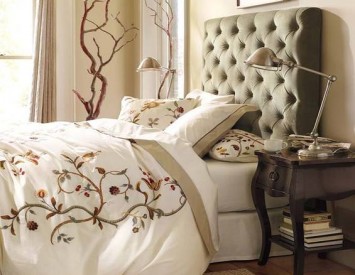
Upholstered headboard
Usually, this filler, leather cloth, combined with the bed design in general. Stuffed the item most often synthetic padding, but it is not a panacea. Fit any other vehicle. This may also be attributed, and a bed with a leather headboard. In this case, the fabric is simply replaced the skin. This is the most popular variant of execution. And the crib, and a large bed with a lifting mechanism and the queen, and a double bed are perfectly combined with a cushioned headboard. Furniture composition becomes comfort and completeness.

drapery fabric
In this case we are talking about the tissue wall decoration or a part of the bed. Decorative fabric must be combined with the stylistic design of the bedroom, to be durable and, preferably, anti-dust This headboard can be seen in the photo.

Creative Economy
To realize this concept, you should use the unnecessary things that are available. Well, let's say, this may be an old door, you are painted or papered, or leave untouched (this definitely will not be in your contacts). You can make a pillow out of old jeans by stitching of the fabric panels are original, leaving the pockets. Then they will be convenient to store all sorts of little things necessary to put or to a favorite book at bedtime.

Practicality
If the bed is located in the center of the room and does not touch the walls, it is advisable, as the head of the bed, use any functional piece of furniture (shelving for books or a chest of drawers).

Or bright-colored "panels" on a background of pastel walls
The headboard can be a central figure in the decoration of the walls, especially if they are in plain soft colors. Soft headboard made their own hands and enclosed in a beautiful frame, it will look better than the picture.

Country decor
The perfect solution - the creation of a headboard from rough untreated boards. To heighten the effect, they can wear out with special solutions, paint or lacquering.

Headboard-fence
Stylized solution, where the wall next to the bed a wooden picket fence or wrought fence.

Headboard mosaic
Such a headboard is performed from squares of different textures and colors. It can be soft parts with upholstery of different colors, plastic, wooden or glass squares, etc.

Mirrors
It will be not bad to look instead of the head of a huge mirror in the entire wall or the same mosaic of small mirrors.

Head-Shirma
It is quite a functional element if the bed must be separated from the rest of the room. Otherwise, Shirma will simply become a sign of extravagance and originality.

Decorative leplinica
Such a headboard perfectly fit into the interior of the Baroque bedroom, will give the illusion of the medieval castle.

Head-pillow
In fact, pillows can be somewhat. Monophonic, motley or multicolored, they are attached to a special cornice. Dimensions and quantity - all in your hands, or rather, heads. As you wish, it will be.

Headplane - graphite board
This is a super-option for creative natures, which everything quickly bothers. Each morning or evening, they will be given the opportunity to write the head of the head of "under the mood".

Braided or carved panels
A panel from such panels can be left in the original color, and you can color on the tone of the wallpaper.

Illusion of the head of the head
If you have an artistic talent, then you can just get the headboard ... Draw. Here you will very easily pick up and style and color. Do not be afraid to fantasize. If there are no special abilities for drawing, you can simply use a stencil or to make an applique from wallpaper residues.

In any case, make a headboard with their own hands is not difficult, but the savings are noticeable. In addition, it will definitely be a masterpiece creation, and not consumer goods.
Bed headboard manufacturing technology
We now turn directly to the task. Consider the process of the production of the headboard on specific examples.
Production of patchwork headboard
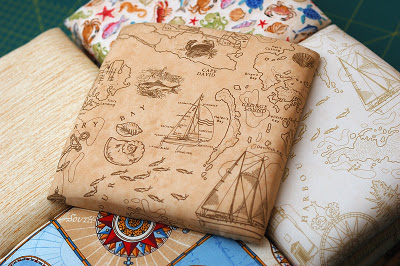
Such an element can be made from the remains of tissue, boning clothes, old jeans, etc. It will be better if you choose samples of different colors and textures. It should be remembered that the flap must be durable and bright, so that very worn things are not suitable for this. The advantage of this technology is simplicity and low cost.

Required tools and materials
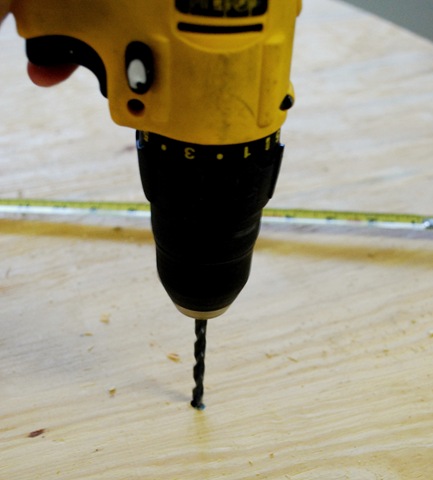
- Plywood sheets (2pcs).
- Hacksaw or saw and scissors.
- Batting, sintepon, foam rubber or other filler.
- Universal glue and adhesive tape.
- Four meter cuts of various tissues (or ready-made flap from old things, such an area).
- Furniture stapler.
- Self-tapping screws and screwdriver.
- Mounting (in order to hang the product on the wall).
Sequencing
- From one piece of plywood cut squares with a size of 20x20 cm, weeping with a hacksaw.
- Cut the same pieces from the filler.
- From the fabric we make flaps 30x30 cm.
- Fold the "sandwich": fabor-plywood fabric.
- Connect the layers with each other with glue so that they do not move.
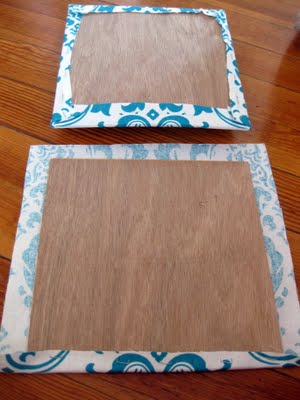
- Put the resulting module with the front side on the table.
- Now the protruding edges of the fabric attach the stapler to plywood layer. First do it in one corner, then in the opposite, and so on. At the same time, make sure that the fabric is tightly tight, but do not get carried away. Here, like everywhere, the main thing is to know the measure.
- We repeat operations 4-8 another 39 times.
- Now lay the resulting pads face down into the rectangle 9pcs 5pcs.
- Shy them around the perimeter with adhesive tape.
- Take the second one-piece piece of plywood and impose on the punching rectangle.
- Using self-drawing and screwdriver, screw each pad to a plywood basis. Here pay attention to the magnitude of the screws. They should not break through the pillow modules, as it can cause injury to further use.
- Screw to the back of the fastening headboard.
- Hang the finished headboard on the wall.


If you do not want to hang it, you can attach two legs to the bottom, the height is lower than the height of the bed, and simply put the decorative element between the lies and the wall. You can also rigidly attach the headboard to the bed frame.
Making a soft headboard with a curly edge

Required tools and materials
- Plywood sheet.
- Thorough 5 cm thick.
- Universal glue.
- Furniture stapler.
- Cutting upholstery fabric.
- Cutting of technical tissue (for processing the side that adjoins the wall).
- Chalk or pasture for applying marking on fabric.
- Furniture cloves.
Sequencing
- On the plywood sheet, draw a sketch of a figured headboard.
- Cut the blank.
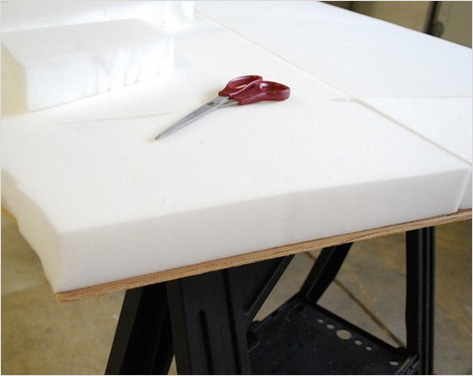
- Do the same with foam rubber.
- Stick foam rubber to plywood blank in several places.
- Pass the stapler on the edge of the future headboard, fixing the edge of the foam rubber on the plywood.
- Secure the cloth at the bottom of the workpiece with the same stapler.

- Put the headboard vertically and pull the cloth, fixing it on the back of the brackets. At the same time, in the places of figured bends, cover the fabric so that its outlines can ideally repeat the specified figure.
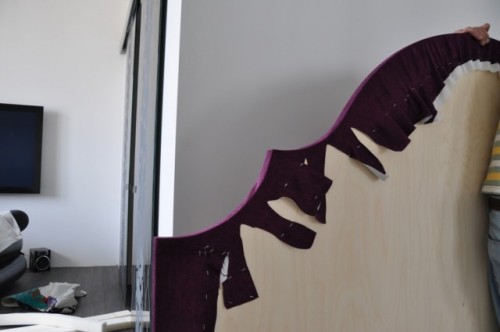
- Check the uniform and symmetry of the tension of the upholstery tissue.
- Duplicate the curly line with furniture cloves, retreating from the edge 1cm.

- Make marking with chalk or pasting for the second line of carnations, retreating 10 cm from the first line.

- Go through the markup of the stapler (not very often).
- According to the designated line, the furniture cloves are adjacent.

- Close the opposite side of the head of the head of the head of the head of the head of the stapler on the plywood.
- Attach the product on the wall or, simply place it between the bed and the wall, pre-happing to the head of the legs.


Creating a headboard with a quilting case
If you got a stiff bed, and you dreamed of the same, but with a soft headboard, then in your power to build a quilted cover for the headboard. It will be logical to make such a cover from the same fabric as the bedspread.

Required tools and materials
- Cellofan (for pattern).
- Upholstery fabric and technical.
- Lining fabric.
- Sintepon or foam rubber.
- Marker, chalk or pasture.
- Scissors.
- Sewing pins. Decorative buttons or beads.
- Sewing machine.
Sequencing
- Make a simplified pattern of the details of the case. To do this, take the cellophan, attach to the headboard and circle the marker on the edge. Alternately, do this operation with the front and rear half of the head of the head of the head.
- Cut the obtained details.
- Place the details of the patterns on the fabric and pin them with pins.
- Circle the details with a chalk or a knead, adding 1.5-2 cm on the windows from the upper and side sides, and 5 cm at the bottom of the pattern. The details of the rear case can be made from technical (cheaper) tissue if the bed is close to the wall.
- The front part flashes with squares or rhombuses.
- Fold together the main fabric, syntheps and lining fabric.
- Slow out the design, stepping all three layers.

- In places intersection of lines, silting decorative buttons or beads.
- Measure the length and width of the side of the head of the head of the head.
- Make the pattern of this detail, not forgetting about the static allowance from all sides.
- Put one side of the side part to the main front part, and the other to the rear technical rug.
- Remove the resulting "bag".
- Dress it on the headboard.
- Send the stapler or sew the bottom allowances, wrapped the edges inward.

That's all! Enjoy your work, boast and rejoice in an excellent result.


