It often happens that families in which several children grow up face the problem of the absence of sufficient space for games and entertainment in the children's room due to the fact that all available area is cluttered with furniture. It is quite easy to find a way out of such a situation with a bunk bed, which is quite possible to construct your own hands.
Content
Advantages of a children's bunk bed
Usually, other necessary furniture, such as wardrobes, computer tables, racks for textbooks and books, etc. If the room is small, then only a narrow space remains between all the listed furniture items, only a narrow space remains between all the listed furniture items.

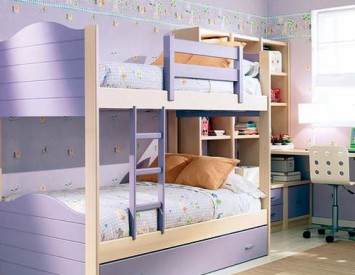
Bunk beds for children are partly help to solve this problem. They are suitable not only for rooms in which two children live, but also for one child of older. First, additional space will never be superfluous, and it will definitely find a use for it, and secondly, on the released place, which was previously sleeping, you can install the table to perform school tasks, computer, as well as drawers and storage shelves Children's property.
To make such a bed yourself, you will need a general idea of \u200b\u200bhow to work with carpentry tools, as well as patience and availability.
Preparatory stage
To make a bunk bed with your own hands, first of all you need to create a project and drawing of the future facilities, while considering the following important points:
-
the bed should have such a size so that not only the baby fit, but also a teenager, then she will not have to change it in a couple of years when he is growing;
-
from the design of the mattresses used will depend on the size. If they are purchased ready, then proceed from their dimensions, but if you expect to do everything yourself, the standard size of one bedroom is 180 x 80 cm;

-
the space between the lower and the top tier should be sufficient to adult, pretext on the bed, did not hurt the top bed. But also too high his finding is also not desirable, because in this case the design will become less stable and, in connection with this, not as safe. In addition, hot air always accumulates under the most ceiling, and the child may experience serious discomfort.
The latter bed mattress should fall behind 30-40 cm. Floor:
- The design of the bed must be rigid enough, because It is not only a place of recreation, but also the place of stormy games, jumps, kwwyrkov, etc. In the event that someone from parents comes at her, it should not be deformed under his weight. Also, do not forget about the fences, especially they are relevant for the second tier.
- In order not to have a failed idea of \u200b\u200bcreating a bunk bed with their own hands, drawings must define the view of the future structures in the interior of the children's. Thanks to this, you can imagine how it will look, and also decide which side it is better to attach the stairs to the "second floor".
- Do not miss sight of such an important point as ensuring the sustainability of the structure and its reliable fixation on the wall. In this case, according to the safety technique, the bed must be at a distance from the windows and opening door shifts.
Also, as part of the design, it is important to think about both the material that will be used for the manufacture of a children's bunk bed with their own hands. Its selection depends on the presence of various elements in the free sale, such as ready-made planed boards, the bars of the desired size, because they independently subjected the tree to the necessary processing, without having a special machine, quite difficult.
When ordering furniture shields, it is better to ask to cut them on the spot on your occupations.
Tools and materials that will be needed for work.
The list of necessary tools includes those that are available in each house, and those that will have to acquire specifically, on the occasion of the manufacture of a bunk bed with their own hands. This list looks like this:
-
roulette, construction level, squares;
-
screwdriver, which, if desired, can be replaced by a drill with such a function;
-
lobzik;
-
vice;

-
passatia, hammer, screwdriver set;
-
sandpaper;
-
wooden bar with a cross section from 40x60 and more for making frames;
-
wooden timber with a 100x50 cross section for the manufacture of bearing racks;
-
metal corners for fixing angular compounds;
-
plywood sheets;
-
board 100x20;
-
lED PHSP;
-
furniture shields;
-
fasteners: Self-tapping screws, screws, screws;
-
paint or varnish.
Sequence of manufacturers of tiers
-
Work should be started with the manufacture of frames where mattresses will be located. They must have a rectangular shape and exceed the length and width by 10-15 cm. The sizes of the mattress.
-
In the process of work, you need to closely monitor the perpendicularity of the parties. Brussia should be connected as quickly as possible in the corners. The most durable is the combination of spike-groove, using special glue, but they can only be used if there is a manual milling tool. If it is not, then it is mandatory to consolidate the connection from the inside using metal corners.

-
Rama must have spacers. If the frame of the selected mattress has the necessary stiffness, it will be enough to install one in the center. If the mattress is characterized by soft and will be laid on a sheet of plywood, the strut will be required at least four and they should be distributed along the entire length of the frame with the same intervals.
-
When the frame is ready, then on its perimeter you need to fix sides that will be mattress locks. The material for them can serve or chipboard or board. This stage is finalizing places under the mattress during the manufacture of places.
Build a bed body
Making the racks on which the whole design will be held, you can go in two ways:
-
Making two identical lateral parts using furniture shields, so that they exceed the level of the second tier by 30-40 cm. To make the work looks aesthetically, you can round them. At the same time, the sidewalls will play the role of barriers from the end of the product.
Carefully and accurately placing the surface of these parts, the holes are drilled in them to connect to the frames of the sun beds. The connection itself is performed by bolts with round hats.

This option has a small minus. It lies in the fact that the bottom bed is obtained fenced in three sides and can cause discomfort and a sensation of a closed space in a child.
-
Make bearing racks made of thick timber. If you go this way, it will be necessary first of all to construct two lateral parts consisting of supporting supports and jumpers that will play the role of the side of the ends.
It should not be forgotten about the plinth, it can interfere with you, tightly lean the racks to the wall.
To attach each other just made sidewalls and mattress frames, use a threaded connection or special screws with a hexagon inside.
To simplify the final assembly process, it follows to the vertical supports to temporarily consolidate the backups for the sun beds, while watching all of them on the same height.
Installation of stairs
For the manufacture of stairs, you can use either boards or bars of suitable size. As a crossbar, the same bar or cuttings from garden tools will fit, which should be chopped into fragments of the desired length and then, carefully clean and polish over the entire surface.
Plant the crossbars is better for special glue, pre-dried in the opening racks for their ends, strictly opposite each other.

At the end of the assembly of a wooden bunk bed with their own hands, it is desirable for greater reliability to strengthen its design with the help of additional strapping. To do this, it is better to use boards that will also play the role of fencing at the same time.
To avoid injury and bypass, all parts of the homemade bed should be thoroughly polished, make her surface perfectly smooth.
The final stage is painting or varnishing coating - it is at the discretion of each.
Next, you can install the bed in the place allotted for it, attach to the wall with the help of reliable screws and start using the intended purpose.


