It is impossible to imagine a full -fledged room without the front door. This, sometimes the most unpretentious design, has a huge responsibility. The entrance doors should perform many functions, the main of which are to ensure the safety of the home and maintain heat. In this article, we will talk in detail about how to make a wooden front door with our own hands.
Content
Door with dowels
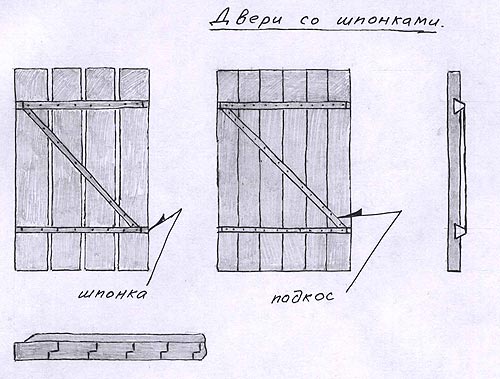
Imagine the simplest wooden door, which often stands at the entrance to the barn or hut. This is the door with the bends. Almost anyone can build it if the instructions follow. Wooden entrance doors from an array do not have high aesthetic characteristics, but they can reliably protect the room from penetration, and if they are also insulated, then from the cold. However, the main purpose of the doors with dowels is fences for sheds, tricks and barns.
The design can be made without gaps for better maintenance of heat or with small gaps to monitor animals if it stands in a stable.
The main material is an array and boards, two wools and a diagonal subtose that is needed so that the door is not overwhelmed.
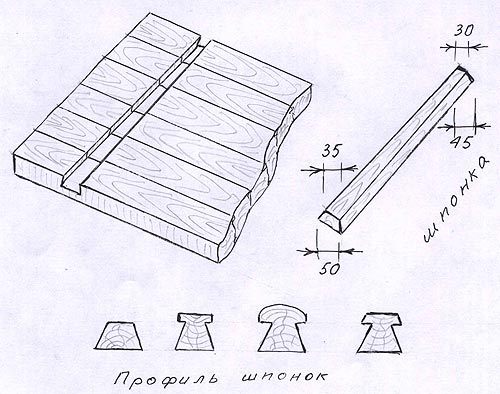
The most elementary option is to pin the handle and downs on the door leaf. For those who are not looking for light tracks, it is proposed to cut the gaps into the door boards. To do this, you need to make the words according to the corresponding sizes.
In the old days, such doors made such doors with a manual saw, laying the boards of the panels in a row and thoroughly aligning them. Then they fixed, marking and fixed a bar, drunk at 45 degrees. On this bar, grooves were drunk half or a quarter of the board. After that, with the help of a chisel, all the excess was removed and the bottom of the groove was leveled, where the gaps were driven to the entire width of the canvas. The thicker the gap, the more reliable the door. It is better to plant the beefs on pin or glue. This will save if the wood will be shattered.
The gear should be cut off from one side at an angle to the veneer without gaps, then put and outline the angle for cutting the second side. When all the cuts are made, attach to the canvas.
Today, this process is much simpler and faster, due to the presence of modern technology. Dispers are easily made by a circular saw, which itself can clearly set the desired degree.
Doors without gaps are perfect for the construction of a Russian bath. In addition, it is several times cheaper than buying a door in a store or ordering from a locksmith.
Filenced doors
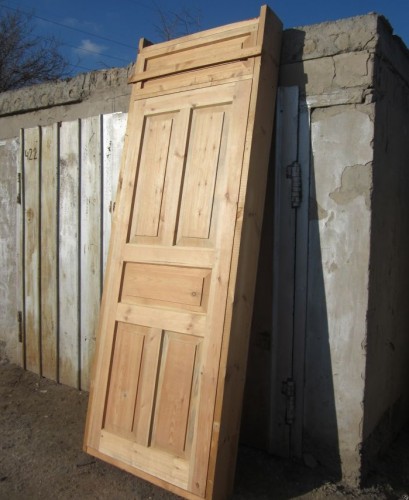
Filencial wooden entrance doors are one of the most common. You can make them yourself, but this will require skills in handling woodworking tools. If you are not sure of your capabilities, it is better to buy or order such a design.
First you should figure out what a phylenka is. Filenka is a smooth shield inserted into a strapping. It can be made of a whole canvas or several boards. A groove is cut in the strapping into which a profile located on the ends of the door leaf is inserted.
Materials
For the manufacture of phylene doors, it is necessary to select lumber for vertical parts of the door frame and the canvas itself. Since the details themselves are long, then for them you should select high -quality durable wood.
Filenes and short details can be made of cheap wood.
Necessary blanks:
- reiki 65x32 mm section;
- reiki 45 mm wide.
To make rails of 65x32 mm, cut straight blanks of 65mm 32 mm thick with a beam width.
Processing
When the blanks are cut, you can start processing the material.
The course of work:
- build the blanks from all sides to achieve a flat and smooth surface;
- distribute the blanks on the bars for subsequent gluing;
- prepare bars for the door frame. They should be with a section of 62x80 mm, bars for strapping - 62x140 mm;
- glue the workpieces distributed along the bars using moisture -resistant wood glue. Apply the glue with a roller, rolling into a thin layer on both glued surfaces. Form blanks in a bar, squeeze with carpentry clamps until the glue dries completely (about 40-50 minutes);
- когда клей высок, выстрогайте бруски по необходимым размерам и сделайте торцовку по длине, сверяя каждую деталь;
- start milling. To do this, mark all the details, guided by the drawing of the box and the canvas. For the construction of a phylene door, you need to make connections in a spike. Cut holes (eyes) to insert the spike of the neighboring element. Cut on vertical elements of the box;
- make a spike on the edges of the transverse parts of the door frame;
- if only a spike was made on the outside of vertical details, then on the inside it is necessary to make not only the spike, but also the eyes. The length of the spike is 40 mm. On horizontal strapping details, to train a spike with a “dark” 25 mm.
Making philanes
The thickness of glued blanks for philanters in our case is 45 mm. Open the workpieces by reducing the thickness to 40 mm. At the same time, the length and width of the philanters should coincide with the gaps on the already mounted door leaf with the addition of 10 mm. For example, if the clearance is 100x100 mm, then the files will be 110x110 mm.
In the blanks, make grooves for installation in the canvas. Profile the visible surface of the element to increase the aesthetics of the appearance. At the end, polish the pholen one with a machine or sandpaper, paying special attention to transverse cuts.
Assembly of the door
When you have finished with milling work, you can start the long -awaited assembly of the door leaf.
The course of work:
- gather the door frame by processing all the spikes with glue and fixing the structure with clamps;
- first, collect the lower part of the canvas, then the upper one, then connect them with each other and install external vertical strapping elements;
- squeeze the door with clamps, follow the defects, if any, and eliminate them;
- carry out preliminary grinding and milling of the grooves for the installation of philanters on the outer side of the door leaf. Filences for the outside should be installed with a “floating” method, for the internal one - applying them on a strapping and fixing them with screws. Screws can be disguised by decorative elements, creating the original design of wooden entrance doors (photo);
- the emptiness between internal and external phylenes subsequently need to be filled with insulation (leaf foam, mineral wool, etc.).
Door blocks
When you buy a door in the cabin or order in a workshop, in addition to the door itself, you are brought to you a door frame, or a door block. For outer doors, frames from thick beam (75-150 mm) are made. The second entrance wooden doors are usually supplied with a block made of thinner bars (up to 50 mm).
Any front door should have a lower block that will act as a threshold, thereby increasing the thermal insulation of the room. The internal doors are deprived of such a spinning for unnecessary. Moreover, they will constantly stumble about him, moving from one room to another. Therefore, it will be completely irrational to set the interior door instead of the entrance and vice versa.
Choose a door frame on the inner surface in a quarter so that the door leaf adjacent to it as tightly as possible. So you protect your house from frost and provide good sound insulation. The slot that remains under the canvas is needed in order to compensate for possible sagging and minimal ventilation. If desired, it can simply be covered with a beautiful rug.
How to fix door blocks
If you install a door block in a wooden room that is not susceptible to sediment, then fix the frame at the wall racks in quarters using nails or screws. If they are placed in quarters, then they will be almost not noticeable and will not affect the neat appearance of the door. The heads can be dried, putty or closed with special decorative plugs.
Recommendations for the installation of blocks:
- fasten the door blocks only with a level, fixing with wedges and horizontally, and vertically;
- according to vertical bars, you need to put at least three nails for greater stability;
- in the sagging log houses, fasten the lower crown, and the fasteners, which will be installed above, taking into account the fact that they will need to be removed. Когда сруб полностью осядет, тогда можно будет сменить временные крепления на постоянные;
- if you install a block in a stone house, use mortgage bars, fittings or anchor bolts.
How to adjust the doors
Very often, after installing immediately or after a certain time, doors begin to freely close, creak or close too tight. In this case, you need to know how to adjust them.
Doors adjusting the lubrication of accessories, hinges, tightening or replacing fasteners with longer ones, installing wedges in empty holes from self -tapping screws, etc. Repair of the entrance wooden door must be carried out as a prevention, and not waiting for visible discomfort. This must be done at least once a year (preferably in the spring).
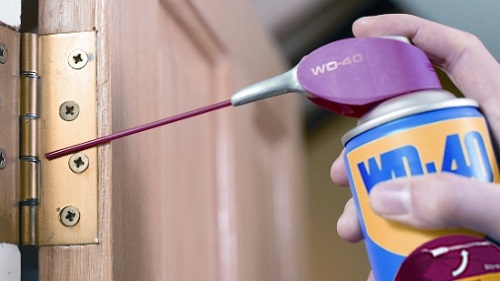
For lubrication, use thick and hard compounds. It can be a graphite rod, lubricant or solidol.
Remove or lift the door on the hinges, place the lubricant in the hole and put the door in place. Do not regret lubrication, but you do not need to put too much either. If you overdo it, the grease will come out of the loop from the pressure. Then it must be immediately removed so as not to stain the door or clothes.
If the door sagged strongly and began to scratch the floor, place the washers on the axis between the door loops or rearrange the loops a little higher.
So that when opening the door does not beat the pen against the wall, strengthen the buffer on the floor, placing it as far as possible from the loops as possible so that it does not shake them.


