Drywall - a versatile material that allows for a very short time completely transform living spaces. In this case, the investment will be minimal. Another unquestionable advantage - the almost complete absence of debris. However, like it is not everything, but the reason of negative feedback is simple - failure to comply with mounting technology.
Content
varieties of drywall
Of great importance for the method of mounting has the form of drywall. There are only three:
- moistureproof (8-10 mm width)
- wall (width 10-12 mm)
- ceiling (6-8 mm width).
Moisture resistant plasterboard is the most expensive, so it is usually used only in the bathrooms.

The wall is the most common. Thickness of 10 mm is more than enough to provide a reliable and durable surface. However, the commercially more prevalent sheets with a thickness of 12 mm.
Ceiling gypsum board, as the name implies, is used for decorating ceilings. He is not only the easiest, but has a specific structure, which does not allow to use the material for other types of work.
After some distance to fix drywall
The answer to this question depends on the type of drywall is. Of course, the smaller the distance between supports, the stronger will be the sheet, so the best option - sticky. Unfortunately, this method is not for ever, so you have to use a metal profile.
According to the building regulations and the practical recommendations of the expert used the following parameters:
- for gypsum wall support rails are not installed at least every 40 cm,
- for water-resistant - every 60 cm,
- ceiling - necessary because of the profile of collect mesh with a mesh size of no more than 40x40 cm.

Correctly set support is not yet enough. It is necessary to precisely mark the holes for screws. If you twist them too often disrupt the integrity of the sheet, it crumble and fall out. Insufficient number of fasteners will lead to similar results. The recommended distance between the screws - every 20 cm With this, one should consider that the distance from the edge of the sheet to the screw should be at least 0.5 cm, or edge crumble..
The fasten drywall to profile
It is worth noting that all installation work should be performed at appropriate screw types. Only two of them:
- screws for metal sheets,
- drywall screws.
The first kind of screws, also happens in two varieties:
- metal-metal,
- metal tree.
Metal-metal is used to connect the two profiles. The screw has a special drill on the end that allows you to easily interconnect elements. Dimensions - 3,5H9,5 mm.

Metal-tree is used if the profile is fastened to a wooden structure, a sharp end of the screw, it cuts the metal with effort, but tightly fixed in the wood. Dimensions - 3,8H11 mm.
As a rule are made of galvanized steel, sometimes have phosphated coating. The first option is suitable for metal-to-metal, the second - for the tree.
Any other mounting options do not provide a reliable connection materials and lead to the fact that the design quickly to shatter and crumble.
Drywall screws to have a lot of varieties. The main distinguishing parameters:
- thickness,
- long.
In theory, involves fixing plasterboard on it shelves or other not very heavy external components, in practice, this is true only in relation to the picture. In all other cases it is necessary vsverlivatsya in the bearing wall and install a standard wall plug.
Therefore, the minimum sizes are suitable (they are the cheapest). It is easy to distinguish them. They have a sharp end and almost even very small threads. This is necessary in order to eliminate the possibility of loosening and minimally destroying plasterboard.

Responding to a question, what self-stakes to mount drywall, it should be noted that they should be covered with phosphatized coating (black). First, it reduces friction (cutting drywall, seam does not destroy the structure of the gypsum), secondly, completely protects against corrosion.
Which side to fix plasterboard
The question is also relevant about how to apply plasterboard to the surface. In order to answer it, you need to understand the device of the standard sheet. It consists of:
- rear paper
- layer of gypsum
- facial paper.
The rear paper has a color of cardboard, in addition, there are factory labeling on it. It is this side and apply plaster to the wall. The front part is usually white (if it comes to moisture resistant drywall, then green).

"Face" differs not only in color, but also by texture. Used more high quality paper. In production, it is glued in two stages. At first, the inner layer, which maximizes all the bumps and irregularities, then external. As a result, the surface is perfectly smooth.
From a chemical point of view, the "face" contains a greater percentage of cellulose, respectively, has increased adhesion (reduces the consumption of primer, paints or glue for wallpaper, while ensuring high quality compound).
These circumstances explain the feasibility of the proper placement of plasterboard sheets. In addition to the purely building nuances there are aesthetic factor. If you place the sheets inside out, the marking is absorbed into the paint or glue and sticks out on the walls. This process will not happen immediately, but sooner or later will show itself. In physics, this phenomenon is called diffusion and implies the penetration of molecules and atoms of a substance to another similar to it by structure.
How to mount plasterboard
From theory proceed to practice. The installation process consists of the following steps:
- lifting the size and drawing up the drawing,
- carack assembly,
- installation of insulation or noise insulation,
- installation of plasterboard.

Before you begin work, it is necessary to accurately remove the size and draw a plan. If we are talking about fastening the plaster on the wall, then on the plan you only need to display the framework. At the same time, it is important that the reference plank is located in each corner. The distance between intermediate supports should be the same, and it is desirable that they do not have the edges of the sheets of plaster. In essence, this is the most time-consuming process.
If we are talking about any kind of drywall, then the dimensions are removed in about the same way. At the same time, the graphic image will allow you to make certain amendments and will clearly demonstrate how well the object fit into the room.
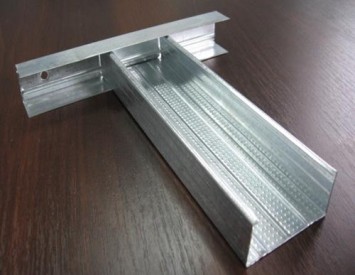
The next step is the frame assembly. The first thing the guides are set - this is "P" a shaped wide profile, which is attached from below and on top of the wall either around the ceiling perimeter (if it comes only to the ceiling). The guides not only set the vector to install the carrier profiles, but also serve as beacons. It is important to install them perfectly smoothly. If a clearance is formed between the wall and the profile, then it is necessary to insert either a dense cardboard or a tree (depending on the size of the gap). Unlike the carcass itself, the guides are attached to the dowels at a distance of no more than 30 cm from each other. After installation, the mounted mounted framework itself, all source data is listed on the drawing.

If the plaster is mounted on the wall, then it is necessary to use thermal insulation. For these purposes, the minivata fits optimally. The foam rubber will provide more reliable savings. Polyfoam and other insulation are not suitable.
For separate structures, insulation is not necessary, but the emptiness must be fill. First, to suppress noise, secondly, different parasites do not start. In a private house it is more expedient to use glass gambler, in the apartments there will be enough ordinary wool. In both cases, it is important that no emptiness remains.
The final stage is the installation of plasterboard. The procedure has its own nuances that need to be considered in more detail.
How to mount plasterboard to the wall
It's easier, faster and more reliable to glue a gypsum sheet directly to the carrier surface. But, if the metal frame is still needed, then the fixation of the gypsum should be carried out using the following recommendations:
- to screw the screws to use a high-quality screwdriver,
- install the average rotation mode
- when screwing out strongly put pressure on the screw so that he came from the first time.

In addition to these simple rules, there are several tips on how it is better to carry out the installation of plasterboard:
- first install the bottom corner sheet,
- he is fixed by one screw
- then check the level and the cross is fixed by the second screw,
- next, the sheet is crimped around the perimeter,
- only after that begin to screw the sheet to carrier boards,
- the procedure is performed sequentially, moving from one bar to another.
Such a sequence of actions, firstly, allows you to perform work yourself, secondly, ensures the most reliable fixation and retains the level.
How to mount plasterboard to ceiling
The main tips are the same as in the case of fastening the plasterboard on the wall. Nevertheless, there are also their own features. The first of them is in size and weight of gypsum. Hold the sheet and at the same time perform fixation to one person is quite difficult. A seductive idea to cut a whole cloth into small pieces is immediately worth throwing back, as the more seams, the less beautiful ceiling will be. And if you collect from very small trimming, then it will be necessary to put it in obligatory.
Therefore, before installing the ceiling of plasterboard, it is immediately necessary to find an assistant. To work, it will be needed either long mop, or homemade analogue. With this tool, the assistant will hold the sheet until you screw it to the profile. This work implies a sufficiently large force load, therefore children and teenagers can not be allowed.
In order for the sheet to be lifted from the first time there is a small trick. First, the installer must climb on the forest, the assistant gives him one end of the sheet, and he himself begins to raise the second. As soon as the mop and plaster gets the mop, it is necessary to insert it. Next, the sheet is raised to the ceiling. The task of the assistant to install the mop as close to the center of the gypsum canvase.

It is important to understand that the installer also holds the sheet, the load on it is minimal, but one hand constantly need to hold. Therefore, the self-tapping screws need to take immediately in sufficient quantities. The same applies to the tool. When fastening a sheet to the ceiling, the fixation fixation is carried out linearly from the edge that holds the installer, to the edge where the assistant is located. After half of the sheet is fixed to keep it no longer needed, the mop is just pressed by the canvas, so that it is easier to screw the screws.
Often, when using drywall for decorating the ceiling create a multi-level structure. If it's a square, then it is clear that going to a few simple skeletons. So let's talk about how to create a semi-circular and circular shapes.
First of metal sheets cut out semicircular frame. To this end, the side faces of the profile incised at a distance of every 5-7 cm and bent at a right angle. Further, the necessary width is cut and soaked strip of gypsum in water. To get wet gypsum became quite suitable for bending 30 minutes (warm water).
Bending the bar should be gradually and carefully, after giving it the desired shape, it is necessary to wait until it is completely dry (at least 12 hours). Next, we use the standard installation procedure. More clearly demonstrate how to fix drywall, video from the article.


