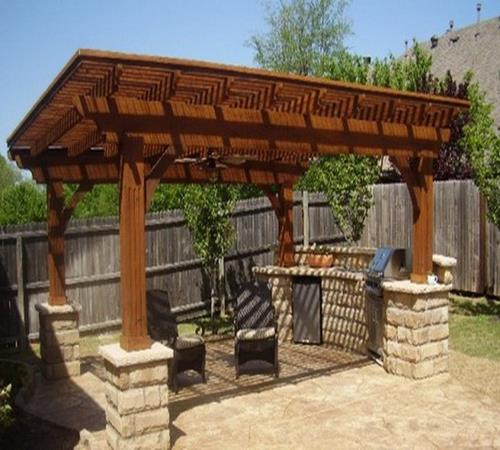
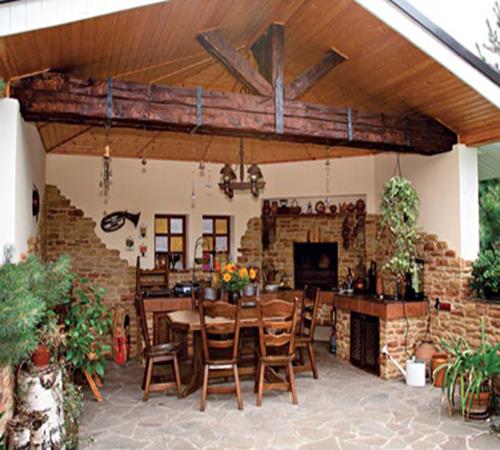
Summer kitchen in the country is not only an opportunity to prepare in comfortable conditions, but also a beautiful art object that is simultaneously able to perform the functions of the dining room, barbecue, stove or even smoke. Building it yourself is quite simple, the only thing you need is a desire.
Content
Preparatory stage
As in any construction site, it all starts with the plan. Summer kitchen, whose projects are both in fashion magazines and on the Internet, should be thought out to the smallest detail. Therefore, before starting to create your own design, it is advisable to study the source material.
First, consider the types of summer kitchens, they are:
- open,
- closed.
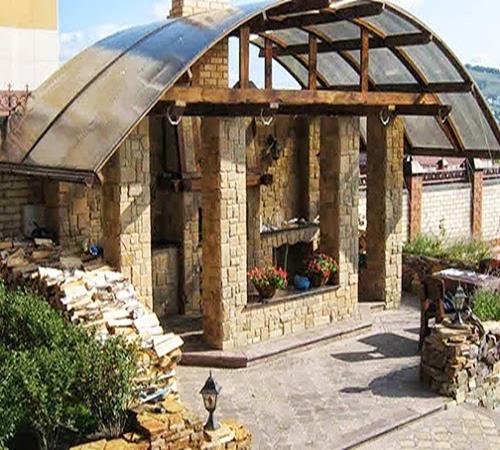
Open kitchens consist of floor and roofs and are analogues of arbors, often used as canteens. In such buildings, the appearance of the exterior is of great importance. From a practical point of view, they are not very convenient, as they have too narrow specialization. In addition, it is necessary to put 2-3 rows of paving slabs around the kitchen, otherwise the entire floor inside after the rain will be in the swamp. Despite these small flaws, this option is very popular today.
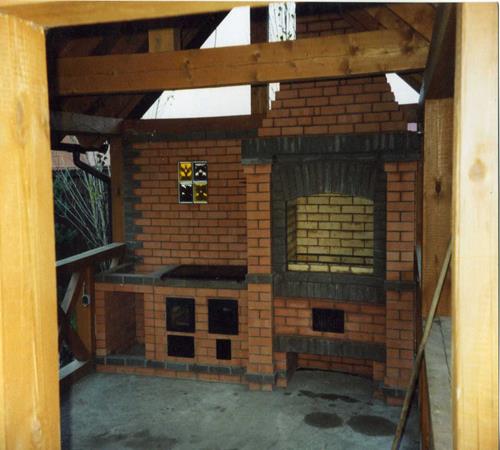
Largely due to the fact that the central element of such a kitchen is a real mangal furnace. One part of it is an open frozen grill, the second allows the bake of classic pizza, bread, cook real mamal, etc. One of the varieties of such furnaces is a tandoor, widely known in a Caucasian kitchen.
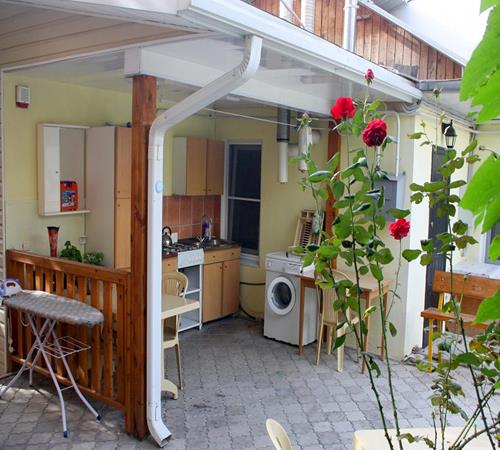
Closed kitchens perform several functions at once. Firstly, the presence of walls allows you to use them for the constant storage of dishes, tools, products and other things (for example, street chairs, chair, etc., if enough area). Secondly, the closed kitchen is often divided into two rooms, one part is allocated for cooking, the second for storing conservation. If desired, it will be equipped with a smokehouse, which allows you to cook sausages, smoked meat and fish.
Materials for construction
The summer kitchen, in most cases, is being built for more than one year, so you need to approach the issue of choosing materials carefully. Consider the most acceptable options:
- tree,
- foam concrete,
- brick,
- stone.
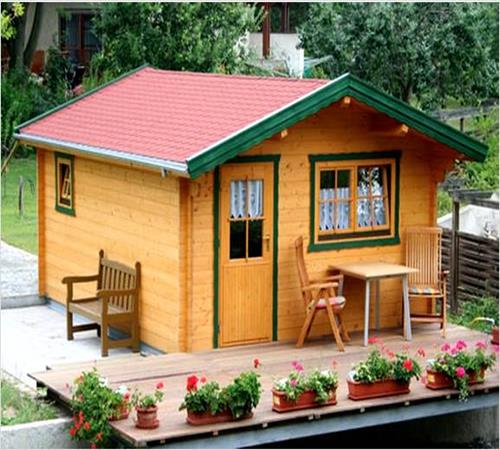
A tree is an option for the lazy. For the price, the kitchen will cost the level with other materials, but the installation process will take a minimum amount of time. It is optimal to assemble glued beams, it will be scheduled and cut off either at the manufacturer or directly in the store. After delivery, it remains only to fold the finished design. This does not require special skills, since precisely marked grooves eliminate the possibility of error. The material will last with proper processing for at least 100 years, and if you take care of it, then much more.
Foam concrete is the cheapest option. Unfortunately, the appearance will be appropriate. Due to this, additional decoration will be required. Thus, the cost of building a kitchen often exceeds other options. The service life of the foam concrete is about 80 years.
Actual savings are brick. Choose a red burnt clay. This is an eternal material that looks very aesthetically pleasing and does not need care. Nevertheless, the construction process will be the longest and most laborious. The summer kitchen made of brick has another undeniable advantage, even in the case of a fire, the box will survive. Sazhi plaque is easy to remove with soapy water. Then the appearance will be like new.
Natural stone, despite its value, is also a good choice. The heterogeneity of the texture allows you not to think about the pattern and not to follow right corners. Fire safety, durability and original appearance, also speak in his favor. The only very insignificant drawback is that you will have to spend time to find a retail seller of natural crushed stone (more often sold slabs-pods or wholesale). On the other hand, in the presence of your own vehicles, the material is easy to bring on your own and free.
How to build summer kitchen
The whole range of works is divided into the following stages:
- the construction of the foundation,
- construction of walls,
- roof installation,
- installation of the ceiling,
- floor installation,
- decoration,
- installation of equipment.
The basis is understood as the foundation. Its parameters depend on the type of kitchen. For the open, it is enough to pour a small strip foundation with a depth of 20-30 cm and a width of 10 cm. For it, it should be digged with a depth of 30-40 cm and fill 5 cm of sand and crushed stone (crushed stone-lower layer).
The weight of a closed summer kitchen, especially when it comes to brick and stone, will be large enough. For solid soils (clay, stone-clay), a wide strip foundation (at least 30 cm) is suitable for a depth of 50 cm. Drainage should be done as follows-5 cm of gravel, then 10 cm of sand (total ditch depth of 65 cm).
If the cottage is located in the area with peaty soils or chernozems, then it is necessary to make a monolithic foundation. The depth of the pit is at least 40 cm. 5 cm of gravel is spilled onto the bottom, then 7-10 cm of sand, then 1-2 cm of gravel. The second time, pushing is done in order to be absorbed into the solution and create additional facets of the load distribution. This will avoid shrinkage.
The exception is only regions with underground waters. The only way to exclude the shrinkage is a pile foundation, but it is quite expensive. Therefore, they often make a monolith. The shrinkage is from several millimeters to one centimeter per year. If you raise the level of the foundation by 20-30 cm above the ground, then the kitchen will stand at least 100 years without cracks or other visible defects.
In all the above cases, the height of the foundation should be at least 10 cm above the ground. In order to provide the necessary height before pouring, you need to collect the formwork. The foundation will become about 5 days, while it must be watered with cold water at least three times a day. The first watering is carried out the next morning after the installation of the foundation.
We build the walls
Regardless of the type of kitchen, you will have to build corner columns. If we are talking about a covered kitchen, then they are an ordinary wall, for an open one - this is an important element that performs a supporting function in relation to the roof.
Columns should be located at the corners of the perimeter of the kitchen. Their height is equal to the planned ceiling height. To save materials, they use the European standard 2.5 m, but in practice the ceilings below 2.8 meters look extremely wretched.
The width of the column does not matter. The load is distributed evenly and falls on the foundation, so the parameter is determined by taste preferences (according to construction standards, it is enough to make masonry in two bricks).
If it is planned to build wide columns, then the masonry is done in one brick, and a cement mortar is poured in the middle. It is prepared (as for the masonry itself) from the ratio of 3 part of the sand and 1 part of the cement.
If we are talking about a tree, then it is enough to install one beam in each corner. In this case, it is necessary to fix the lower edge using corners. Beams are always placed on the foundation. From the reliability, there is enough cross -section of 5x5 cm, from an aesthetic point of view, the cross -section of 10x10 looks much more beautiful.
Now let's talk about the construction of a whole wall. Before starting this work, it is necessary to consider how the windows will be located and visually imagine them on the future wall. Next, a stick is dug into the ground, the upper end of which is at the same level with the planned window. The stick is placed on the corner from which the masonry begins.
Brick, slag block and stone are placed equally - rows. At first, one wall is erected to a height of 40-60 cm, then move to the other. This approach is necessary in order to constantly monitor the angle of inclination of the wall. For brick and cinder block, the ratio of the wall-earth should be strictly 90 0 for the stone, a small error of 2-3 degrees is allowed.
It is very important to put a brick in rows, especially for red clay, since this is the only way to create a pattern, in addition, the load is distributed evenly, which increases the strength of the structure. When the height is scored to the lower boundary of the window, the rows are placed from the corner to the side of the opening, then the procedure is repeated from the opposite side. The upper boundary of the window opening is covered with a channel, it should lie on the wall at least 10 cm on both sides. The upper part of the height is obtained by analogy with the lower.
Tip: if a large gap is formed between the planned opening and the end of the masonry and the stone does not need to be cut and put into it. When installing the window, all voids are sunk with mounting foam.
A convex summer kitchen, a photo of which is often found on the Internet, although it looks quite original, but in practice it is very unreliable. Each next row of bricks is placed in a certain step. The finished wall is plastered, as a result, the kitchen has an oval shape. This technology was used in the Middle Ages to arrange vaulted basements and was quite reliable. The difference is that the whole mass of the building is pressing on the arch, driving bricks into the castle and not allowing to disperse or sag. The greatest pressure falls on the first row of stone, respectively, the overall load does not give the walls and the ceiling will collapse. In the case of the kitchen, the weight of the roof is not enough to create the necessary pressure.
Roof and ceiling installation
The basis of any roof is the rafters. Their design and dimensions depend on the form that you want to give the roof. If the kitchen is small, then the rafter box is completely collected on the ground and then lifted and installed on the walls or columns. For rooms with an area of \u200b\u200bmore than 20 square meters. m. It is appropriate to collect rafters in place. In the beginning, support beams are attached, frame are mounted on them, after which jumpers and binding crossbars are installed.
The insulation for the summer kitchen is an optional thing, but you still need to install a moisture and vapor barrier. Next, the rafters are covered with a crate on which the roofing is laid. His choice depends only on your preferences. And then we proceed with the arrangement of the ceiling.
The procedure is performed in two versions:
- bearing,
- monolithic.
Bearing involves decorating rafters using PVC panels and lining. This is quickly relatively cheap and does not weight the structure. Unfortunately, it does not always look spectacular. Therefore, it is better to pick up the rafters from below and make an even monolithic ceiling. A more expensive analogue is a stretch ceiling, but in the summer kitchen it is inappropriate to install it, since after the winter you will have to tighten it.
Floor installation
Paul is always done last. This is due to the fact that when performing any type of work, all garbage, dirt and tools fall on the floor, if you lay it in advance, then the appearance after the construction will be the best.
By and large, there are no special questions with the floor. Optimal options:
- tree,
- tile,
- animal skins.
Wooden boards are suitable in the case of a strip foundation. For their installation, you will need to install supports at a distance of 40 cm from each other. They should be located perpendicular to the direction of the floorboard. With all the visible advantages (ease of installation, environmental friendliness, durability, the effect of a warm floor), the significant minus is that the boards should be treated with special protective stains, and then paint to the desired color and lazelled with colorless cellulose nitrolac. As a result, the smell will pass only after 3-5 weeks.
The tile is ideal for a monolithic foundation. All that will be needed:
- glue for tiles,
- grout,
- spatula.
In time, masonry is performed quickly enough, but it all depends on the size of the tile.
Animal skins are a combined solution. They are thrown directly on a monolithic foundation, on a tile or wooden floor. It is relevant only if it is planned to walk barefoot in the kitchen.
Tip: if it is planned to install the furnace, then it must be carried out before work on the arrangement of the flooring.
Decoration and installation of equipment
On the one hand, the summer kitchen with your own hands is already ready, but on the other hand, it is also necessary to give it a browned appearance:
- stone and brick do not need decoration,
- the tree should be opened with antiseptics (if you want to change the color - paint),
- cinder blocks must be plastered with decorative plaster or overlapped with artificial stone.
After the end of external work, they proceed to the arrangement of the exterior. The most interesting is Provence and the castle style, but this is already the work of your imagination. Internal design should be well thought out and sketched on paper or using special computer programs. This will allow you to decide on the choice of furniture and go in search of everything necessary. Naturally, any furniture, if desired, is easy to make independently and optimize it for your taste and functional preferences.


